
Format Conversion Software: How to Choose the Right Output
The most repeated advice about this topic is that the converter matters most. Pick the tool with the longest list of supported formats, drag the file in, download the result. For 3D assets, that advice gets people into trouble, because a converter is a translator and a translator can't invent sentences the original speaker never said. What your file contains when it enters the tool is exactly what it can contain when it leaves, minus whatever the destination format has no way to hold.
The useful question isn't which converter has the most formats in its dropdown. It's which data has to survive this particular trip, and how you'll prove it did. A one-click STL export can hand you a model that looks perfect on screen and fails in the slicer, and no extra format options will change that.
Table of Contents
- How Format Conversion Software Works
- How to Choose the Target Format for Your Workflow
- What Survives a Conversion and What Gets Lost
- Checking a Converted File Before You Use It
- Fixing Common Conversion Problems
- Confirm Your Workflow and Start Converting
How Format Conversion Software Works
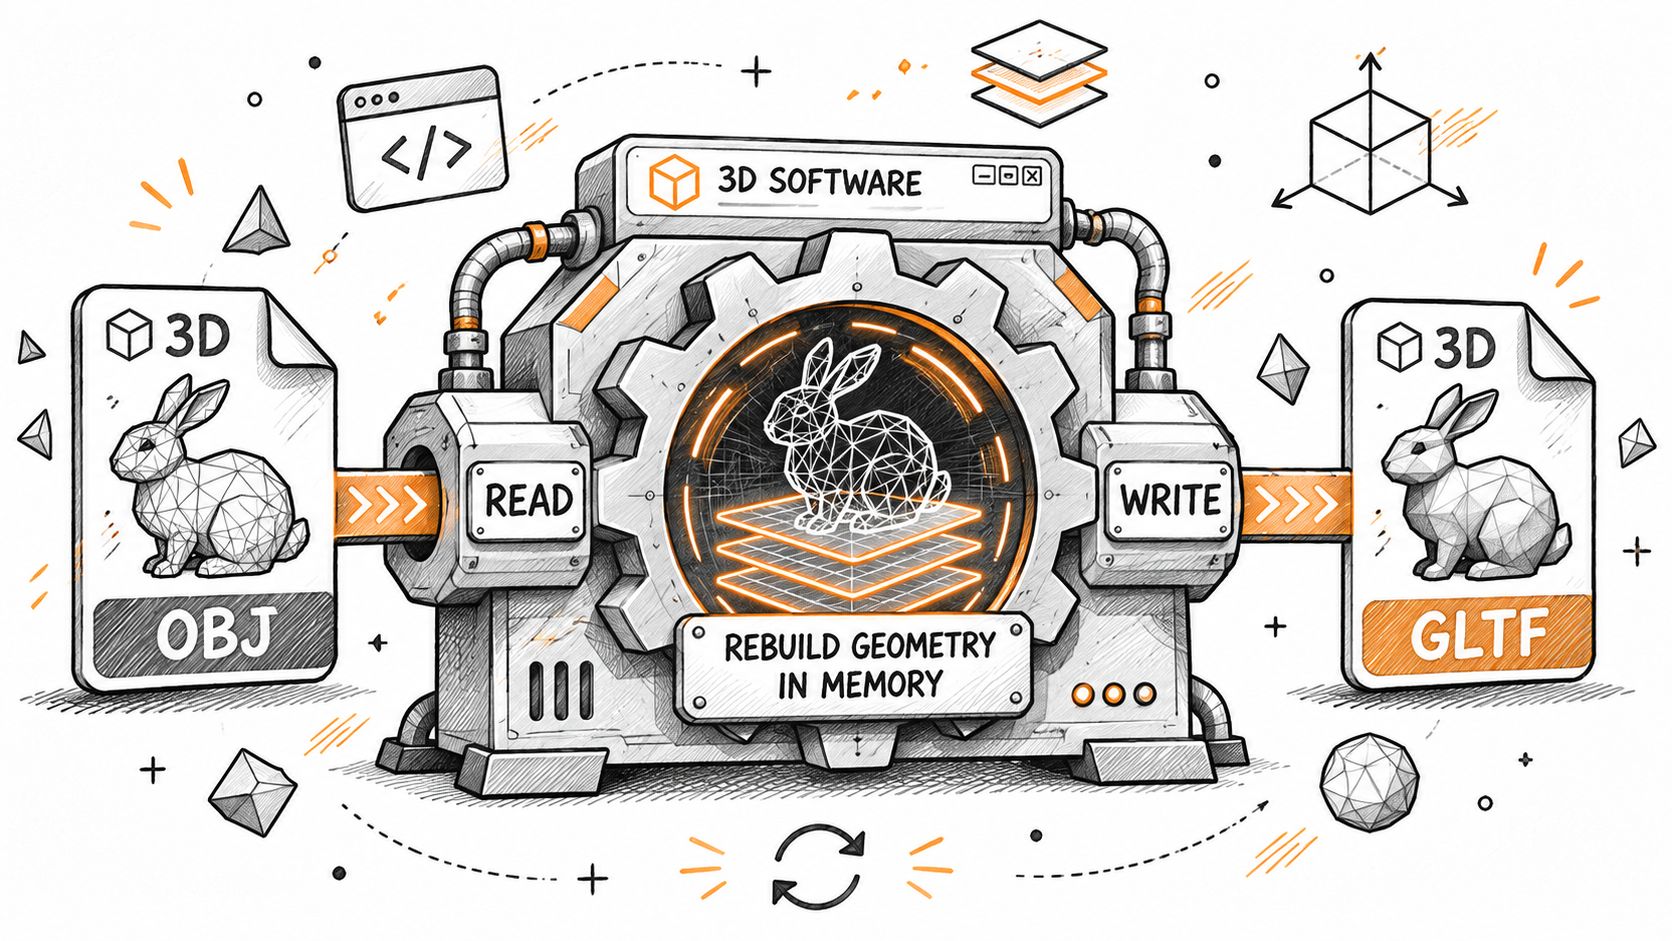
Format conversion software reads a 3D file in one format, rebuilds its contents in memory, and writes them into another format so the asset can open in a tool built for a different job. The filename extension changes. The model underneath changes only as much as the destination format forces it to.
The image below shows the moment to keep in your head, an OBJ entering a converter and coming out as a glTF.
The pipeline, step by step
Whether you're using a browser tool or a desktop add-on, the same four stages run in order.
- Parse the source. The converter reads geometry (vertices, faces, normals) plus every piece of presentation data the source happens to carry: material assignments, texture references, skeletons, scene hierarchy, object names.
- Normalize units and axes. A model authored in millimeters and one authored in meters have to land on a common scale, and Y-up versus Z-up conventions have to be reconciled before anything is written.
- Repair, tessellate, decimate. Curved and parametric surfaces get approximated as triangles. Damaged meshes may get holes filled and normals recomputed. Dense scans may be thinned.
- Write the target container. Losses happen here. The writer keeps the data the destination format defines and drops the rest, usually without a warning dialog.
Two layers inside every file
Geometry is the shape. Where the vertices sit, which ones connect, which direction the faces point. Presentation data is everything else. Color, roughness, metallic values, image textures, the UV coordinates that map those textures onto the surface, rigs, animation, and the names that keep a scene organized.
STL is the cleanest illustration of why that distinction matters. Charles Hull developed and published STL in the 1980s so CAD data could be translated for stereolithography printers, and by 1986 he had co-founded 3D Systems to commercialize the technology, as the Library of Congress description of STL records. STL represents a surface as a triangle mesh and became the de facto standard for rapid prototyping and 3D printing. It carries geometry reliably and does not natively preserve color, texture, scene structure, or animation. Wavefront's OBJ, openly documented before 1995, closed part of that gap and picked up wide import and export support, which is why it's still the default for textured polygonal assets.
The Library of Congress guidance on format selection lists STL as acceptable for scanned 3D objects alongside PLY and OBJ, and stresses separately that accompanying metadata and technical-production information matter just as much as the mesh itself. That's the split to hold in your head for every conversion you run.
Practical rule: Converting a GLB or OBJ to STL is a manufacturing export, not an archival one. Converting STL back to a richer format cannot recover materials, UV coordinates, object names, or the original topology.
The same trade-off turns up in every media format. When you switch between audio file formats, a WAV keeps every sample while a compressed format discards what its encoder decides you won't hear, and nobody expects the compressed file to hand the samples back. 3D conversion behaves the same way. The target format decides what survives, so keep your richest file, usually GLB, OBJ or PLY, as the master, and treat each export as a copy made for one destination.
How to Choose the Target Format for Your Workflow
Pick the target format by naming the next application that opens the file. Converter brand and file size come later, and they rarely overturn the answer.
| Target format | Best for | Keeps | Usually loses or risks | Check after conversion |
|---|---|---|---|---|
| STL | 3D printing and slicers | Triangle surface geometry | Color, textures, materials, animation, scene structure | Watertightness, unit scale, wall thickness |
| 3MF | Slicer handoff with units and metadata | Geometry and print-related metadata | Defects copied from a faulty source mesh | Watertightness and dimensions |
| OBJ | Textured polygonal assets across CAD and design tools | Geometry, UV coordinates, texture references | Animation, some PBR setup, texture paths if files move | Texture paths and face normals |
| GLB | Web viewers, real-time engines, client handoffs | Geometry, materials, animation, textures in one file | Data the target engine ignores; texture compression effects | Color space, texture sizes, animation playback |
| FBX | Game engines and animation pipelines | Rigs, skins, animation channels | Shader and material node setups that don't map cleanly, plus import settings that live only in the receiving engine | Skeleton and animation playback in the target engine |
Criteria that matter more than file size
Long-term preservation guidance ranks formats on the openness of the specification, how well they resist corruption, backward and forward compatibility, software dependencies, and plain interoperability, as Library and Archives Canada's guidance on file formats sets out. The same criteria apply to 3D assets, where selection also has to account for geometry, textures and coordinate systems, and for whether the receiving software can read the asset and edit it.
A mesh-to-mesh conversion can keep every vertex and every texture and still drop units, materials, animation, scene hierarchy, metadata, or editable parametric geometry. Survey meshes are a known example: pushing them straight into IFC isn't always appropriate, because IFC isn't designed to encode very large survey meshes efficiently.
Three questions before you click convert
- Which data has to survive? Physical dimensions for printing, rigs for animation, materials for rendering, or parametric history for CAD editing.
- Which application opens it next? Blender, Unity, Unreal, a slicer, or a browser viewer each tolerate different gaps.
- Who edits it later? If a colleague will retexture or re-rig the asset, the delivery copy is not your working file.
If Blender sits at the end of your pipeline, the Blender file format guide covers which formats arrive with materials and rigs intact and which ones need rework on import. Choosing an output for the destination rather than for convenience is the same reasoning behind how Vid Kraken handles audio downloads, where the file you get is shaped by the device that will play it.
What Survives a Conversion and What Gets Lost
Five paths cover most of the conversions people run, and their losses are predictable enough to tabulate.
| Conversion path | Usually survives | Usually lost | Verify first |
|---|---|---|---|
| OBJ to STL | Triangle geometry, scale if units are set | Color, textures, UV maps, materials | Watertightness and face normals |
| GLB to OBJ | Geometry, UV coordinates, textures as image files | Animation, skins, most PBR setup | Texture paths and normal direction |
| OBJ to GLB | Geometry, UV coordinates, textures, materials | Object names and metadata, depending on the exporter | Color space and texture sizes |
| STL to 3MF | Geometry and units if set | Materials, textures, object names | Copied holes and non-manifold edges |
| GLB to STL | Triangle geometry | Textures, materials, animation, scene hierarchy | Watertightness, wall thickness and unit scale |
What the GLB container actually does
GLB is a packaging decision as much as a format decision. Khronos built glTF specifically for efficient transmission and loading of 3D scenes. Its working group began exploring a web-oriented successor to earlier interchange approaches in 2012, demonstrated the concept at SIGGRAPH that year, and released glTF 1.0 on October 19, 2015, with version 2.0 following in June 2017 after beta testing, according to the documented history of glTF. Adoption moved quickly: Sketchfab added glTF support in December 2016, and Microsoft, Google, Adobe, Meta, Unity, Unreal Engine and Qt Quick 3D have all supported the format or its GLB binary form.
GLB packs the glTF JSON and the binary payload into a single little-endian container, which removes the external-resource management that an ordinary glTF export demands. Buffers can hold geometry, animation, skins and images, and binary blobs let a renderer build GPU buffers and textures with almost no parsing beyond decompression.
Watch the packaging cost: embedding binary resources as base64 data URIs increases their size by roughly 33 percent, though gzip can claw back part of that overhead, and separate resources add download requests.
That's why GLB suits browser previews, gallery assets and client handoffs where predictable packaging matters, while external glTF suits teams that need independently cacheable geometry and texture files.
What to check after packing
Run through the buffer structure rather than the visual result. Confirm that buffer views and accessors preserve component types, offsets, counts, index buffers, UV sets, tangents, animation channels, and texture color-space metadata. Apply texture compression deliberately instead of assuming it helps, because reducing image payloads can visibly change how roughness, metallic and normal maps behave. If your source is an OBJ, this OBJ file format converter walkthrough covers the exporter settings that determine whether textures and normals arrive intact on the other side.
Checking a Converted File Before You Use It
A newer, richer container does not repair the model inside it. Conversion preserves defects as faithfully as it preserves geometry: holes, non-manifold edges, self-intersections, incorrect normals, scale errors and thin walls all transfer unchanged. Converting a defective STL to 3MF copies those defects into the new container, and triangle-based representations introduce geometric approximation error between the ideal surface and its tessellated version, as research on anticipation and correction in STL-based manufacturing sets out.
These are the failures the check below is designed to catch.
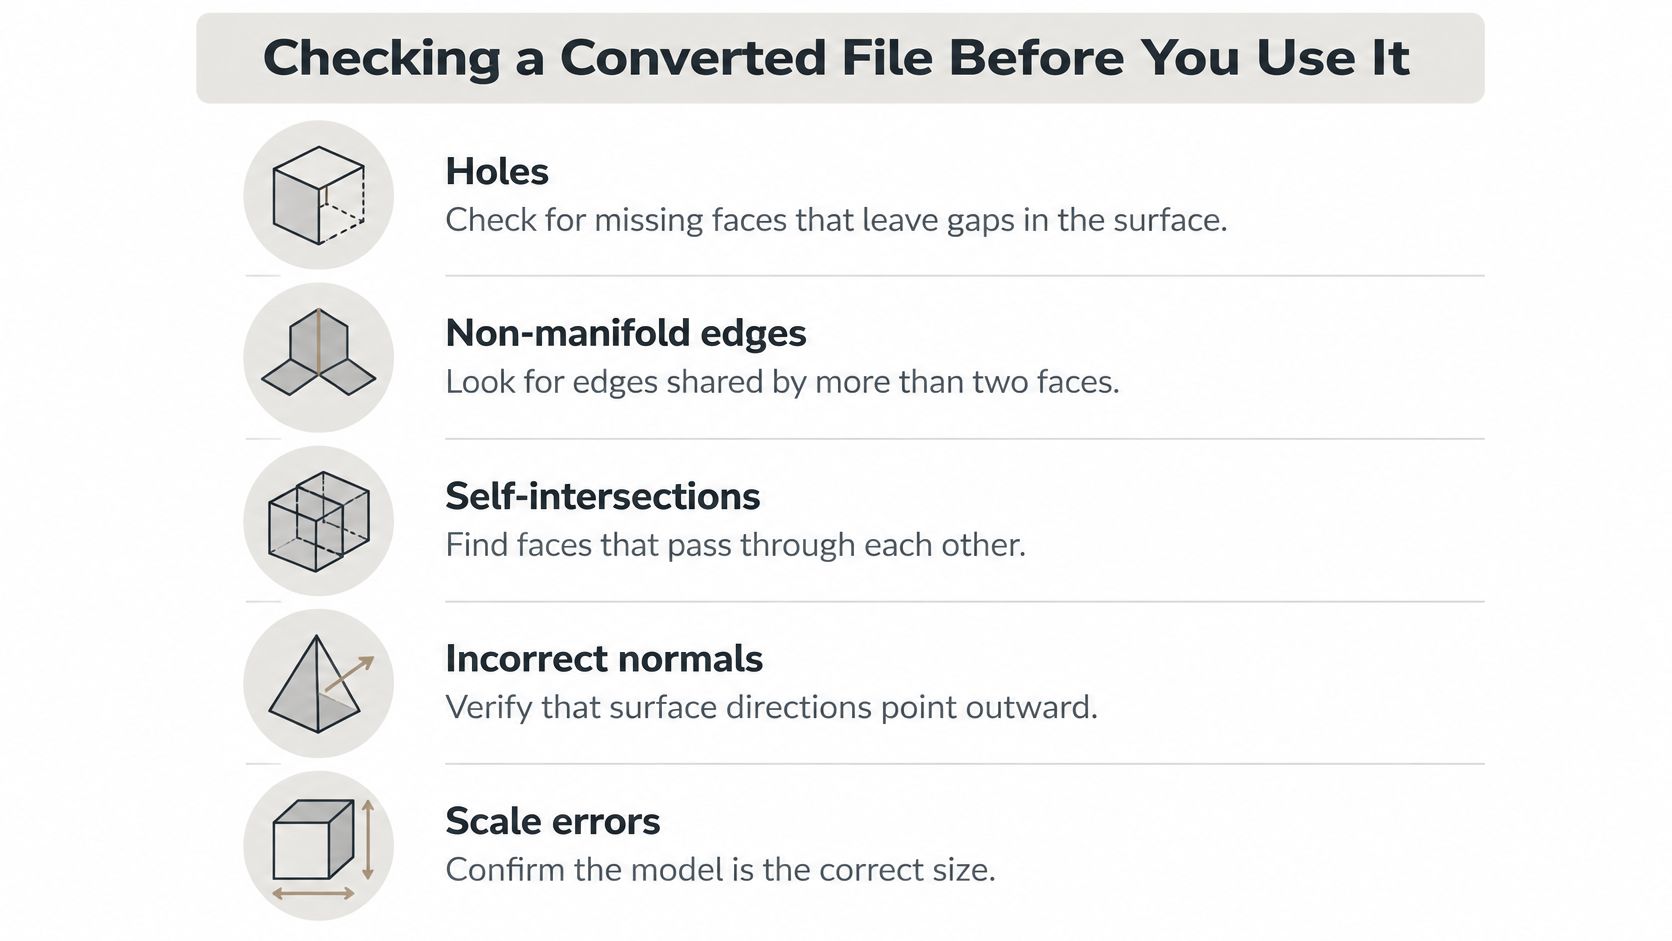
The checks, in order
- Compare bounding-box dimensions. Measure the source and the converted file in the same units. Pass if the three dimensions match to within your tolerance.
- Confirm the unit setting. Pass if the file declares the unit you intended. If it's wrong, rescale once and re-check the dimensions rather than nudging the model repeatedly.
- Run a watertightness check. Count open edges and non-manifold edges. Pass at zero for anything headed to a slicer.
- Inspect normals and self-intersections. Pass when every face points outward and no two faces pass through each other.
- Measure thin walls against the minimum wall thickness your printer and material can produce. Pass when the thinnest feature clears that number.
- Compare textures and PBR values against the source in a neutral viewer, not in the engine you're targeting, so you're judging the file rather than the renderer.
- Import into the destination application. This is the acceptance test. Pass when the slicer slices without repair prompts or the game engine shows the asset correctly rigged and lit.
Loading both files side by side in a browser 3D model viewer makes step six practical, because differences in color, roughness and silhouette show up immediately when they're adjacent.
Record the before-and-after numbers as you go. A dimension table, an edge count and a wall-thickness figure turn "it looks fine" into something you can audit later.
AI-generated meshes usually need cleanup, remeshing or retopology before this check even starts, since the topology arriving from a generator is rarely the topology a printer or engine wants.
Fixing Common Conversion Problems
Most post-conversion problems trace back to one setting or one missing file, and the fastest fix is nearly always to correct the source or the export options and reconvert, not to hand-edit the output.
Scale is the most frequent culprit. A model exported in meters and read as millimeters arrives a thousand times too small, with flawless geometry and dimensions that would fit on a grain of rice.
| Symptom | Likely cause | Fix |
|---|---|---|
| Model appears far too small or large | Unit mismatch, such as meters read as millimeters | Set the unit at export, then rescale once |
| Print fails with holes or open shells | Non-watertight source mesh copied into STL or 3MF | Repair holes and recompute normals in the source, then reconvert |
| Textures missing after OBJ export | Material library or texture paths lost in transfer | Package textures with the MTL file or export as GLB |
| Metals or roughness look wrong in engine | Texture compression or color-space conversion changed PBR values | Compress color maps only and compare roughness and metallic values |
| Animation missing in target | Target format lacks skins or animation channels | Use GLB or FBX for animated assets |
| Surface looks faceted after STL round trip | Triangle approximation from an earlier tessellation | Reconvert from the original richer source, not from STL |
The texture case deserves a specific note. An OBJ file doesn't contain its textures; it points at image files and a companion MTL material library. Move the OBJ without them and you get an untextured mesh that looks like a conversion failure but is really a missing-file problem. Keep the OBJ, MTL and texture folder together, or consolidate everything into a single GLB.
Animation losses can't be patched at all. If the destination format has no concept of skins or animation channels, nothing in the converter will invent them, so re-export from the rigged master in GLB or FBX.
Faceting after an STL round trip is the one problem you can't fix downstream. The triangles were baked in during an earlier tessellation, and re-exporting the STL just carries them forward. Go back to the original smooth or parametric source and set a finer tessellation on the way out.
Time check: unit fixes, texture relinking and preset changes take minutes. Holes, faceting and lost animation require re-exporting from the original source, so keep that file reachable.
Confirm Your Workflow and Start Converting
Run the same five steps every time and conversion stops being a gamble.
- Keep the richest source as your master, normally GLB, OBJ or PLY.
- Name the next application and pick the target format from the decision table.
- Convert with units and axes set explicitly, never left on auto.
- Run the checks in order and record the measurements.
- Export the delivery format only for that application, and label it as such.
Sculpty fits into that path as one option among several: its format converters move between GLB, glTF, STL, OBJ and PLY variants in the browser, and exports cover GLB, STL, OBJ, FBX, USDZ and 3MF for downstream tools. For printing, clean up and remesh the AI-generated output before exporting STL or 3MF. For games or the web, keep GLB as the delivery file. When licensing matters for assets you've pulled from open libraries, this Creators Toolbox guide to license checks covers what to verify before you ship.
Conversion never replaces verification. It's a translation step, and the only proof it worked is the measurement you take afterward. So make one decision now: which application opens your file next, and which single check you'll run before you hand it over.
Sculpty is a browser-based 3D AI studio where you can generate a mesh, texture it with PBR materials, remesh it for printing or games, and convert between GLB, glTF, STL, OBJ and PLY variants without leaving the tab. Every export lands in a format your next tool can read, so the delivery copy is one click from the master you're keeping. Visit Sculpty to run your next conversion and check the result in the built-in viewer before anyone else sees it.