
USDZ to OBJ: A Practical Conversion Guide
You've received a USDZ product model that looks right in an AR preview, but your next tool wants an OBJ. The converter finishes without an error. Then the model opens gray in your game engine, lies sideways in your modeling scene, or arrives at the wrong size in your slicer.
The useful question isn't whether you can save an OBJ. It's whether you can deliver the right geometry, usable UVs, correct normals, working material references, and an agreed scale. Treat USDZ to OBJ as an asset hand-off with acceptance checks, not an extension change.
Table of Contents
- What Converting USDZ to OBJ Really Means
- Choosing the Right Conversion Path
- Converting USDZ to OBJ in Blender
- Command-Line and Scripted Conversion
- Preserving Textures and UVs Through the Conversion
- Verifying the Result Before You Hand Off the File
- Putting It Together in a Real Project
What Converting USDZ to OBJ Really Means
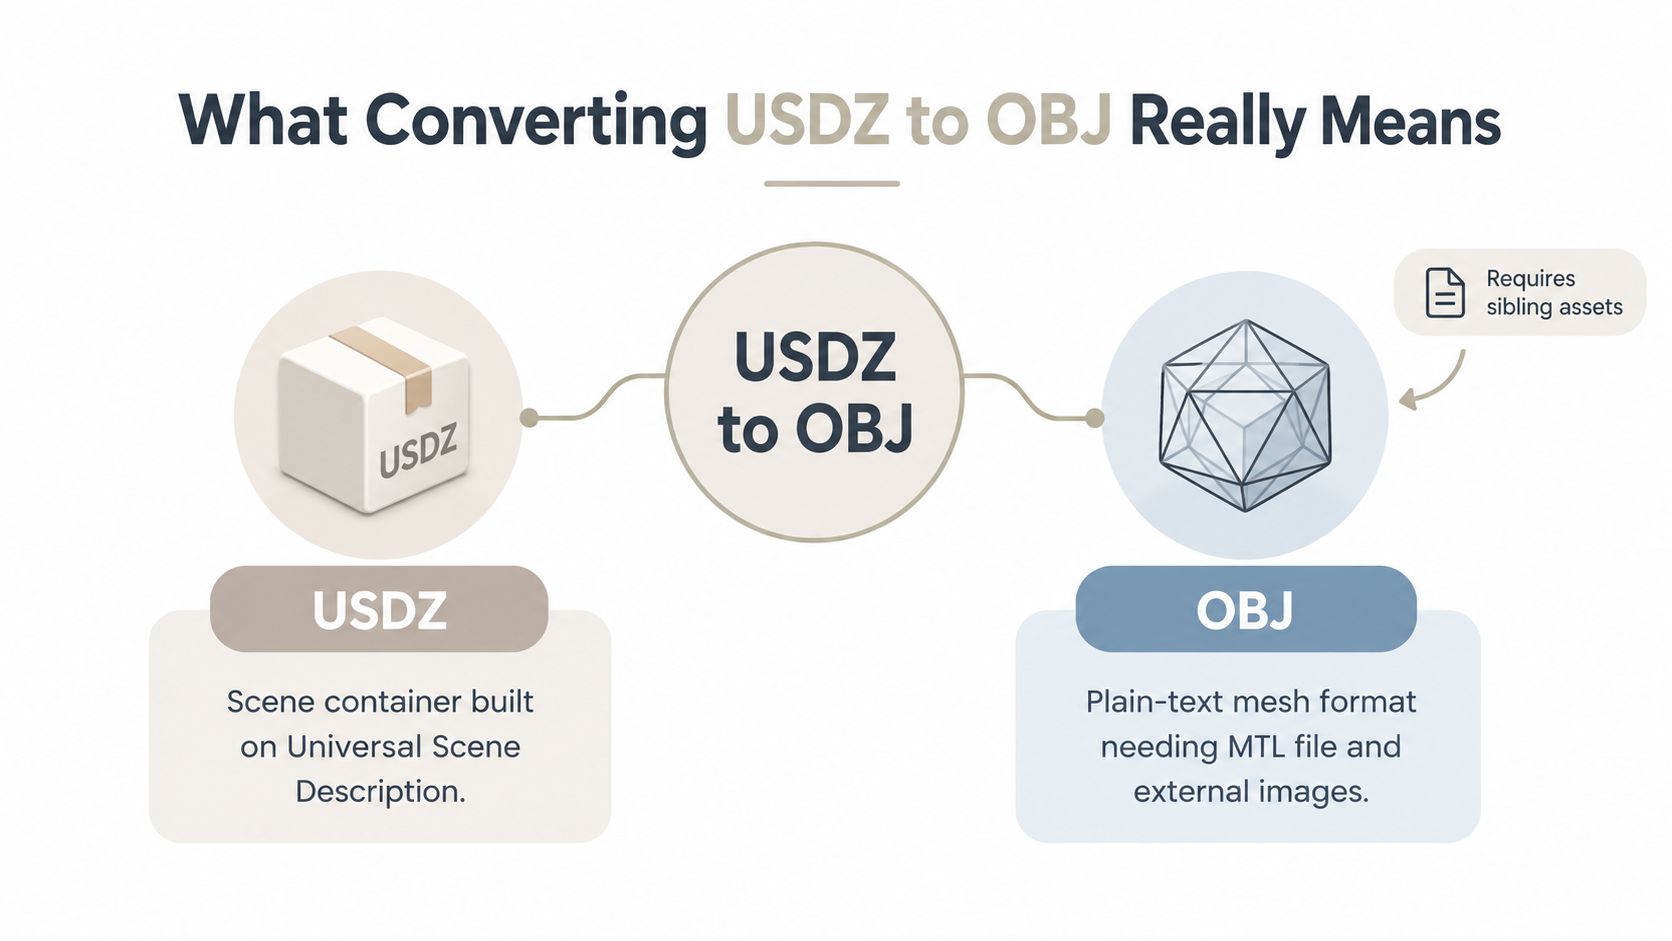
USDZ is a packaged scene; OBJ is a mesh exchange format. The Library of Congress describes USDZ as an uncompressed, unencrypted ZIP-based package built around Universal Scene Description that can include scene data and supported image assets. Its role in Apple AR delivery helps explain why a source package may contain considerably more than the geometry your destination needs (USDZ format description).
OBJ has a different job. Its human-readable, indexed structure describes vertex positions, polygonal faces, texture coordinates, vertex normals, and grouping information. Those capabilities make it useful for portable geometry exchange, rather than complete scene preservation (Wavefront OBJ format description).
The diagram separates the source container from the destination's file requirements.
Define the hand-off before exporting
A practical conversion contract should distinguish between data that can transfer and data you deliberately leave behind.
- Geometry: Export the required polygon meshes, not every visible or hidden object indiscriminately.
- UVs and normals: Preserve them explicitly, then inspect their interpretation in the destination.
- Grouping: Retain useful part boundaries where the receiving workflow needs separate components.
- Scene behavior: Don't promise that animation, lighting, hierarchy, or advanced material behavior will survive as an equivalent OBJ asset.
For broader format selection, this guide to 3D file formats provides context for deciding whether mesh exchange is your requirement.
Choose a deliverable, not just an extension
Specify mesh-only OBJ, OBJ with MTL, or OBJ with MTL and texture images. A fabrication hand-off may need only geometry. A textured visualization hand-off needs the material dependencies as well.
Also decide whether the asset should retain separate parts, which pose represents the static result, and what physical dimension the recipient should measure. These decisions belong before conversion because they affect selection, transforms, and export settings.
Practical rule: A successful save confirms that an exporter wrote a file. It doesn't confirm that the recipient received the asset you intended.
Choosing the Right Conversion Path
Choose a conversion path by the amount of inspection you need, not by how few clicks its interface advertises. A disposable reference mesh and a textured client deliverable shouldn't automatically go through the same workflow.
Browser conversion is a reasonable starting point when you're allowed to upload the asset and can inspect the downloaded result. Desktop inspection is the safer choice when you need to resolve nested objects, compare dimensions, or repair material assignments. For confidential models, establish where processing happens before uploading anything.
USDZ to OBJ conversion paths at a glance
The table is a selection guide. Texture handling and batch features must be checked against the particular tool and installed version.
| Path | Install effort | Texture support | Batch capable | Best for |
|---|---|---|---|---|
| Browser converter | No local installation | Verify whether the download includes MTL and images | Service-dependent | A permitted, one-off compatibility test |
| Blender | Desktop installation | Inspect imported materials and exported dependencies | Through scripting | Artist-controlled cleanup and export |
| Apple preview and conversion workflow | Depends on the available macOS tools | Useful for checking source appearance; verify export support separately | Tool-dependent | Establishing an Apple-side visual reference |
| Python or CLI pipeline | Runtime and dependencies | Requires explicit dependency handling | Suitable for automation | Repeatable, controlled asset processing |
Separate preview tools from exporters
Quick Look is a reference viewer, not an OBJ export plan. Use it to establish how the source is supposed to appear. Likewise, don't assume Apple Reality Converter provides the reverse conversion you need merely because it participates in USDZ workflows. Confirm the actual output formats before investing time in that path.
For Blender, test a representative source package before committing to a batch. Check whether your installation can import USDZ directly and whether its material interpretation is sufficient for the intended hand-off. An importer that displays the mesh correctly may still require material cleanup.
If the destination is a slicer, question whether textured OBJ is necessary at all. FIRMFG's STL vs OBJ practical guide is a useful companion when deciding what the fabrication recipient needs.
Choose the simplest path that lets you inspect the properties the recipient cares about.
Automation becomes worthwhile after you've approved an export manually. Otherwise, you're likely to reproduce an unresolved orientation or material problem across an entire folder rather than save useful work.
Converting USDZ to OBJ in Blender
Use Blender as an inspection workspace before treating it as an exporter. Start with an empty scene and preserve an untouched copy of the source package. Apple identifies USDZ as a distribution package that must be unpacked before editing, and its workflow guidance emphasizes handling the asset and its dependencies together (creating USD files for Apple devices).
Keep the original visual reference available while preparing the export.
Import and inspect the scene
Look under File > Import for the USD importer. Availability and labels vary by Blender build, so don't follow an old instruction to enable a USD add-on without checking your installation first. If direct USDZ import isn't available, unpack the archive and import its root USD asset while preserving the dependency folders.
In the Outliner, identify the model's meshes and their parent objects. Select the intended deliverable rather than exporting the entire scene. Check whether nested transforms position individual parts or place the complete model in space.
Before changing anything, inspect:
- Dimensions: Compare the imported model with a known source dimension.
- Orientation: Identify the intended top, front, and resting surface.
- Part boundaries: Decide which components need to remain separate.
- Surface data: Check the UV map and shading on conspicuous seams or curved surfaces.
Resolve transforms without moving the model
Don't delete parent objects to flatten the Outliner. If you remove a parent relationship, use Object > Parent > Clear Parent with the option that keeps the transform, then confirm that the child hasn't moved.
Correct scale and orientation deliberately, checking the complete assembly after each change. Use Object > Apply for rotation and scale where your hand-off requires baked transforms. Avoid applying location automatically, since the recipient may need a meaningful origin or placement.
Keep parts separate unless the target requires a single mesh. Joining objects for a cleaner object list isn't a sufficient reason to discard useful component boundaries.
The video provides an additional visual walkthrough to compare with your installed interface.
Export through File > Export > Wavefront OBJ, checking the options for selected objects, UV coordinates, normals, and materials. Choose axis settings for the actual recipient, not a preset copied from an unrelated tutorial.
Save into a dedicated delivery directory. This Blender to OBJ export guide offers additional export context, but the decisive check remains reopening your own output and comparing it with the source.
Command-Line and Scripted Conversion
A scripted workflow should encode an approved conversion decision. It shouldn't guess which mesh matters, choose a pose, or apply an unexplained scale correction.
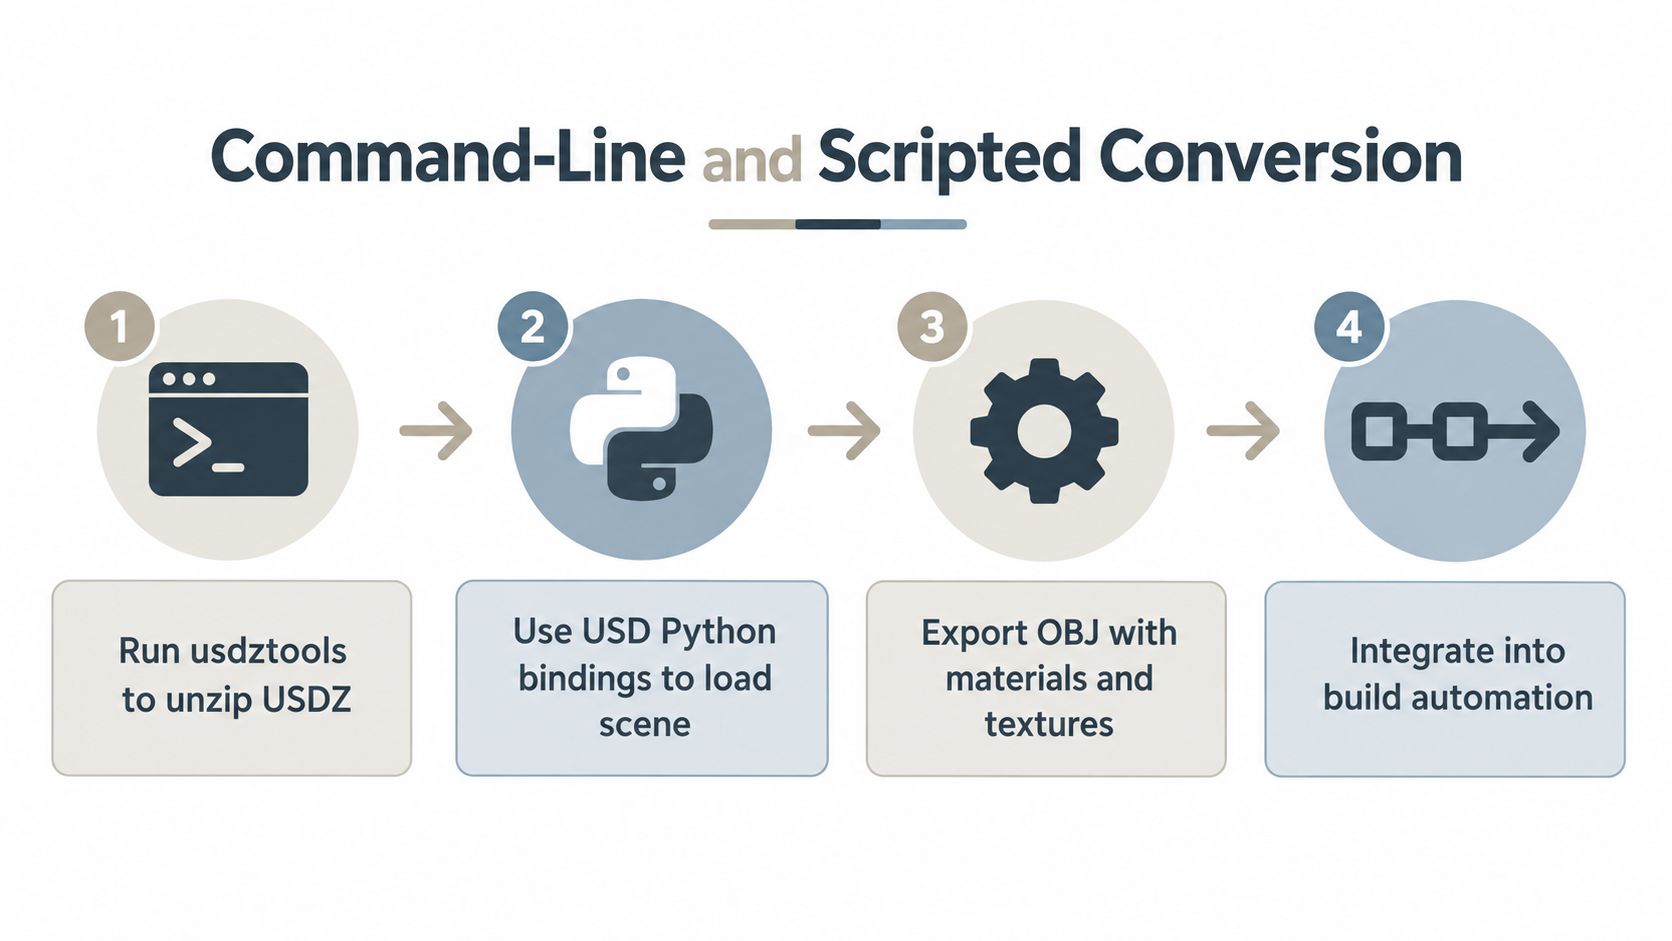
Separate package extraction, scene evaluation, mesh export, and delivery validation. USD Python bindings can support scene inspection, but opening a USD stage isn't itself an OBJ export. You still need an exporter that handles evaluated geometry, transforms, UVs, normals, and material assignments.
The diagram shows the automation boundaries, rather than a guarantee that any single utility completes them all.
Use a known exporter as the automation endpoint
If your approved conversion already works in Blender, its Python interface is a practical endpoint for headless processing. The following starter script uses the current-style OBJ export operator; confirm the operator arguments in your installed Blender version.
Save it as convert_asset.py. This is deliberately a mesh-export starter, not a production-ready material conversion system.
import argparse
import sys
from pathlib import Path
import bpy

args = sys.argv[sys.argv.index("--") + 1:]
parser = argparse.ArgumentParser()
parser.add_argument("source")
parser.add_argument("destination")
parser.add_argument("--scale", type=float, default=1.0)
parser.add_argument("--forward", default="NEGATIVE_Z")
parser.add_argument("--up", default="Y")
options = parser.parse_args(args)

source = Path(options.source).resolve()
destination = Path(options.destination).resolve()
destination.parent.mkdir(parents=True, exist_ok=True)

bpy.ops.wm.read_factory_settings(use_empty=True)
bpy.ops.wm.usd_import(filepath=str(source))

bpy.ops.object.select_all(action="DESELECT")
for obj in bpy.context.scene.objects:
    obj.select_set(obj.type == "MESH")

bpy.ops.wm.obj_export(
    filepath=str(destination),
    export_selected_objects=True,
    export_uv=True,
    export_normals=True,
    export_materials=True,
    global_scale=options.scale,
    forward_axis=options.forward,
    up_axis=options.up,
)
Run it with blender -b -P convert_asset.py, source.usdz delivery/model.obj. If your importer requires an unpacked source, substitute the root USD file path. The numeric default is a script setting, not a recommended physical conversion factor.
Make batch processing explicit
Pass --scale, --forward, and --up only after validating those choices against a representative asset. The starter selects every mesh, so add a root-model or object-name filter before using it on packages containing unrelated geometry.
For a folder batch, invoke the same command for each source with a separate destination directory. Record the input path, exporter version, arguments, and any warnings.
If you use usdztools, check that distribution's supported extraction commands rather than assuming a universal syntax. Unpacking is preparation, not conversion. Add texture copying, material checks, and a clean reimport test before promoting the script into a build pipeline.
Preserving Textures and UVs Through the Conversion
Consider a representative product model with a printed label, a painted body, and a differently shaded cap. This is a working example, not a reported project result. The label provides a useful visual test because a recognizable graphic makes texture placement errors easier to spot than a uniform surface.
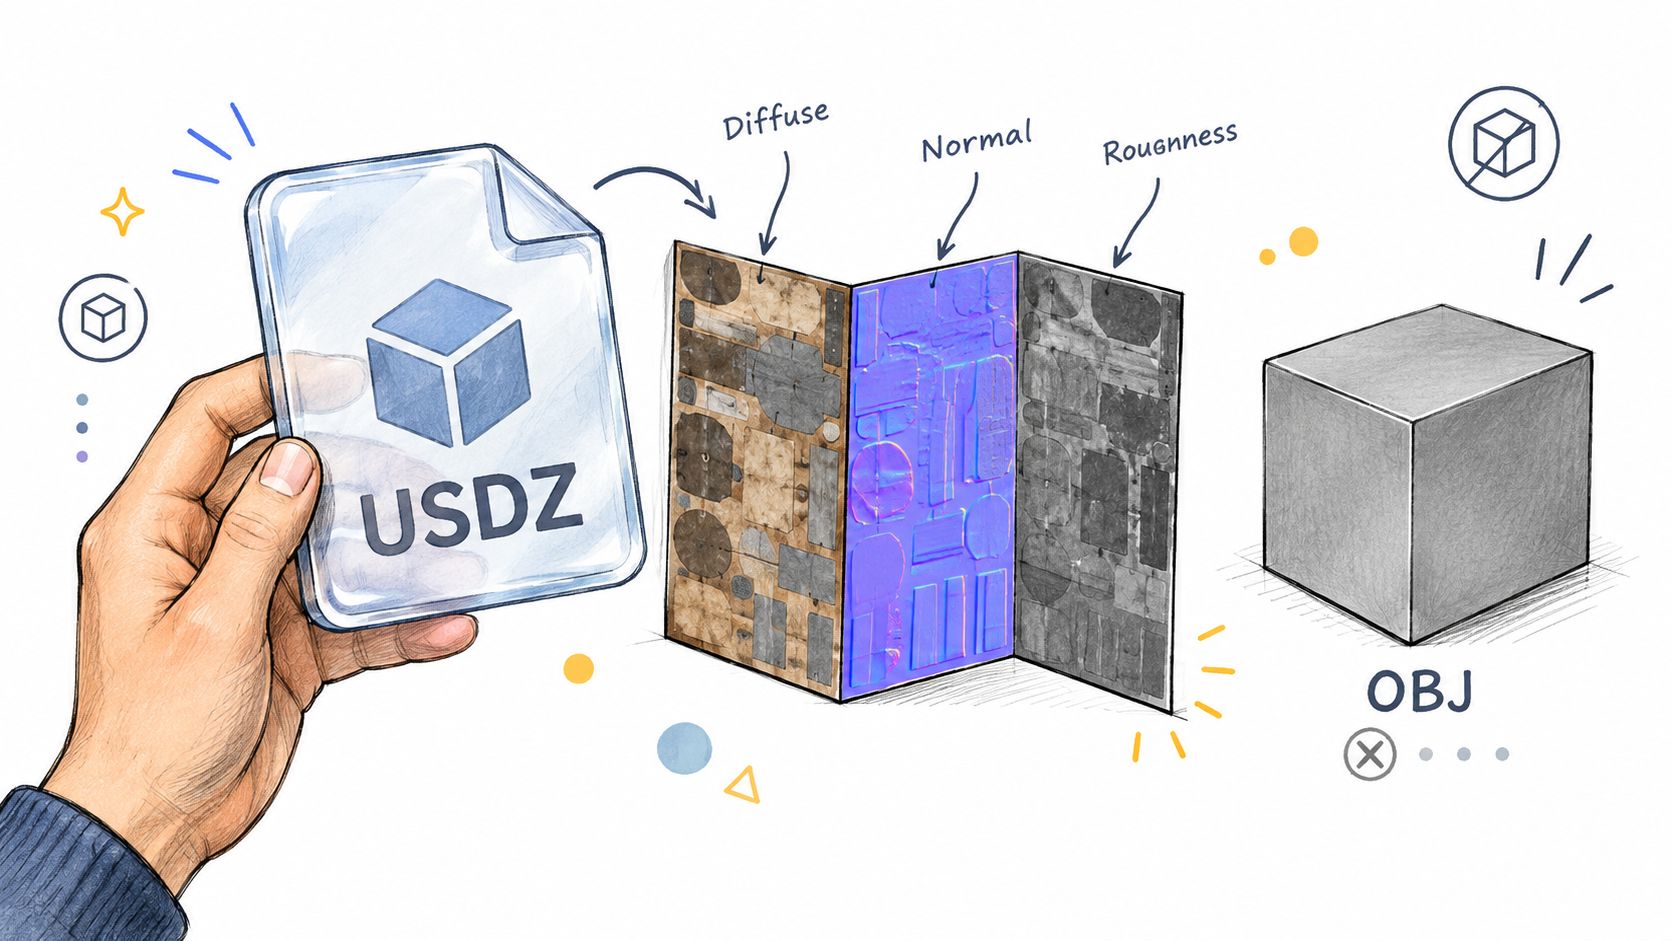
USDZ can carry scene materials and textures together, while the OBJ hand-off depends on separate material and image assets. Apple's discussion of USD workflows provides useful context for the distinction between packaged assets and portable textured results (working with USD assets).
The visual below illustrates the geometry-and-texture hand-off.
Follow the references from mesh to image
Extract the source package into a working directory without immediately renaming its contents. Inspect the imported material assignments to determine which images belong to the label, body, and cap. Don't infer every image's role from its filename alone.
After export, inspect the OBJ's material-library reference and the MTL's texture paths. A manageable delivery layout is an OBJ and MTL beside a textures directory, with texture paths relative to that location.
For the example product, trace the label all the way through:
- Mesh assignment: Confirm the label faces use the intended material.
- Material name: Check that the OBJ's material assignment matches an MTL definition.
- Image reference: Confirm the MTL points to the delivered label image.
- Filename consistency: If you rename an image, update the reference rather than only changing the file.
Avoid paths that point into a temporary extraction directory or your personal workstation folders. The recipient won't have those locations.
Check UV placement separately from material appearance
Reimport the exported asset and inspect its active UV map in Blender's UV Editing workspace. Select the label faces and compare their image placement with the source. A linked image isn't proof that the correct UV data survived.
Then inspect the painted body and cap under comparable lighting. Don't expect every roughness, normal-map, or richer shader behavior to reproduce automatically through MTL. Reconnect destination materials where necessary, and document which appearance features require that work.
This guide to textures for 3D models offers broader context for preparing the image assets.
Delivery warning: A folder containing every texture still fails if the material references point somewhere else.
The goal is a portable dependency set with verified placement, not merely a directory full of images.
Verifying the Result Before You Hand Off the File
An OBJ that opens without an error hasn't passed acceptance. It has passed a file-reading test. Acceptance means the recipient can use it for the stated purpose without reconstructing missing context.
Test from the final delivery directory, not from the working scene where source materials and cached images may conceal broken references. Open a clean scene in Blender, then repeat the relevant checks in the actual game engine, viewer, or slicer.
Run a recipient-side acceptance check
Use the original preview and the agreed reference dimension as your comparison targets.
- Silhouette: Compare recognizable contours, openings, and separate components. Investigate missing pieces before adjusting shading.
- Scale: Measure the reference feature in the receiving application. Write the intended units and dimension into the hand-off notes.
- Orientation: Confirm the top, front, and contact surface. A sideways model calls for checking coordinate conversion, not arbitrary rotation until it looks plausible.
- Normals and winding: Inspect outward-facing surfaces and problematic shading transitions.
- Material dependencies: Load the asset using only the delivered MTL and image files.
- Target purpose: Inspect fabrication-relevant geometry in the slicer or material reconstruction in the engine, rather than relying solely on Blender's viewport.
Diagnose symptoms without jumping to fixes
A gray object warrants checking material assignment, MTL loading, image paths, and the viewer's display mode. It doesn't prove that UVs are missing. Examine the dependency chain before rebuilding the mapping.
Unexpected shading warrants checking exported normals, face direction, and destination smoothing behavior. Don't recalculate normals immediately if the source uses intentional custom shading. A repair that removes an obvious artifact may also alter an intended hard edge.
A scale mismatch deserves a measurement-based correction. Avoid judging size by framing because viewers can fit both small and large objects comfortably into the same window.
The strongest portability test is opening the delivery folder without access to the source workspace.
Record the outcome and any remaining limitations. If the recipient must rebuild a material or apply a known unit interpretation, state that explicitly rather than presenting the conversion as complete and equivalent.
Putting It Together in a Real Project
A reliable project rhythm separates source assets, working files, and delivery files. Keep the received USDZ unchanged in the source archive. Perform inspection and cleanup in a working scene, then create a delivery directory containing only the approved output and its required dependencies.
Make the hand-off reproducible
Before exporting, write a short asset contract: required parts, static pose, orientation, reference dimension, and whether textures are part of acceptance. Use that contract to choose a browser test, an inspected desktop export, or an automated job.
After export, run the recipient-side checks against the final directory. Preserve the approved settings alongside the working file or script so another artist can reproduce the result without guessing.
- Archive the source: Retain the original package for comparison and future scene-level work.
- Deliver dependencies deliberately: Include only the material and image files required by the agreed output.
- Record exceptions: Name any destination-side material work or unresolved appearance differences.
- Approve the reimport: Don't substitute an exporter's success message for a visual and dimensional check.
Avoid unnecessary conversion
If you control asset creation, request or generate the destination format directly when possible. Converting an AR delivery package back into a mesh may be necessary for a received asset, but it needn't become the default route for every new model.
The durable lesson is to match the deliverable to the recipient. For game work, that means geometry and a clearly understood material hand-off. For fabrication, it means usable physical geometry at the intended size. The export button is only one operation in that agreement.
Sculpty offers browser-based text-to-3D and image-to-3D creation, texturing, mesh cleanup, and exports including OBJ and USDZ. Visit Sculpty to create an asset and export the format your recipient needs, then verify its geometry, dependencies, and scale before delivery.