
FBX to USDZ: How to Convert Without Broken Materials
The popular advice for FBX to USDZ conversion is to upload a file, download the result, and call it finished. That's a file-creation test, not a delivery test. A converter can produce a valid package while dropping animation, misreading roughness, or leaving your model sideways when someone places it on a floor.
Treat conversion as a QA problem instead. Decide what must survive, normalize the source scene, and reject any export that fails on the intended device.
Table of Contents
- What Survives the Trip from FBX to USDZ
- Prepare the FBX Scene Before You Convert
- Convert the FBX into a USDZ Package
- Check Materials and Textures in the Result
- Validate Scale Orientation and Animation on Device
- Fix the Failures That Show Up After Conversion
- Ship the Right File and Keep the One You Came From
What Survives the Trip from FBX to USDZ
A USDZ file can open and still fail its job. The export must preserve the scene elements required by its viewing device and use: geometry, materials, placement, or animation. Treat each conversion as a pass-or-fail test against that delivery target.
FBX is a proprietary production interchange format with roots in motion capture. Its format history traces its origins to Kaydara and describes its use for exchanging meshes, materials, cameras, lights, rigs, and animation between applications. That broad support helps during production, but it does not mean every converter can carry every feature into USDZ. For the distinction between editable interchange assets and packaged viewing assets, see this guide to 3D file formats.
What carries over from FBX to USDZ
| FBX content | Typical USDZ result | What to do before converting |
|---|---|---|
| Polygon mesh and UV sets | Geometry and UVs usually transfer reliably | Clean topology, remove unnecessary interior faces, and triangulate where needed |
| PBR materials | Supported channels map to USD Preview Surface, but not automatically one-to-one | Rebuild or remap channels |
| Custom shader graphs, including V-Ray, Arnold, and Redshift | Renderer-specific networks do not translate faithfully | Bake the intended appearance into PBR textures |
| Embedded textures | Images may need extraction and packaging | Convert to PNG or JPEG and relink |
| Cameras | The source camera is not the viewing camera for AR placement | Remove unnecessary cameras |
| Lights | Production lighting does not provide a reliable AR lighting setup | Remove production lights; bake only deliberate appearance information |
| Static pose from a rig | The displayed mesh pose can survive | Set and verify the intended pose |
| Skeletal animation clips | Static-oriented converters may omit them | Use a USD-aware animation workflow |
| Blend shapes and morph targets | They can disappear if unsupported | Test the converter and viewer early |
| Empty nodes and hidden scene objects | They may be flattened, discarded, or exported unnecessarily | Delete unused hierarchy |
Choose the export type before choosing the converter
For a static AR preview, check geometry, surface appearance, physical scale, and placement. The production rig can be left behind if the delivered model only needs a fixed pose.
For transform animation, preserve the hierarchy and pivot locations, then check timing and playback. A file that keeps the moving parts but changes their pivots or timing has not preserved the intended motion.
For skeletal or facial animation, the delivery must retain usable clips, joints, skinning, and morph targets. USDZ can carry animation, but a mesh-focused conversion route is not an animation pipeline. A character that opens correctly but no longer deforms fails an animated delivery, even if its rest pose looks right.
The viewing device sets the acceptance test. Check its expected USD features and playback behavior before choosing the export route. To compare smart-glasses viewing contexts, see compare 2026 smart glasses trends.
Prepare the FBX Scene Before You Convert
Work on a duplicate in your digital-content-creation application. Keep the original FBX untouched so a cleanup decision doesn't destroy something you later need, especially a rig, animation take, or procedural material.
The visual and scripted routes should start from the same normalized scene.
Run the preflight in order
Set units and verify dimensions. Normalize the scene to meters, then measure the actual object. Changing the unit label without correcting the geometry doesn't establish real-world size. For furniture, check a known width or seat height against the design specification.
Confirm the up-axis. Identify whether the source scene is Y-up or Z-up and make the conversion explicit. Avoid an improvised rotation on a parent node that another exporter might bake differently.
Apply transforms carefully. For static assets, apply object rotation and scale and put the origin where placement needs it, usually at the support surface. For animated assets, don't indiscriminately freeze joints or animated transforms. Preserve the bind relationship and validate any rebake.
Strip unused scene content. Remove production cameras, unnecessary lights, hidden alternatives, empty collections, and takes you aren't delivering. Keep nodes that drive required pivots, skinning, or animation. Cleanup should remove dead content, not meaningful structure.
Bake renderer-specific materials. Produce base color, roughness, metallic, normal, and emissive maps where needed. Bake procedural grain, layered coatings, and other unsupported shading into those channels. Don't bake directional highlights into a product's base color unless that fixed appearance is intentional.
Normalize the image set. Use PNG or JPEG, choose power-of-two dimensions where practical, and relink every image from a controlled asset folder. Preserve alpha in an appropriate format. Reduce resolution according to visible detail at the intended viewing distance rather than exporting every map at its largest available size.
Simplify dense geometry. Decimate scans and remove invisible internal surfaces, but protect silhouettes, UV seams, and deformation areas. Compare the reduced mesh with the source before committing it to the export path.
A practical walkthrough can help connect those scene operations to the conversion interface.
Save a reproducible intermediate
Save the cleaned scene as the normalized intermediate, alongside its textures. Record the intended export type, scene units, up-axis, and any deliberately removed features.
Set texture and geometry budgets against the weakest supported device and the actual delivery connection. A sharp desktop preview isn't evidence that the asset is appropriate for mobile delivery.
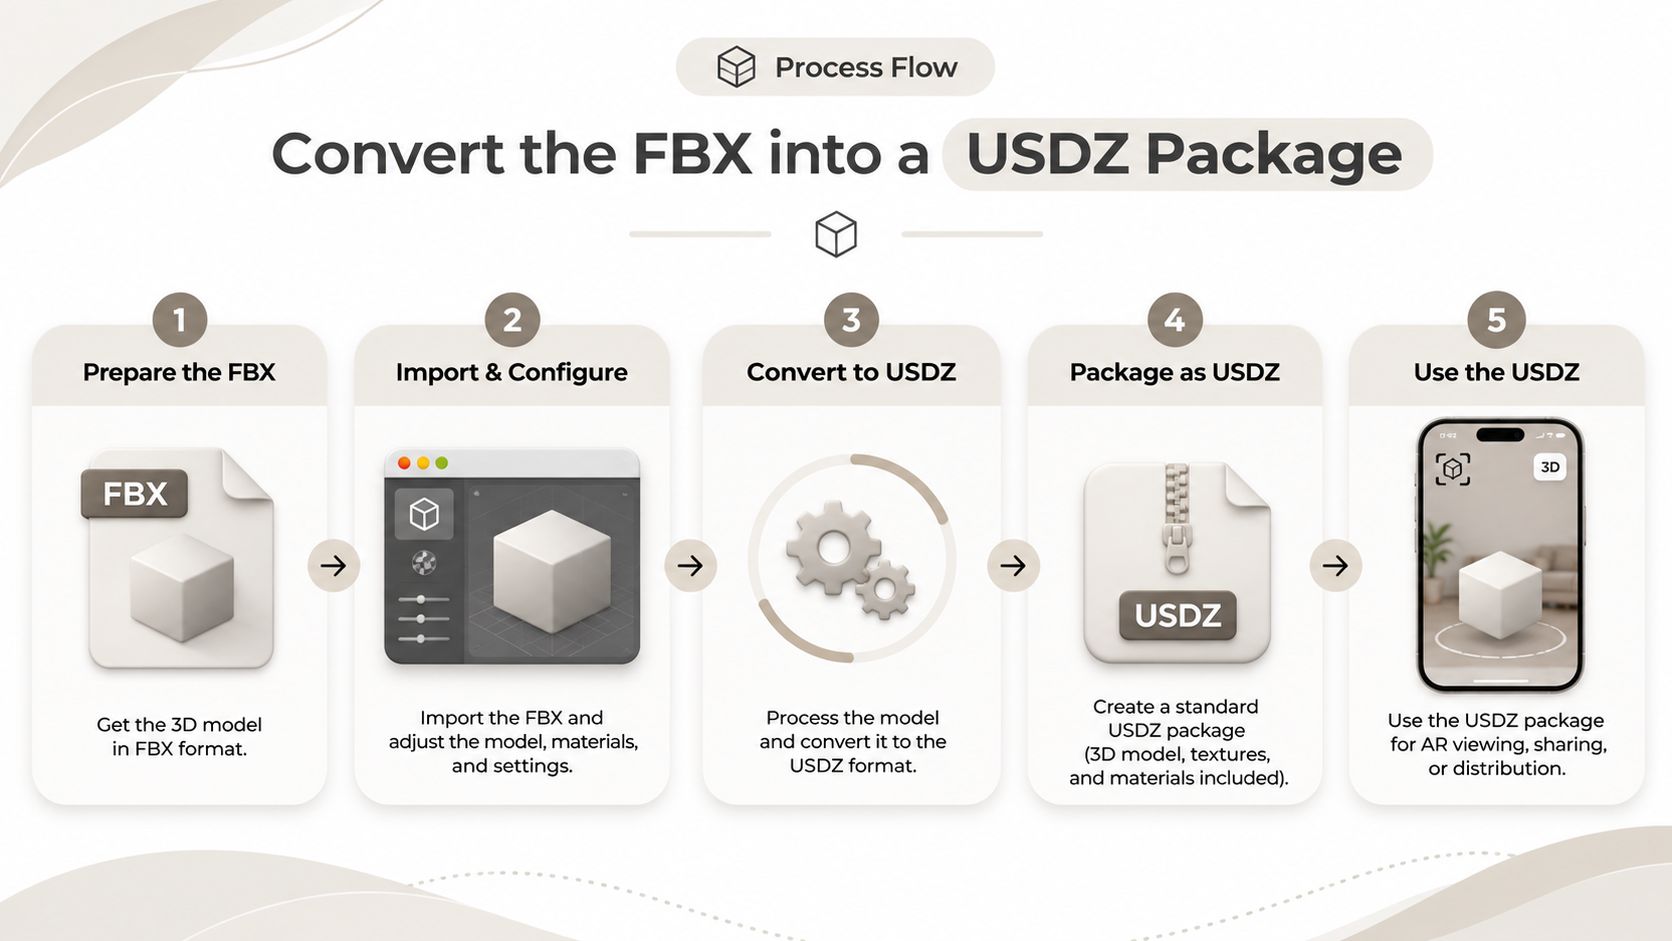
Convert the FBX into a USDZ Package
USDZ isn't an FBX file in a different wrapper. The OpenUSD package specification defines an uncompressed package containing USD scene data and permitted supporting resources. Image optimization happens before or during export; the archive itself doesn't provide ordinary ZIP compression.
Use the normalized source for every route so you're comparing converters rather than different scenes.
Visual conversion on macOS
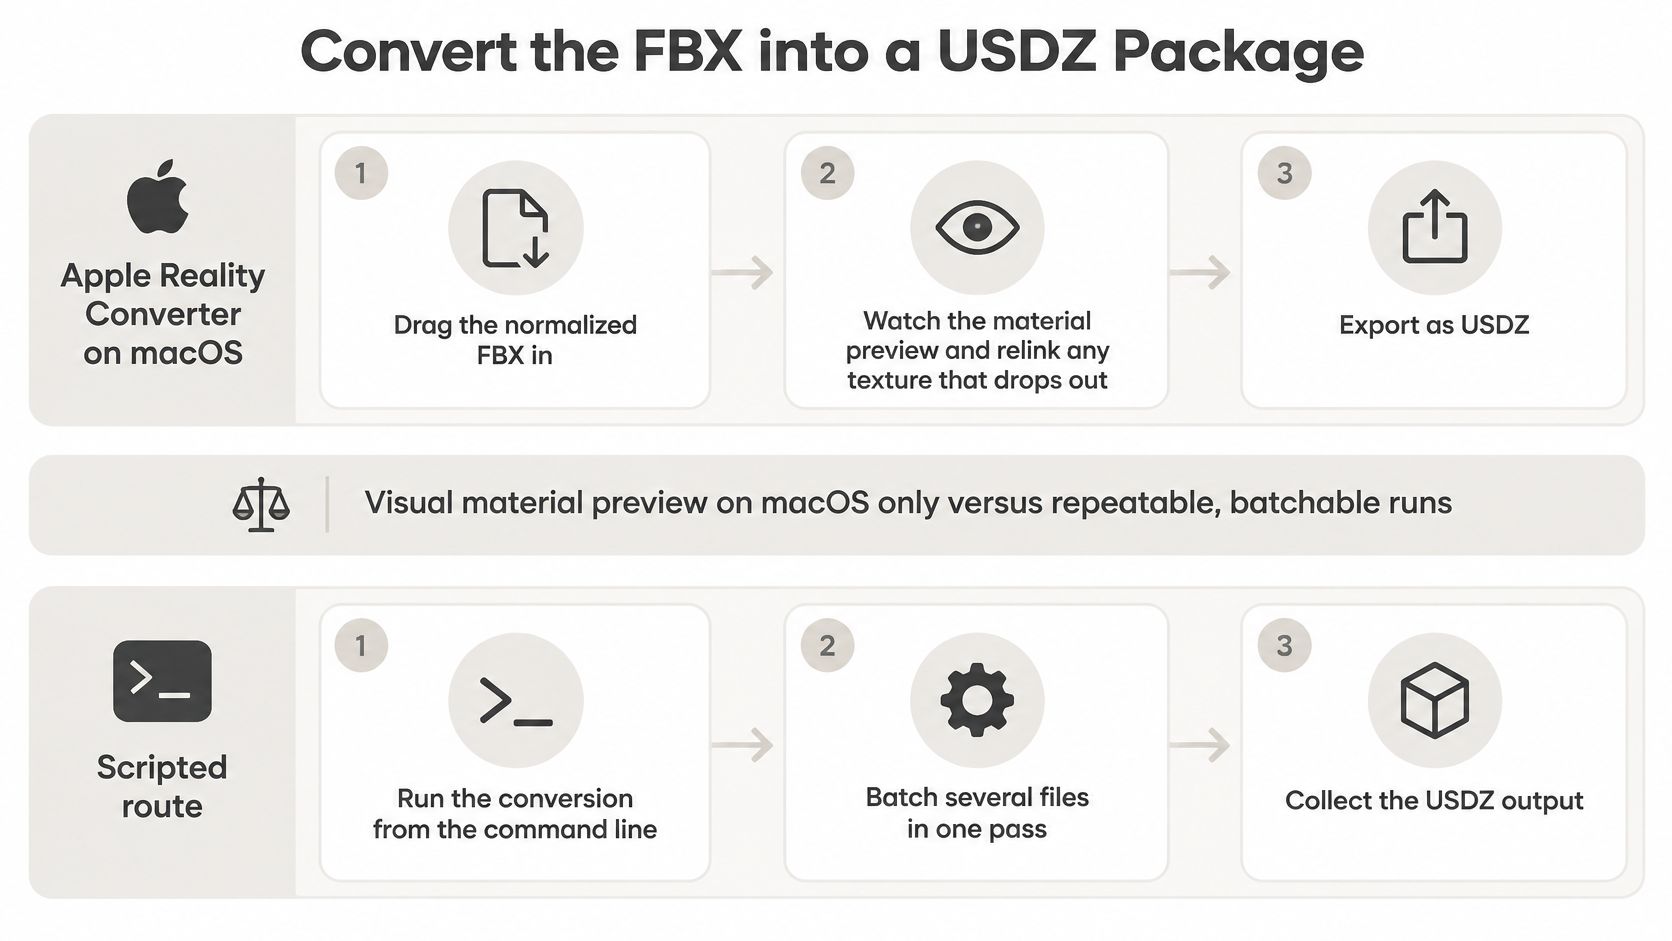
With Apple Reality Converter, where available for your macOS environment:
- Import the normalized FBX and inspect the preview before changing anything.
- Resolve missing images and check which material is bound to each mesh.
- Correct supported material properties in the inspector rather than assuming imported assignments are right.
- Review available texture-processing options, export USDZ, and record the resulting package size.
This route suits a static asset whose material problems are easiest to diagnose visually. It doesn't establish that an animation survived.
Scripted conversion and artist-controlled export
For Apple's USD conversion tooling, including legacy usdzconvert installations, check the installed version's supported inputs and dependencies first. Don't build a production pipeline around an old command copied from a tutorial.
- Stage the source and images in a predictable folder structure.
- Fix the conversion options and capture logs, tool version, and validation results.
- Batch only after a representative asset passes, then stop or quarantine outputs with errors.
With Blender, import the FBX, rebuild unsupported materials, and use the USD export capabilities available in your installed version. Check whether that version writes USDZ directly or requires a separate packaging step. For browser converters, assume a static-preview workflow until a controlled animation test proves otherwise.
Converter options for FBX to USDZ
| Tool | Platform | Geometry inputs | Rigs and animation | Best for |
|---|---|---|---|---|
| Apple Reality Converter | macOS | FBX, OBJ, glTF, USD | Treat as a static material-conversion route | Visually checked, individual conversions |
| Apple USD tooling, including usdzconvert | macOS command line | FBX, OBJ, glTF, USD with required support installed | Validate supported animation explicitly | Repeatable batch pipelines |
| Blender USD export | Windows, macOS, Linux | Scene imported or rebuilt in Blender | Only features supported by the installed exporter | Material and hierarchy rebuilding |
| Online browser converters | Browser | FBX uploads accepted by the service | Treat as static unless tested otherwise | Quick geometry previews |
| Studio direct export | Browser | AI-generated meshes from the studio | Static mesh delivery | Generated assets without an FBX intermediate |
For generated assets, direct USDZ export from the same private gallery avoids an unnecessary FBX round trip. It doesn't remove the need to inspect the delivered materials.
Architectural work needs a separate measurement reference. Pinnacle Property Media's commercial floor plans from Matterport are relevant to that handoff, but a floor-plan deliverable shouldn't be confused with an optimized AR asset.
Check Materials and Textures in the Result
A successful export tells you the converter wrote a package. It doesn't tell you that painted metal still looks painted, transparent plastic still reads correctly, or the normal map still describes raised detail.
Apple's USDZ workflow guidance supports treating the result as a constrained delivery asset, with deliberate material mapping, texture optimization, and target-viewer inspection. Start with channel meaning, then inspect the visible result.
Material channels and the failures they cause
| FBX channel | USD Preview Surface input | Defect to check for |
|---|---|---|
| Diffuse or Base Color | diffuseColor |
Washed-out or oversaturated color from incorrect color-space interpretation |
| Roughness | roughness |
Inverted surface response when gloss is used without conversion |
| Specular | specularColor in a supported specular workflow, not a direct metallic substitute |
Plastic turning chrome after incorrect metallic assignment |
| Normal | normal |
Reversed detail from tangent-space mismatch or an inverted green channel |
| Emissive | emissiveColor |
A bright surface without the expected bloom halo |
| Opacity or Alpha | opacity and, for cutouts, opacityThreshold |
Fringed silhouettes or incorrect transparency |
| Ambient Occlusion | Deliberately baked into base color when required by the workflow | Lost contact detail or excessively dark creases |
| Texture files | Packaged image resources | Missing assets caused by unresolved paths |
Read the defect before changing the map
Color textures and data textures need different handling. Base color is generally interpreted as sRGB; roughness, metallic, and normal data shouldn't receive the same color transformation. Check the assigned color space before repainting an image that looked correct upstream.
Gloss and roughness describe opposite surface behavior. A direct connection can make polished areas dull and dull areas polished, so inspect contrasting regions rather than judging only the overall shine.
Specular isn't another name for metallic. A plastic surface can have a strong highlight without being metal, and copying its specular map into metallic can create an entirely different material.
For normal maps, inspect a recognizable feature such as an embossed logo. If the logo looks engraved, check tangent conventions and the green channel before rebaking.
Don't repair a channel-assignment error by editing the texture until it happens to look acceptable under one lighting setup.
Inspect edges and package contents
Use cutout transparency for hard-edged masks, such as perforations or leaf cards. Keep blended transparency where partial transmission is intentional; replacing glass with a cutoff mask isn't a repair.
Compare the USDZ against a source render on a neutral background. Inspect seams, stretched UVs, flat-looking surfaces, and emissive regions without assuming the viewer will reproduce a renderer's bloom effect.
Verify that image references resolve inside the delivered package, not from your workstation. If you're considering an OBJ detour to simplify troubleshooting, check the FBX to OBJ workflow before introducing another material translation.
Validate Scale Orientation and Animation on Device
Use pass or fail, not looks mostly right. Apple's USD conversion and validation guidance identifies supported source assets and validation tooling, but successful conversion still needs a delivery test on representative hardware.
Keep a result sheet with the asset version, device, operating system, converter version, and any exceptions. An unrecorded check can't reliably distinguish a new regression from an old problem.
Run a hardware acceptance test
Physical scale on iPhone AR Quick Look. Place the model beside a measured reference or compare it with a documented product dimension. Pass only when its default placement matches the intended physical size. Manual pinch-scaling doesn't count as a fix.
Orientation and grounding on iPhone. Place it on a detected surface and walk around it. Pass when it stands upright, faces the intended direction, and rests on its support point without floating or sinking.
Appearance on iPhone and macOS Quick Look. Compare distinctive surfaces with the approved reference. Pass when required textures resolve, bindings are correct, and no missing-asset warnings appear.
Loading on an older supported iPhone. Open the delivered asset over an ordinary cellular connection rather than a warmed desktop cache. Record first-render time against the project's agreed acceptance target. Reject crashes, incomplete loading, or visibly unresponsive interaction.
Destination behavior on visionOS. If the asset is headed there, test it there. Pass only when placement, appearance, and intended playback work in the actual delivery application.
Test motion as a separate deliverable
For transform animation, check moving parts, pivot positions, timing, and looping. For skeletal animation, also inspect deformation at shoulders, elbows, fingers, or other demanding joints.
Verify joint hierarchy, skin weights, morph targets, and clip names in the authored scene or an appropriate inspection tool. Then verify the visible result on the device. A mobile viewer may not expose the metadata needed to diagnose a broken rig.
Use a small regression set whenever you change conversion settings:
| Test asset | Required pass conditions |
|---|---|
| Static product model | Geometry, dimensions, materials, textures, placement |
| Textured organic mesh | Silhouette, UV seams, normals, texture completeness |
| Rigged asset | All applicable static checks plus skinning, required clips, and morph behavior |
Mark irrelevant checks not applicable, with a reason. Don't mark animation as passed on a static export merely because nothing moved incorrectly.
Fix the Failures That Show Up After Conversion
Post-conversion symptoms, causes and fixes
| Symptom | Likely cause | Fix |
|---|---|---|
| Model lies on its side or faces the wrong way | Axis conversion or forward-direction mismatch | Establish the intended Y-up export and verify facing |
| Textures show black, white, or missing | External image references or failed bindings | Relink supported PNG or JPEG images and reconvert |
| Surfaces look flat or plastic | Custom shader graph dropped | Bake PBR textures and rebuild channel assignments |
| Animation doesn't play on device | Converter wrote only a static pose, or viewer can't play the authored result | Use compatible USD animation authoring or ship a static variant |
| Blend shapes stopped working | Unsupported or omitted morph targets | Test the animation route early and split the deliverable if necessary |
| File opens slowly or fails on cellular | Oversized images, dense geometry, or delivery problems | Optimize images and mesh, then retest the hosted file |
| Edges show halos or fringes | Unsuitable blending or contaminated transparent pixels | Use a cutout threshold where appropriate and inspect image edges |
Most repairs belong upstream, in the normalized scene or export configuration. If the object's size is wrong, inspect source dimensions and unit conversion before scaling the delivered package by eye.
Separate appearance repairs from animation decisions
Material repairs can be straightforward when the correct images already exist. Relinking an image, correcting a color-space tag, or fixing an opacity setting is a targeted adjustment.
A missing procedural finish requires more work because you must create the portable appearance first. Use a controlled baking workflow, such as this PBR texture tutorial, rather than compensating with arbitrary sliders in the destination viewer.
Animation requires a different decision. The The3DAI FBX-to-USDZ guide highlights how converters can output a static snapshot while omitting takes, skeleton behavior, or blend shapes. The extension alone doesn't explain the failure; inspect what the converter authored.
Choose a repair that matches the contract:
- Static AR preview required. Approve a deliberate pose and remove animation from the stated deliverable.
- Rigid motion required. Author compatible transform animation and verify pivots and playback.
- Character performance required. Use a USD-aware rig and animation workflow, or deliver a separate animation asset alongside the static AR preview.
Repair discipline: Change the normalized source and regenerate the package. Don't turn hand-edited delivery files into an undocumented second source of truth.
Path and assignment fixes are usually localized. Missing shader bakes, retopology, and unsupported character deformation can require substantial rebuilding, so identify those failures before committing to a delivery date.
Ship the Right File and Keep the One You Came From
Ship the asset that matches the approved job: static USDZ for product placement, transform animation for rigid motion, or a USD-authored character package whose required deformation and clips have passed on-device checks.
Keep the original FBX, normalized intermediate, and validated USDZ together. Include the version, triangle count, texture budget, intended viewer, and deliberately omitted features in the handoff record. Assign an owner to approve exceptions rather than leaving the recipient to discover them.
For teams building an asset-submission interface, Tutorial AI's multi file upload implementation guide is relevant to collecting source files and supporting images together. Preserve those relationships instead of accepting an isolated FBX with no texture context.
Final delivery gate
- Upright and correctly sized. Default placement matches the documented real-world dimensions.
- Textures packaged completely. The delivered file opens without relying on workstation paths.
- Required motion verified. The intended clip plays on the destination device, or the handoff explicitly identifies a static asset.
Don't approve the file because it exported. Approve it because the required experience works.
Sculpty offers AI-assisted model generation, prompt-driven PBR texturing, remeshing, and retopology, with USDZ export from a private gallery alongside GLB, STL, OBJ, FBX, and 3MF. Visit Sculpty to prepare and export a generated asset without an unnecessary FBX intermediate, then run the same device-level acceptance checks before delivery.