How to Make a 3D Dragon from Sketch to Export
The most popular advice on how to make a 3D dragon is to chase a prettier picture. Add more scales, raise the polygon count, and export whatever the generator returned. That path gives you a viewport trophy. It does not give you a jaw that opens, a wing that folds, or a file a slicer will accept.
A convincing image is not a usable dragon. Pick the job first. Generation is the start of topology, materials, and export, not the finish line. I would rather ship a simpler body with predictable joints than a dense sculpt that fails the first time something has to move.
Table of Contents
- Pick the Dragon You Are Actually Making
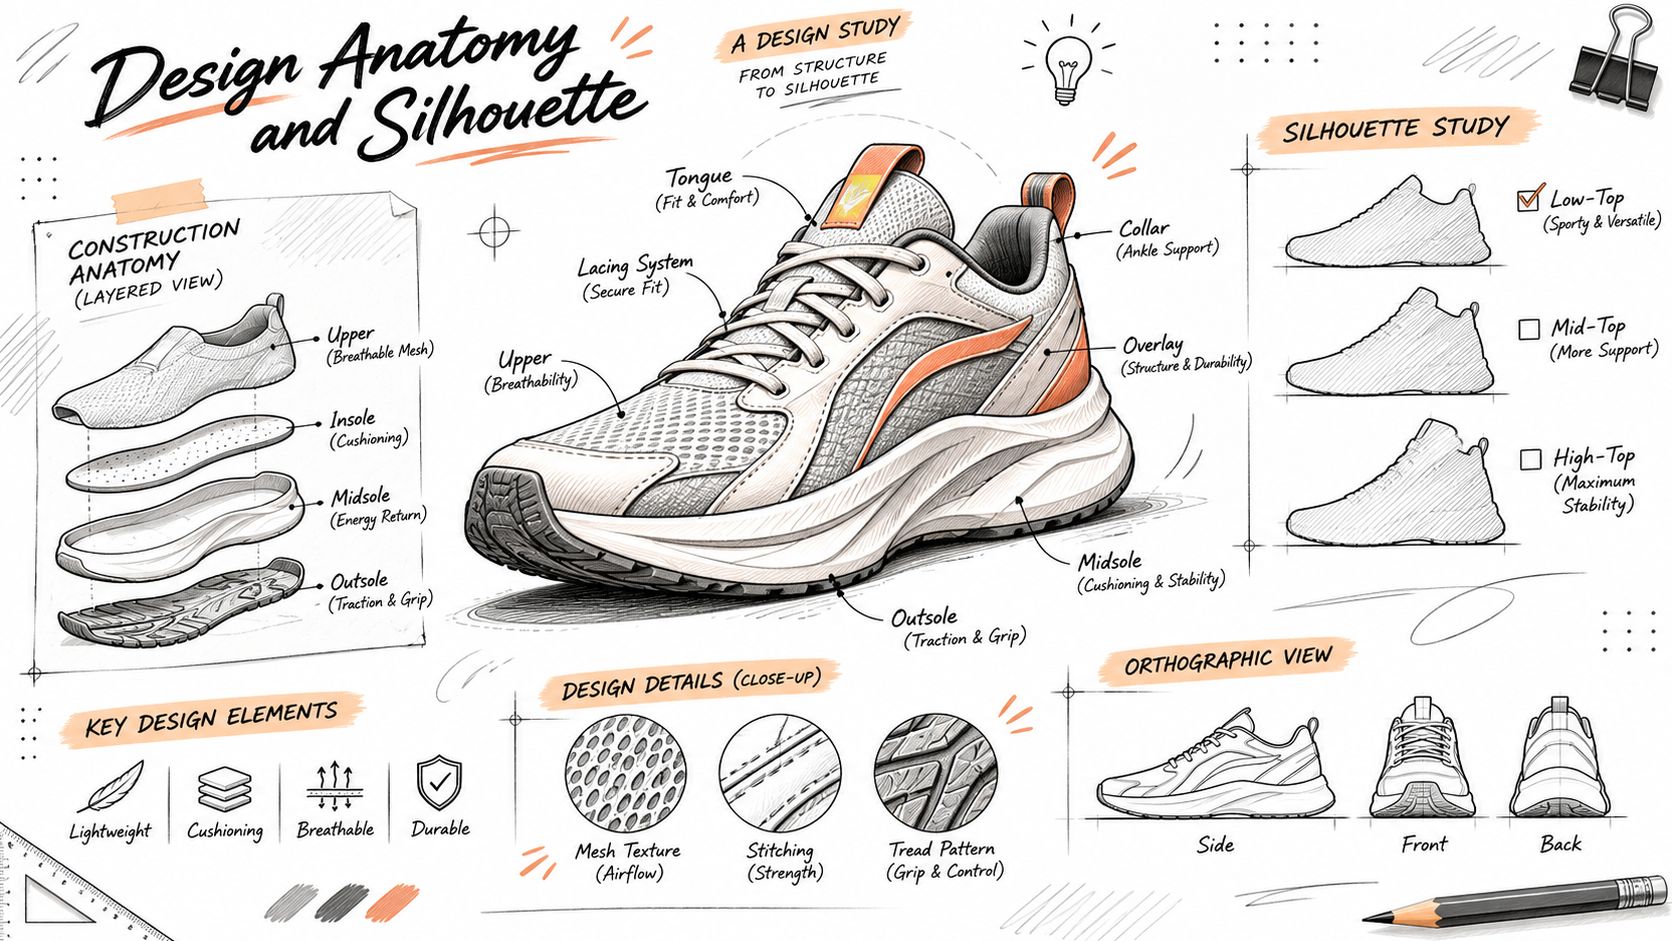
- Design Anatomy and Silhouette First
- Generate the Base Mesh Step by Step
- Retopologize for Joints UVs and Games
- Texture Then Export the Right File
- Fix the Print Before You Slice
- Start the Dragon That Matches the Job
Pick the Dragon You Are Actually Making
Before you name a sculpting app, decide what this dragon has to survive after the pretty shot. The same creature can be a game character, a still, a resin miniature, an articulated desktop print, or a client review model. Those five jobs do not share a mesh.
| Destination | Mesh target | Design choice that matters | Export |
|---|---|---|---|
| Game character | About 15,000-30,000 triangles, more if wings and face animate | Deformation loops at jaw, shoulders, hips, wing roots, and tail | FBX or GLB |
| Hero render or still | Dense sculpt is acceptable | Silhouette, scale breakup, and material separation | GLB or USDZ |
| Resin miniature | Watertight, hollowed shell | Drain holes, thicker membranes, horns, and claws | STL or 3MF |
| FDM articulated model | Solid or lightly hollow parts with calibrated gaps | Folded wings and joint clearance matched to printer and filament | STL or 3MF |
| Client turntable | Mid-density readable mesh | Clear profile from every angle, not micro detail | USDZ |
Read the row as a contract, not a menu.
Game character. The body stays near that triangle band so it deforms in an engine. Spend extra triangles only where wings articulate, the face acts, or the camera gets close. FBX or GLB is what Blender, Unity, and Unreal open for a rigged handoff.
Hero render or still. Nothing has to bend, so a dense sculpt is fine. What fails here is a muddy outline and materials that are one blob. GLB or USDZ carries the look into a review without a game rig.
Resin miniature. The mesh must be a closed shell you can hollow. Membranes, horns, and claws need enough thickness to print and to survive a thumb. STL or 3MF goes to the slicer.
FDM articulated model. Print-in-place joints live or die on clearance. That gap changes with the printer, the filament, and the scale. Supports that drop into the gap fuse the segments shut. Fold the wings. Export STL or 3MF.
Client turntable. This file is for review. A readable silhouette from every angle beats microscopic scale detail nobody will see at thumbnail size. USDZ is enough for a quick preview.
Practical rule: Pick one row and write three constraints before you generate anything: the triangle budget or minimum wall thickness, whether any joint has to deform, and the file the next tool opens.
A dragon built for all five rows at once is built for none of them.
Design Anatomy and Silhouette First
Treat the body as five decisions before a mesh exists: anatomy, structure, surface, motion, and presentation. A documented USC Viterbi School explanation of dragon production starts with sketching and blueprinting, moves through digital modeling, and ends at rendering. That production borrowed lizard and bird anatomy, airplane structure, and even flamethrower design, and the crew studied store-bought chickens to see how a real wing folds flat against a body.
If proportion still feels abstract, a course that helps you build foundational 3D design skills is a better use of an evening than another random sculpt.
Block the body before the scales
Borrow a measurable cue. Use a lizard torso and tail for the mass, a bird shoulder for the wing, and a simple beam where the wing root meets the chest. The chicken is the folding reference, not a texture.
Block masses in order. Skull, jaw, neck, torso, limbs, wings, tail, horns. Approve the silhouette from the front, the side, and the top before a single scale goes on. Scales hide a bad profile. They do not fix it.
Write three proportions. Neck length versus torso length. Wingspan versus body length. Tail thickness at the root versus the tip. If you cannot say those ratios out loud, the generator will invent them for you.
Lock a real size. Height, length, and wingspan are decisions, not vibes. A tabletop miniature and an 18-foot story creature cannot share wall thickness or joint gaps.
Separate the surface into layers. Place the wing on a shoulder that can fold. Give each limb a joint range you can pose. Keep scales, belly plates, horns, and wing membrane as different materials, not one painted skin.
Finish with three orthographic sketches, or a clay blockout you can hold next to every generated mesh. Artists on that same production moved from those proportions into detailed digital models, a simple stick-figure skeleton, and a mesh-like skin, then tested the creature in poses before anyone called it finished.
That clip is useful as a silhouette check, not as a modeling tutorial. If the profile fails in a turn, more detail will not save it.
Generate the Base Mesh Step by Step
Copy the destination row and the three constraints onto the brief. Triangle budget or wall thickness. Whether joints deform. The file the next tool opens. A generator that does not see those limits will optimize for a pretty still.
For the 1996 film Dragonheart, Industrial Light & Magic built Draco from a physical maquette that was photographed from every angle, scanned, rigged, and performed, rather than treated as one sculpt. The Christian Science Monitor account describes that dragon as 18 feet high and 43 feet long, with more than 200 photographs of Sean Connery's expressions used for the talking face. The lesson for a solo artist is the order of work, not the headcount. Define proportions, make a base mesh, keep the landmarks, then add a skeleton and materials.
One pass, then stop
Name what stays simple. "Western dragon, neutral stance, folded wings, closed jaw, digits separate." Folded wings are easier to retopologize and easier to print than a full span.
Generate several meshes from that same brief. In a browser studio such as Sculpty you can send one prompt through selectable text-to-3D engines, or switch to image-to-3D and multi-view when a sketch already exists. A tighter brief beats a longer adjective list. These prompt engineering practices for 3D are worth reading before the third regenerate.
Keep the clearer silhouette. Prefer separated limbs over extra scale noise. Reject fused claws, a wing growing out of the hip, and a tail melted into the ground.
Match the blockout. Regenerate until skull, jaw, neck, torso, limbs, wings, tail, and horns agree with the front, side, and top sketches. If the neck ratio is wrong, do not "fix it in retopo."
Remesh only as a sculpt base. Automatic remesh evens density so you can sculpt. Mark that file as not ready for joints. It is the wrong finish line for a rig.
Save the winner. Export a working GLB or OBJ once the digits are separate, the profile reads, and there are no obvious holes.
Stop this pass when that working file is saved. More likeness to the concept image is not more progress.
Retopologize for Joints UVs and Games
The joints that break first are the jaw, the wing membrane, and the limb bends. Build for those, not for the rest pose.
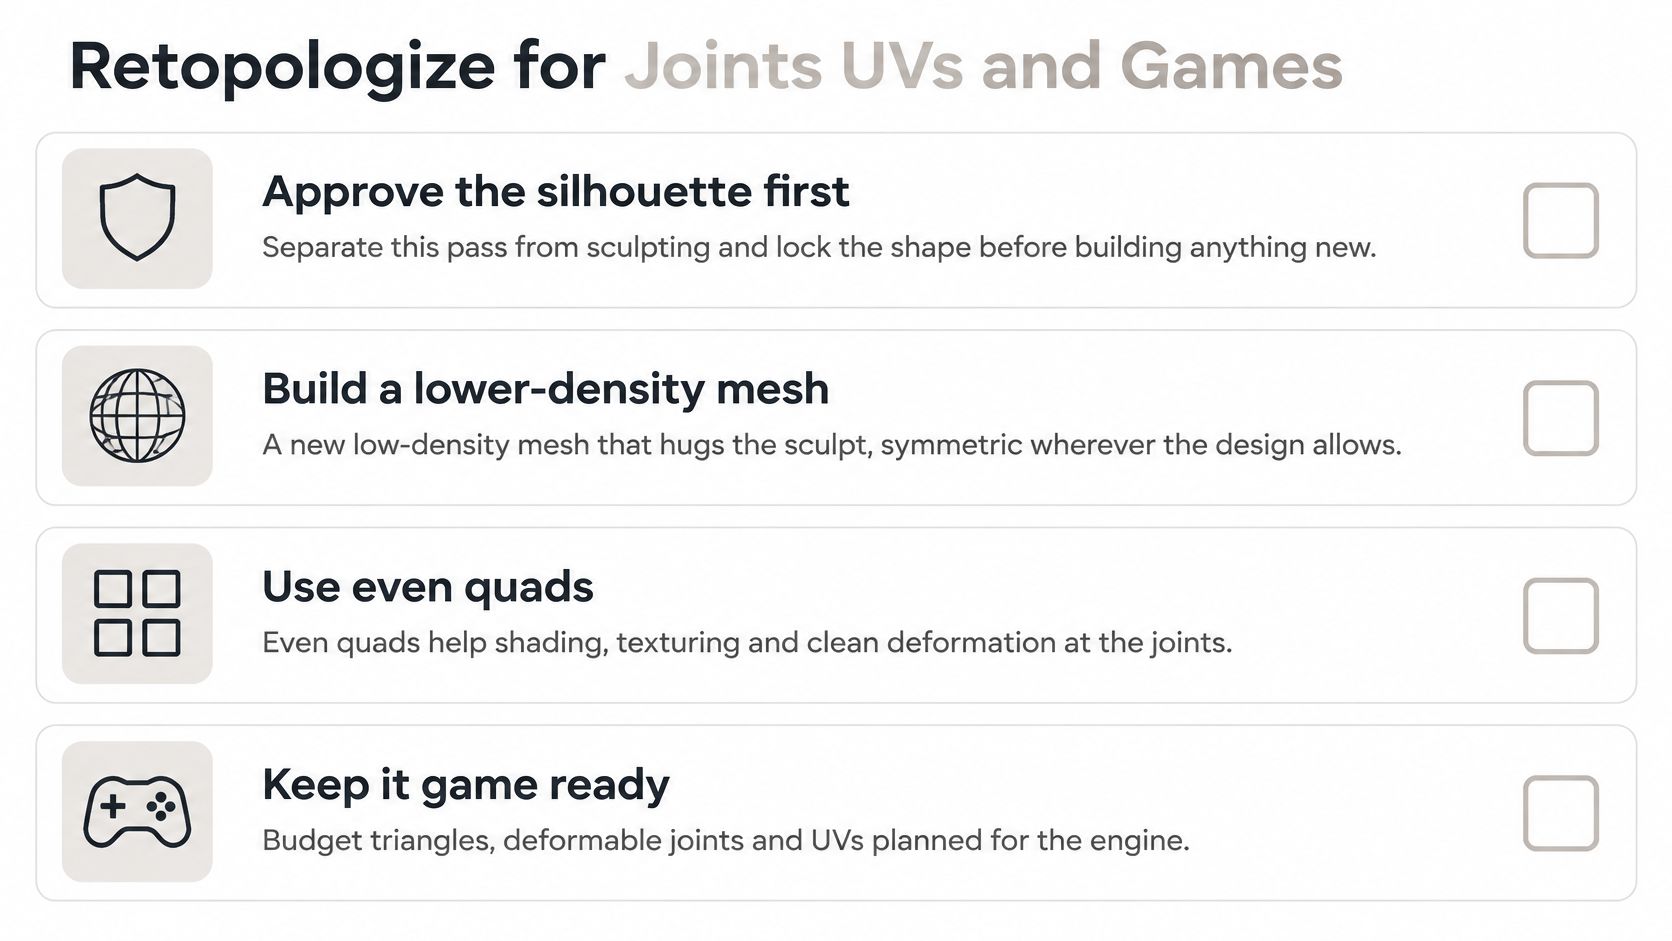
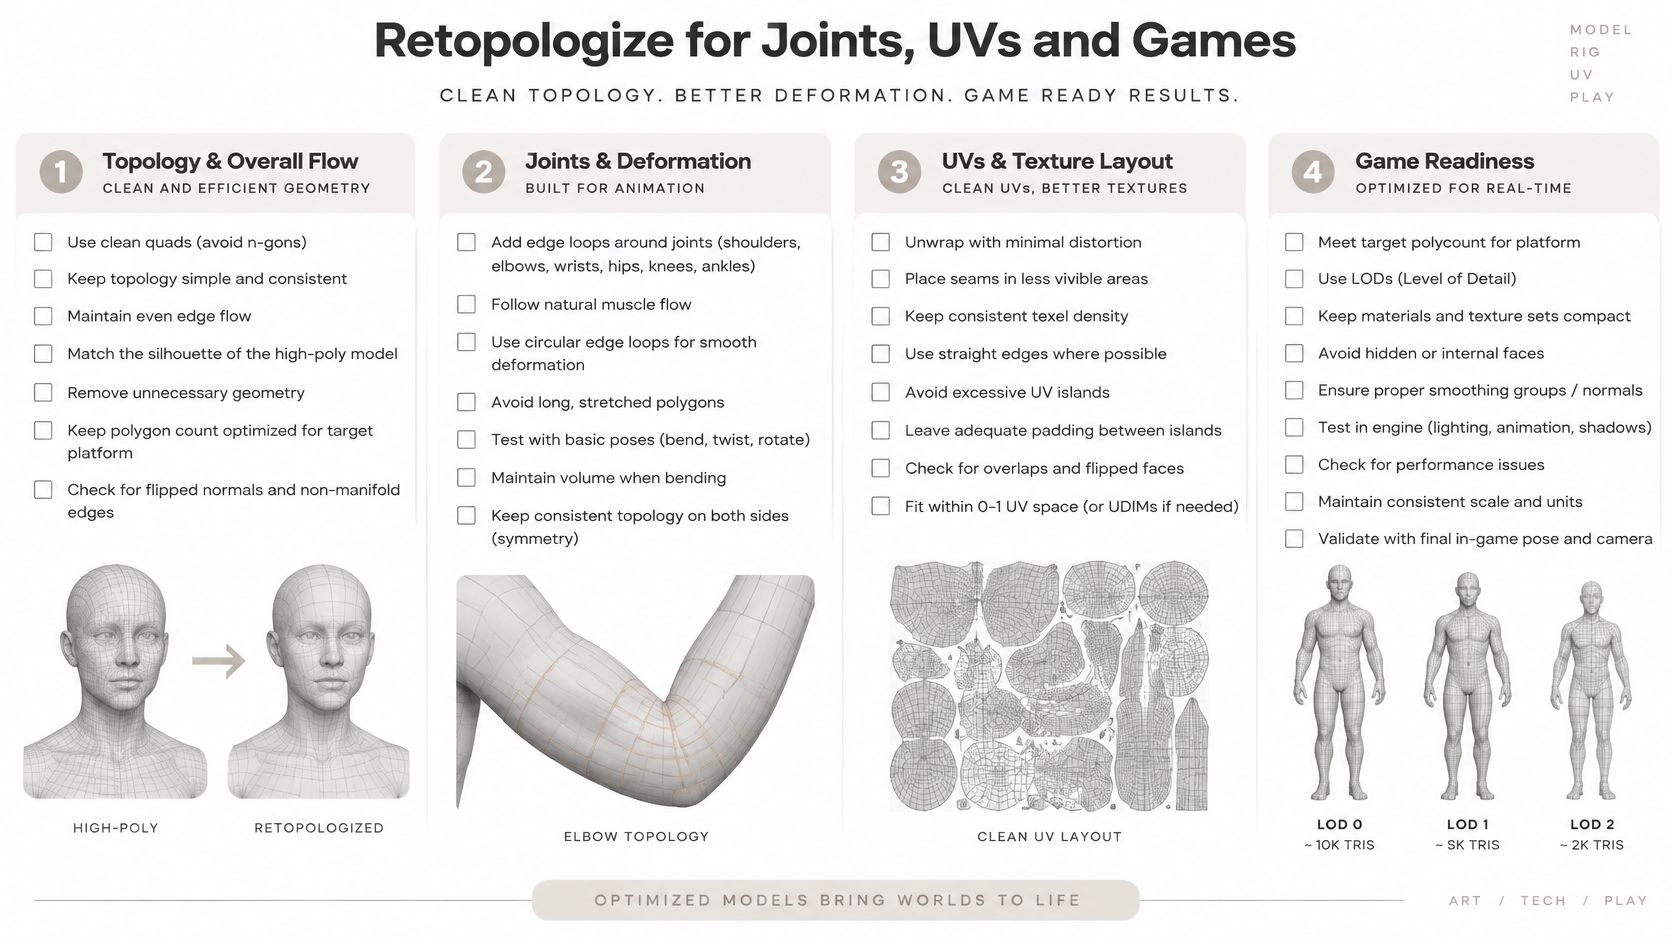
Blender production notes on retopology separate design sculpting from topology planning, retopology, detail reprojection, and validation. Approve the silhouette, then build a new lower-density mesh that hugs the sculpt, symmetric wherever the design allows. Relatively even quads support shading, texturing, rigging, and animation. Automatic remesh is useful for a clean sculpt base and is the wrong tool for a rig.
Loops before the budget
Place deformation-aware edge loops around the jaw, eyes, mouth, shoulders, hips, knees, wing roots, and tail. Keep poles off creases and off high-movement zones. A pole sitting in the wing root will pinch the moment the wing folds.
Pose the jaw open, one wing folded, and one limb bent before you commit to final loops. Loops drawn only for the neutral stance commonly collapse around the mouth, the membrane, or the knee.
A practical game benchmark in those same notes is approximately 15,000–30,000 triangles for a principal character. Articulated wings, facial animation, and close-ups can justify more. That is a ceiling you argue for, not a starting boast. If you want the quad-flow habits behind that budget, this guide to 3D modeling topology is the companion read.
UVs and a skeleton you can test
Split materials the way the surface changes: scales, belly plates, horn, eye, and wing membrane. Keep islands large enough for 2K or 4K on the body. Do not spend resolution on the inside of the mouth unless the shot needs teeth.
Before you call it game-ready, check non-manifold edges, flipped normals, and overlapping UVs.
After the loops hold, add a simple control skeleton. A spine from skull to tail tip. A jaw bone. Two wing chains from shoulder to finger tips. Limb chains through shoulder, elbow, wrist, hip, knee, and ankle. Bind with the symmetry you already retopologized, then pose the jaw open, one wing folded, and one knee bent. If the membrane or the mouth collapses, fix edge flow before you paint weights.
A simpler mesh with predictable deformation beats a beautiful dense mesh that cannot be rigged.
Save this deformable mesh as the hero. Build LODs from it only after those three poses hold. LODs are not a substitute for a mesh that bends.
Texture Then Export the Right File
Shape is settled. Do not reopen topology while you paint.
Build PBR materials as layers. A scale albedo with a larger, duller belly break. A roughness map that is shinier on horns and wetter around the mouth. A normal or height pass so scales catch light without extra polygons. The wing membrane should read thinner and more translucent in the shader. A second mesh for that membrane is only worth it on a hero close-up.
Prompt-driven texturing can spit out 4K PBR sets quickly. You still assign materials by region and spin the model. Industry commentary on AI 3D generation is blunt about the gap. AI can create concepts, base meshes, textures, and variations in minutes, yet clean topology, reliable rigging, watertight precision, and final quality control stay hard. Decorative models may need little cleanup. Animation assets and precision models need real refinement.
What each map has to survive
- Albedo: Must still read as scales versus belly at thumbnail size, not only in a clay viewport.
- Roughness: Horns and wet mouth should separate under a three-quarter key light. If they do not, the map is flat.
- Normal or height: Catches light on the body. It does not replace edge loops at the jaw.
- Transmission or a thin shader on the membrane: Sells thickness in a render or an engine. A slicer ignores it, so do not rely on it for a print.
Render one neutral three-quarter view and one pose, or a 360 spin, before export. Lighting shows flipped normals and stretched UVs that a flat viewport hides.
Then name the file
GLB and FBX carry mesh plus materials into Blender, Unity, and Unreal. USDZ suits a lightweight client preview. STL and 3MF are for slicers and should be watertight, with scale set in millimeters. OBJ is the safe intermediate when a material handoff is messy.
Validate by reopening the file in the target app. The export dialog is not a test. Better likeness to a concept image does not mean a better production file. A dense, irregular dragon can be worth less than a simpler mesh with clean deformation and predictable materials.
Fix the Print Before You Slice
Printing fails for fabrication reasons, not because the sculpt needed more micro-detail. Guidance on printing a dragon gives rough starting settings of 0.1–0.2 mm layers and 10–20% infill, with supports under wings or horns, and then points at the problem. Those numbers do not explain folded versus spread wings, resin drain holes, or a joint that welds itself shut.
Match the symptom to the process you chose. If you are still deciding how thick a horn should be, start from how to model for 3D printing and only then open the slicer.
| Symptom | Likely cause | Fix |
|---|---|---|
| Slicer rejects the mesh | Holes or non-manifold edges | Watertight check, merge vertices, re-export STL or 3MF |
| Joints will not move after printing | Supports fused the clearance | Gap test for that printer, material, and scale |
| Wing tips or claws snap | Features thinner than the process can hold | Thicken membranes and split large parts with pins |
| Spread wings collapse on the plate | Unsupported membrane | Fold the wings and keep supports off the joints |
| Resin cup or blowout | Solid or sealed hollow | Hollow with drain holes before slicing |
| Weak large body | Walls or infill too light | Start near 0.1-0.2 mm layers and 10-20% infill |
Print-in-place dragons fail in a specific way. Supports fall into the joint gap and fuse the segments. Successful gaps are calibrated for that printer, that filament, and that scale. Print a short test strip before you commit a full body.
Spread wings fail more often than folded wings because the membrane is a long unsupported sheet. If the part has to survive FDM, redesign the pose with the wings against the body. Thin membranes, separated claws, and needle horns look better on screen and snap on the bench.
Resin wants a hollow shell and drain holes so the piece is not a sealed cup of uncured resin. A large FDM display piece is stronger as pinned parts than as one plate. Fix only the row that matches the destination you already picked. Adding detail is how these prints get worse.
Start the Dragon That Matches the Job
One sitting. One destination. Write a single line with the destination, the triangle budget or minimum wall thickness, and the export format. Open the front, side, and top sketches from the anatomy pass and do not redraw them.
Generate three neutral-pose variants from that same brief. Text-to-3D when you only have words, image-to-3D when a sketch exists. Remesh for an even base, apply a PBR pass by region, and export GLB, FBX, STL, or 3MF for the row you chose. Keep the mesh whose silhouette matches the three sketches. Discard the other two even if they have nicer scales.
Run one check, then stop.
- A game dragon is ready for this pass when the jaw and one wing bend without collapsing.
- A print dragon is ready when the slicer accepts the file and the thinnest horn still reads in the preview.
- A client dragon is ready when the profile reads at thumbnail size in a 360 view.
Heavy local sculpting and 4K turntables punish a weak machine. If you are about to buy hardware for that workload, this custom PC advice for developers is a clearer comparison than a spec-sheet argument. The next sitting is retopology or texturing for that one destination, not another prompt.
Sculpty is a browser studio for text-to-3D and image-to-3D dragons, with remeshing, prompt-driven PBR textures, and export to GLB, FBX, STL, USDZ, and 3MF. Use it to get a base mesh that matches the job, then finish topology, joints, or print checks before you call the asset done. Open Sculpty and generate the dragon against the destination you already wrote down.