
How to Create a 3D Old Man Model: Complete Guide
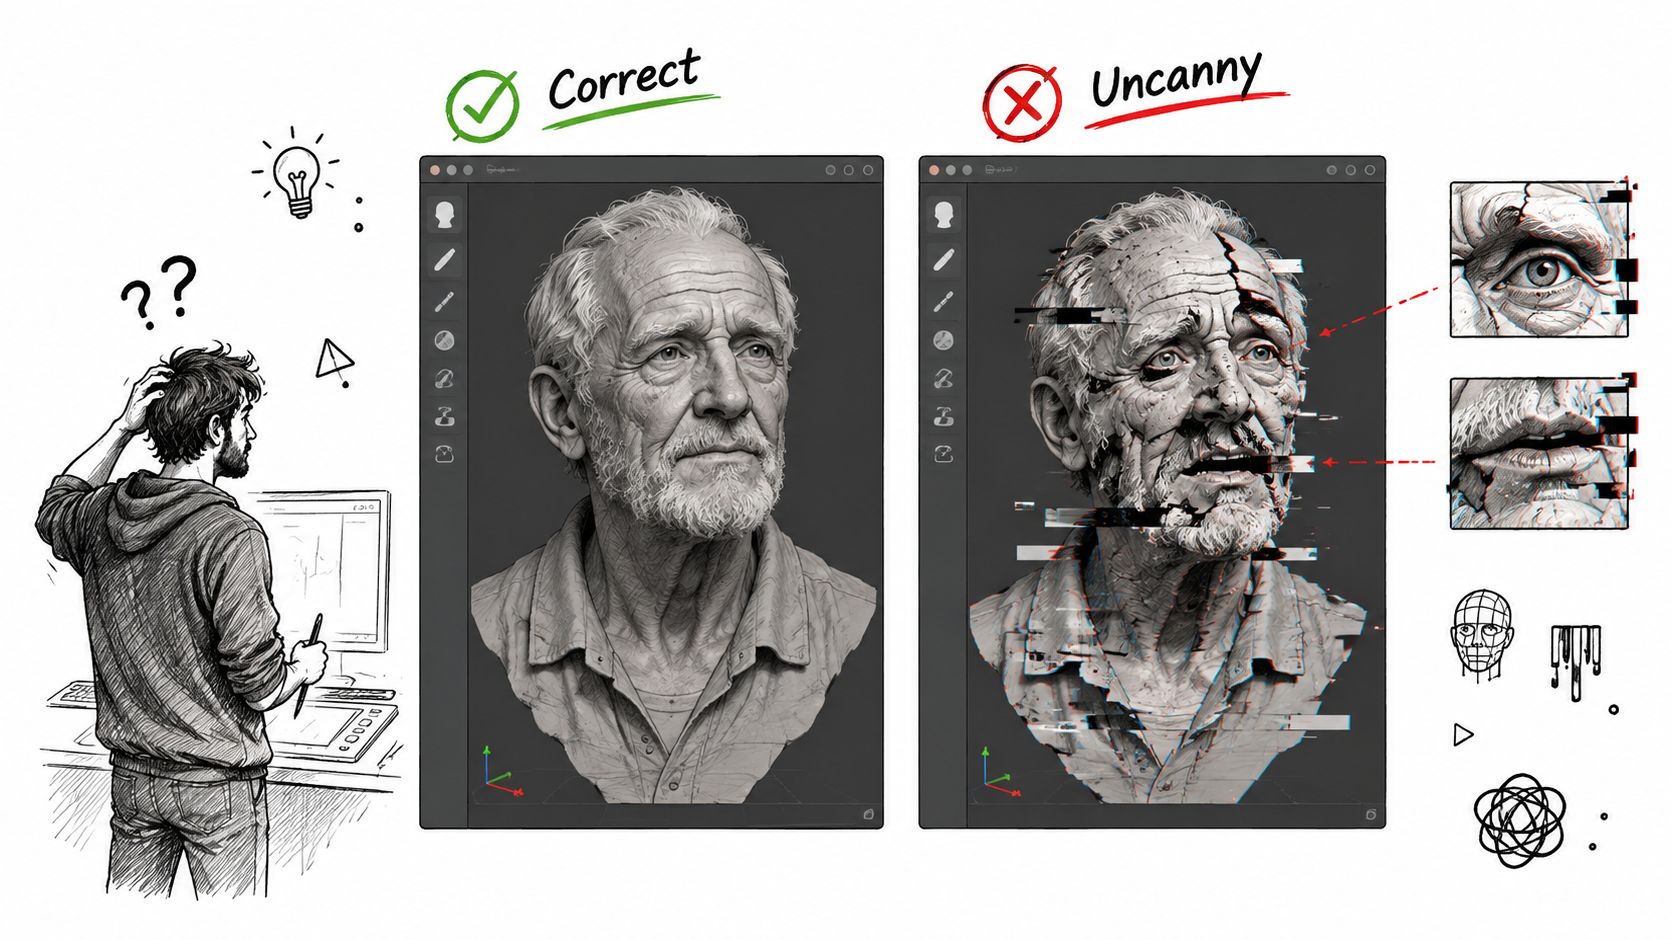
You generate an elderly face with convincing wrinkles, skin pores, and gray hair. The mesh looks impressive in a turntable preview, but once the character enters a game scene, something feels wrong. The eyes don't focus naturally, the mouth stays strangely neutral, and the face reads as a generic old man rather than a specific person with a history.
That gap between visual realism and emotional believability is where most 3D old man projects lose quality. A successful asset needs more than aged skin. It needs the facial structure, asymmetry, posture, gaze, and expression to work together under movement and changing light.
Table of Contents
- Why Your 3D Old Man Feels Wrong Even When It Looks Right
- Generating the Base Mesh With Text and Image Prompts
- Correcting Age-Specific Facial Features Manually
- Building Game-Ready PBR Textures and Clean Topology
- Adapting the Model for Games, Prints, and Presentations
- Putting It All Together From Prompt to Final Export
Why Your 3D Old Man Feels Wrong Even When It Looks Right
A high-detail render can hide weak character decisions. Wrinkles may be sharply sculpted, but if the brow sits too high, the eyelids are too open, or the mouth corners remain perfectly symmetrical, the character will still feel young or artificial. Viewers read those signals before they consciously inspect texture resolution.
Research on photorealistic 3D avatars illustrates the problem. Only 61% of older adults and 68% of younger adults rated the avatars as life-like, while emotion-recognition accuracy was 80% for older participants compared with 93% for younger participants (Research Protocols). The important lesson isn't that realism fails. It's that a model can look realistic while communicating emotion poorly, especially to the people whose faces and expressions you're trying to represent.
Age is a moving system
An elderly character's identity comes from relationships between features, not from isolated wrinkles. A lowered brow changes the visible eyelid opening. Fuller lower cheeks and jowls alter the mouth silhouette. A forward neck posture changes how the jaw transitions into the throat. A slight difference between the left and right sides keeps the face from looking like a manufactured mask.
That means polygon count is a poor substitute for observation. Adding more geometry won't fix an expression that doesn't communicate fatigue, patience, suspicion, warmth, or concentration. Higher-resolution textures won't repair a gaze that points past the conversation.
Production rule: If the character looks correct only in a neutral front render, the asset isn't finished. Test the face while it blinks, speaks, turns, and reacts.
For artists building short animated clips or visual references, it can also help to study how AI tools handle cartoon timing, exaggeration, and readable expressions. A practical starting point is this guide to best AI cartoon video generators, not as a replacement for character work, but as a way to compare how stylized motion makes emotional intent clearer.
Start your 3D old man with a behavioral target. Decide whether he should appear guarded, gentle, alert, tired, amused, or stern. Then shape the brow, lids, mouth, head angle, and posture to support that target. The best elderly characters don't merely contain signs of age. They behave like people who have aged.
Generating the Base Mesh With Text and Image Prompts
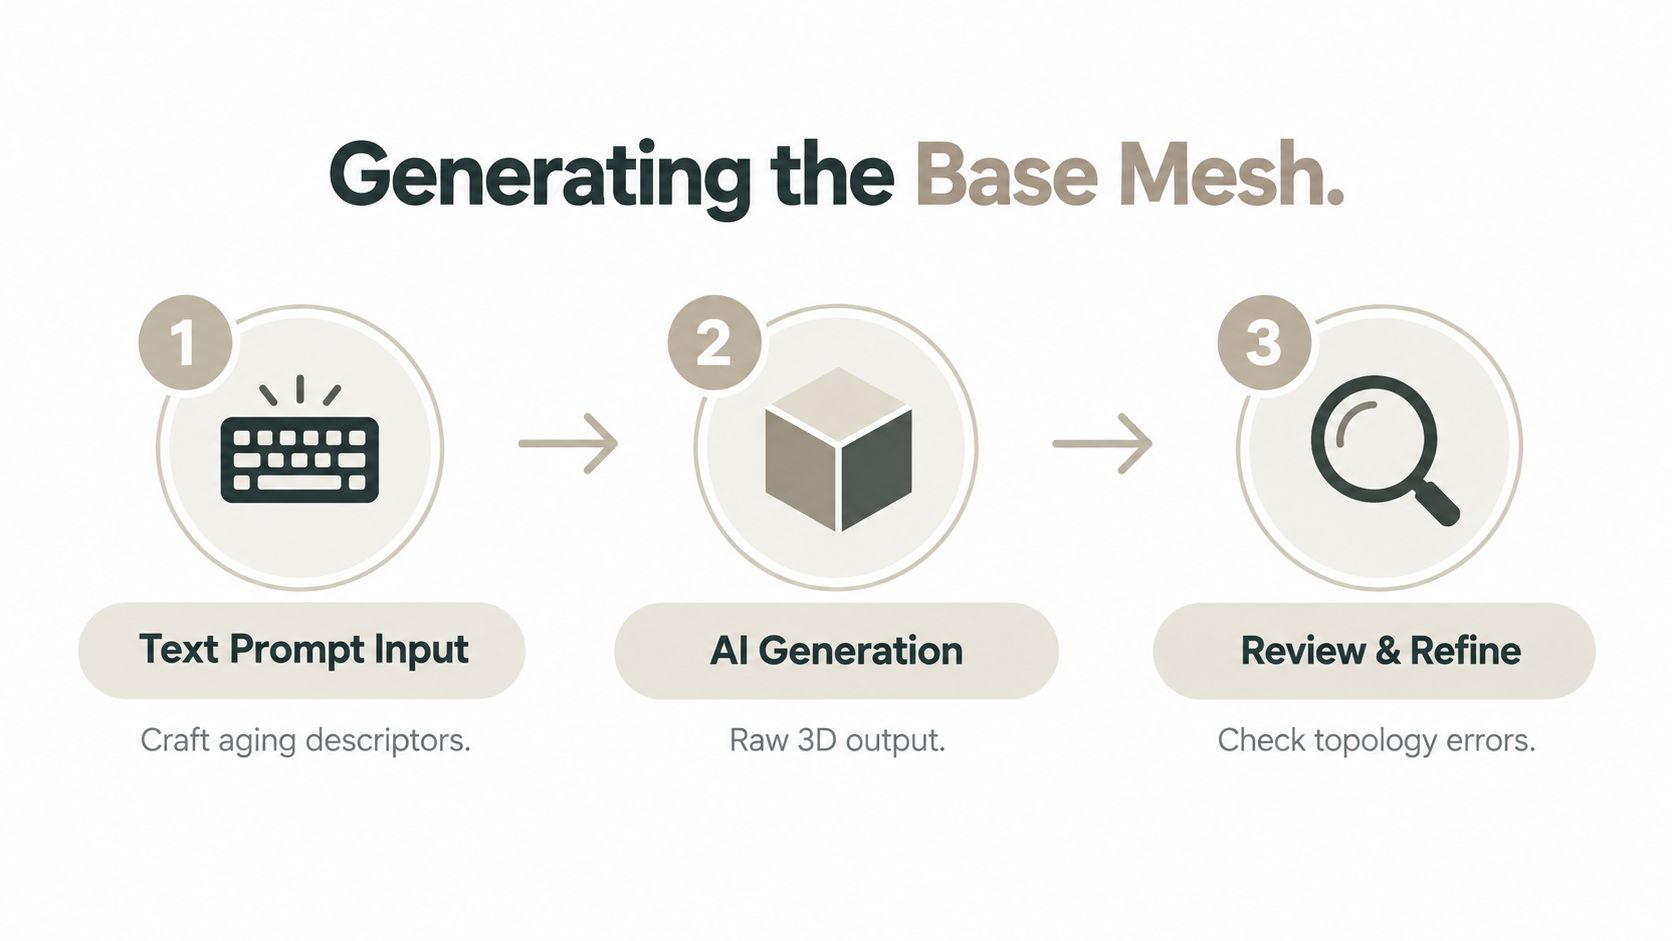
AI generation is useful for establishing a starting proportion, but the prompt must describe an adult face rather than a caricature. “Old man with deep wrinkles” often produces exaggerated furrows, collapsed features, and theatrical skin folds. Production work benefits from more controlled language.
Describe the subject through structure, age cues, and presentation:
- Structure: elderly male head, long or broad face, prominent cheek planes, softened jawline, natural ear shape.
- Age cues: brow descent, hooded upper eyelids, subtle jowls, neck volume, uneven nasolabial folds, asymmetrical mouth corners.
- Presentation: neutral expression, diffuse lighting, realistic anatomy, restrained skin detail, front-facing portrait.
- Exclusions: no caricature, no exaggerated wrinkles, no deformed eyes, no melted ears, no glasses, no hat, no beard covering the jaw.
Negative prompts matter because hair, eyewear, and dramatic shadows can confuse both generation and later landmark fitting. Ask for a neutral head scale and a calm expression before you request a distinctive personality.
Choose speed or evidence
Text-to-3D engines such as Meshy, Hunyuan 3D, Rodin, Tripo AI, and TRELLIS 2 can give you rapid alternatives, but their useful qualities differ by task. A fast output is valuable for blocking a cast of background characters. A more detailed face may be preferable for a hero asset, although no engine removes the need for proportion checks and manual correction.
Sculpty brings several of these generation routes into a browser workflow, including text-to-3D, image-to-3D, multi-view generation, and export formats for downstream work. Its text-to-3D workflow is suitable for creating candidate meshes quickly, then selecting one for refinement rather than treating the first result as final geometry.
Single-image reconstruction requires tighter expectations. A frontal-image study reported a mean RMS surface error of 2.62 mm, with results ranging from 1.00 to 6.75 mm, while a better state-of-the-art result reached 1.38 mm (South African Journal of Science). These figures describe benchmark conditions, not a promise for an ordinary portrait. Treat the output as a shape hypothesis.
For identity-sensitive work, use controlled multi-view references:
- Neutral front and left and right three-quarter views.
- Both profiles, with the ears and neck visible.
- A slightly raised view to expose brow, nose, and cheek relationships.
- Fixed focal length, head scale, lighting, and expression across every image.
Diffuse illumination prevents shadows from becoming false wrinkles. Stable landmarks include the inner and outer eye corners, alar points, mouth corners, chin, and tragion. If the final object may become a physical prototype, plan the downstream requirements early. Separate industrial 3D printing solutions from facial reconstruction, because a mesh that looks correct on screen still needs appropriate wall thickness, scale, and manufacturing checks.
Correcting Age-Specific Facial Features Manually
AI rarely places age cues with enough anatomical discipline for a production head. The correction pass should happen before detailed texturing, while the face is still easy to reshape and compare against references.
Begin by fitting a parametric face model or landmark system to establish broad proportions. Then work region by region instead of applying a global smooth or inflate operation. Broad edits preserve identity; local edits create the age pattern.
Correct the structure before the wrinkles
Brow descent usually changes the visible opening of the eyes. Lower the brow mass carefully and check the relationship between the brow ridge and upper eyelid. If you push the brow down without adjusting the eyelid fold, the face can look bruised rather than aged.
Upper eyelid hooding needs volume, not a painted dark line. Build the fold as a soft transition and preserve enough lid surface for blinking and expression. The eyelid should still deform cleanly when the character squints or looks down.
Nasolabial furrows should follow the cheek and mouth structure. Deepening a groove without shaping the surrounding cheek creates a trench. Keep the fold uneven from side to side, because perfectly mirrored aging patterns feel synthetic.
Jowls and neck volume affect the silhouette more than many artists expect. Inspect the face from three-quarter and profile views. The lower cheek should transition into the jaw and neck without a sudden inflated ridge.
Natural asymmetry is essential. One eyelid may sit lower, one mouth corner may pull differently, and the jaw may not align perfectly with the center of the nose. These differences make the character specific, but they must remain intentional enough to survive animation.
Use measurable checks
Compare the corrected mesh with a neutral reference using landmark distances and cheek-to-jaw silhouette overlays. This catches proportion drift that a shaded viewport can hide. Check the ears and neck separately, because a front-facing image says very little about whole-head accuracy.
Avoid four common traps:
- Flattening wrinkles into large geometric grooves, which makes the surface look carved.
- Reading cast shadows as folds, especially around the nose, eyes, and mouth.
- Over-smoothing age texture, which removes the small irregularities that support realism.
- Letting hair or glasses distort landmarks, producing a convincing but incorrectly proportioned head.
The best manual pass is selective. Fix the brow, eyelids, cheek volume, mouth, jaw, and neck first. Save fine crow's-feet and shallow skin breakup for secondary maps, where they can respond to lighting without destroying the base form.
Building Game-Ready PBR Textures and Clean Topology
A watertight AI mesh is a useful blockout, not a finished character asset. Game-ready production requires a controlled surface, predictable deformation, and maps that preserve age detail without forcing every wrinkle into the base topology.

Start by correcting the face, then generate or paint albedo, roughness, and normal information from the approved form. Albedo should describe pigmentation and color variation, not deep shadows. Roughness should distinguish oily areas around the nose and forehead from drier cheeks and older skin. Normal and displacement maps should carry fine furrows, pores, and shallow creases.
Sculpty's PBR texture generator can support prompt-driven material creation, but an artist still needs to inspect the result. AI texturing often adds attractive detail in the wrong place, repeats wrinkle patterns, or turns every recess into a dark line. Use generated maps as a draft, then correct the face-specific areas by hand.
Retopology should follow deformation
Remesh the approved sculpt into even quads or a controlled game-ready triangle layout. Preserve deformation loops around the eyes and mouth, because those regions must support blinking, speech, frowning, and smiling. Keep sufficient structure around the nostrils and jaw if the character needs broad facial movement.
Wrinkles generally belong in secondary maps rather than dense base topology. Geometry should describe the large forms that change the silhouette. A deep fold that changes the cheek profile may deserve sculpted form, but small surface creases should remain in displacement, bump, or normal data.
Validate beyond the front view
Align the model against controlled front, three-quarter, profile, and raised references. Inspect the ear, underside of the jaw, neck, and back of the head separately. Frontal crops can conceal errors at extreme angles, and a successful front render doesn't prove that the complete head is accurate.
Calibrated facial-scanning research reports sub-millimeter deviations in some standardized systems, including approximately 0.49 ± 0.32 mm trueness in the best tested system (facial scanning study). That result shouldn't be transferred to casual smartphone capture. Use phone references for visual guidance, not as precision measurement.
Acceptance should combine landmark checks, regional surface review, and artist judgment. Chamfer distance alone can underestimate reconstruction error and can even change the apparent ranking of methods. A mesh that wins a numerical comparison may still fail when the jaw rotates, the mouth speaks, or the character looks toward another actor.
Adapting the Model for Games, Prints, and Presentations
The same source head shouldn't be exported unchanged for every purpose. A deforming game character, a presentation render, and a printable figurine need different topology, map treatment, scale decisions, and validation.
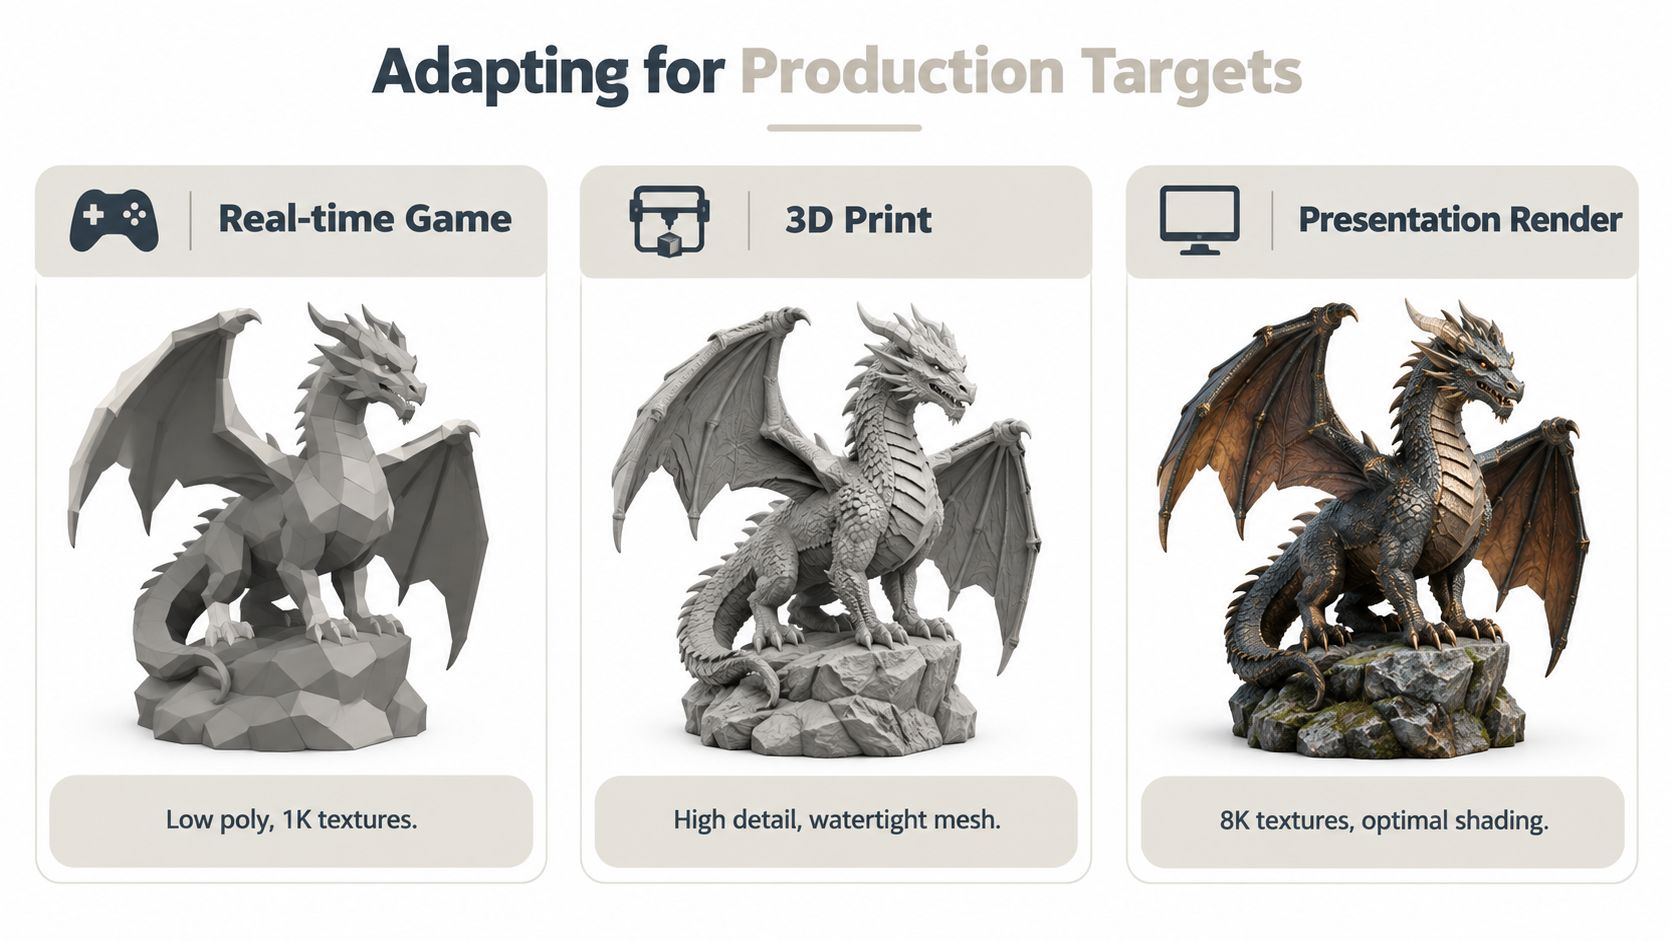
| Target | Priorities | Common failure |
|---|---|---|
| Real-time game character | Deformation loops, efficient topology, blendshapes, LOD versions, engine-compatible export | Remeshing erases eyelid and mouth control |
| Presentation render | Silhouette accuracy, high-quality shading, detailed maps, controlled lighting, turntable output | Texture detail distracts from weak proportions |
| Printable figurine | Watertight volume, scale conversion, printable overhangs, stable base, STL or 3MF export | Thin features and unsupported folds fail physically |
Game output
For games, preserve the facial landmarks that drive expression. Build blendshapes or a facial rig around the brow, eyelids, mouth corners, lips, and jaw. Test the character in motion before committing to a final bake, because an automated retopology pass can shift loops away from the anatomy that gives the face its age.
Guidance on modeling for games is most useful when treated as a production constraint rather than a polygon-count recipe. Reduce detail where it doesn't affect silhouette or deformation, and keep the meaningful aging cues in the areas the camera and animation will reveal.
Print and presentation output
A print version needs closed volume and physical thickness. Deep facial recesses may need exaggeration so they survive scale reduction, while long hair, ears, fingers, and loose clothing may need reinforcement or support planning. STL is common for slicing, but the correct export depends on the printer and the rest of the fabrication pipeline.
A presentation model has the opposite priority. Keep the high-frequency skin detail, but judge it under the final light rig. A face that looks excellent under broad studio illumination may become noisy under a hard key. Render tests and turntables should expose the cheek silhouette, eyelid profile, and neck transition, not only the most flattering angle.
Automated remeshing is helpful for branching outputs from one source, but it isn't neutral. It can soften wrinkles, alter the mouth shape, or damage clothing folds. Keep the corrected source model, create separate output branches, and compare each branch against the same identity reference before export.
Putting It All Together From Prompt to Final Export
A reliable 3D old man pipeline starts with a restrained prompt or controlled reference set. Generate several base candidates, choose the one with the strongest proportions, and don't mistake surface detail for a finished character. Remove glasses, hats, dramatic lighting, and heavy facial hair during the identity pass if they obscure the landmarks you need to judge.
Fit the broad face first. Correct brow descent, eyelid hooding, cheek volume, jowls, neck shape, mouth asymmetry, and ear placement before adding fine wrinkles. Use front, three-quarter, profile, and raised views to catch silhouette errors, then preserve the approved form as the source for every later output.
The next decisions depend on the destination:
- Animation requires clean facial loops, stable skin deformation, and expression tests.
- Games require efficient topology, baked maps, export validation, and usable level-of-detail branches.
- Printing requires a watertight mesh, physical thickness, scale checks, and support-aware design.
- Presentation requires controlled materials, lighting, camera staging, and a turntable that exposes the full form.
Keep the final review focused on the failures that automation hides. Don't flatten wrinkles into trenches. Don't interpret cast shadows as anatomy. Don't over-smooth the skin until every side of the face matches. Don't trust a single front view, and don't assume a watertight mesh is ready for animation or printing.
A convincing elderly character isn't a pile of wrinkles. It's a structured face that communicates age while moving like a person.
The strongest result comes from combining AI speed with human judgment. Use generation to explore shape, landmark fitting to establish proportion, manual sculpting to restore specificity, PBR maps to carry fine detail, and targeted validation to confirm that the character still reads correctly outside the hero angle. Emotional believability comes from expression clarity, gaze, posture, and recognizable aging cues, not from endlessly increasing surface resolution.
Sculpty lets you generate an old-man character from text, a single image, or multiple views, then move through AI texturing, remeshing, retopology, rendering, and export in one browser-based workflow. Visit Sculpty to create a base asset, test different generation engines, and prepare the version that fits your game, presentation, or 3D printing pipeline.