
3D Nature Image: Workflow and AI Tools
You've got a beautiful forest photograph, a promising AI-generated rock, or a reference image of a plant. The render looks convincing at first glance. Rotate the object, inspect the underside, place it beside a known-scale asset, and the illusion starts to fail. Leaves float, bark repeats, terrain rises where the ground should be flat, and the material looks painted rather than physically grounded.
That gap defines modern 3D nature imagery. A polished image only needs to persuade one camera. A usable asset must survive inspection from every angle, carry sensible geometry, use controlled PBR materials, and expose enough provenance for someone else to understand what was observed and what was inferred. The right workflow depends on whether you're making a cinematic still, an explorable game asset, a scientific visualization, or a presentation model.
Table of Contents
- Understanding 3D Nature Imagery
- Converting Photos to 3D Assets
- Handling Vegetation and Terrain Accuracy
- Texturing and Topology Cleanup
- Single-Engine vs Multi-Engine Workflows
- Scene Staging and Rendering
- Best Practices for Realism and Validity
Understanding 3D Nature Imagery
A moss-covered boulder can produce a convincing render while remaining a poor 3D asset. The photograph records color, cracks, and a soft shadow, but it does not establish the hidden face, true depth, or the scale of each surface feature. An image-to-3D tool can infer a plausible volume for a background shot. It cannot, from that evidence alone, prove the reconstruction is faithful.
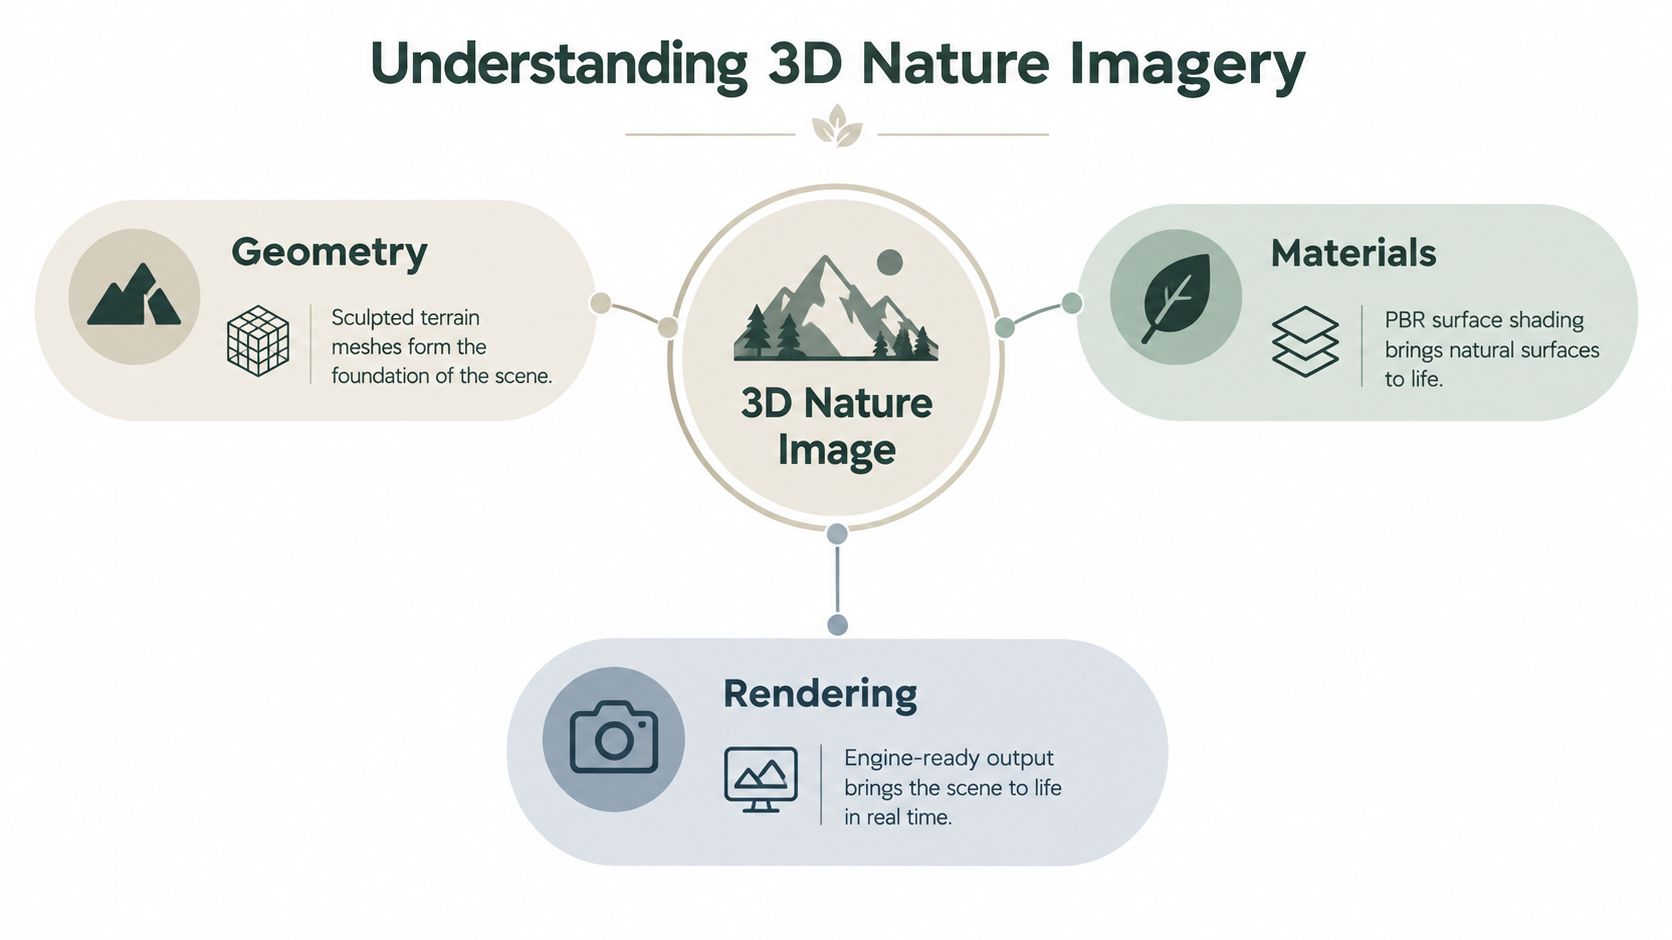
A useful 3D nature image connects three production layers:
- Geometry establishes volume, silhouette, cavities, branching structure, and relationships between objects and terrain.
- Materials define how bark, stone, soil, water, leaves, and skin react to light through color, roughness, normal detail, and other PBR channels.
- Rendering presents those decisions in a still image, turntable, real-time engine, or interactive scene.
The target determines which shortcuts are acceptable. A static forest render can hide a missing backside or represent distant foliage with cards. An explorable asset must withstand orbiting cameras, player movement, shadows, collision, and changing light. Those checks expose paper-thin leaves, floating branches, weak topology, and materials that only resemble nature from one viewpoint.
Decide what “accurate” means first
Accuracy depends on use. A game asset needs a stable silhouette, efficient topology, predictable PBR materials, and sensible level-of-detail transitions. An educational specimen needs identifying features and clear labels for inferred parts. A terrain model used for analysis needs defensible elevation rather than a surface that merely appears natural.
NASA's Shuttle Radar Topography Mission shows why measured structure matters. Conducted aboard Space Shuttle Endeavour in February 2000, SRTM used radar sensors separated by a 200-foot mast. It collected approximately 12 terabytes of data across 320 tapes during nearly 10 days of observation (NASA's historical account of SRTM). The resulting elevation data supported shaded-relief images combined with natural-color or false-color imagery.
For production teams, the lesson is practical: a visually appealing render and a valid asset require different evidence. Clean meshes, controlled PBR inputs, and documented inference make the result inspectable rather than merely persuasive.
Converting Photos to 3D Assets
A single photograph can produce an attractive render while leaving half the asset unsupported by evidence. Before choosing a reconstruction method, decide whether the reference provides enough information for the intended use. One image shows one view and leaves depth ambiguous. Multiple overlapping views provide correspondences that a reconstruction system can triangulate.
Single-photo image-to-3D
Single-image generation suits archival references, subjects that cannot be reshot, and early concept work where speed matters more than measured fidelity. The model reads contours, shading, texture cues, and familiar forms, then fills hidden regions with a plausible continuation. That can establish a useful blockout for a stump, rock, shell, or stylized plant.
The main production risk is hallucinated geometry. A crack may continue as a deep groove around the unseen side. A leaf cluster may become a solid mass. A cast shadow may be interpreted as a recess. Treat these regions as hypotheses, not captured structure. They require inspection before sculpting, collision setup, or material authoring.
Use a short validation pass:
- Prepare the reference. Remove distracting backgrounds where possible, correct severe perspective distortion, and keep the silhouette readable.
- Generate a first mesh. Use the image-to-3D workflow to establish broad volume, not final topology.
- Inspect unseen areas. Rotate the mesh under neutral lighting. Check for repeated textures, melted edges, sealed cavities, and arbitrary underside geometry.
- Mark confidence. Record which features are directly visible and which are inferred.
- Rebuild important regions. Sculpt or replace invented surfaces instead of accepting a smooth completion.
A clean render is not proof of a clean asset. For a game-ready result, verify silhouette continuity, topology behavior under deformation or subdivision, and whether the texture inputs can support a coherent PBR material. Sculpty's workflow is useful for rapid blockout, but the same inspection discipline applies to any generator.
Multi-view reconstruction
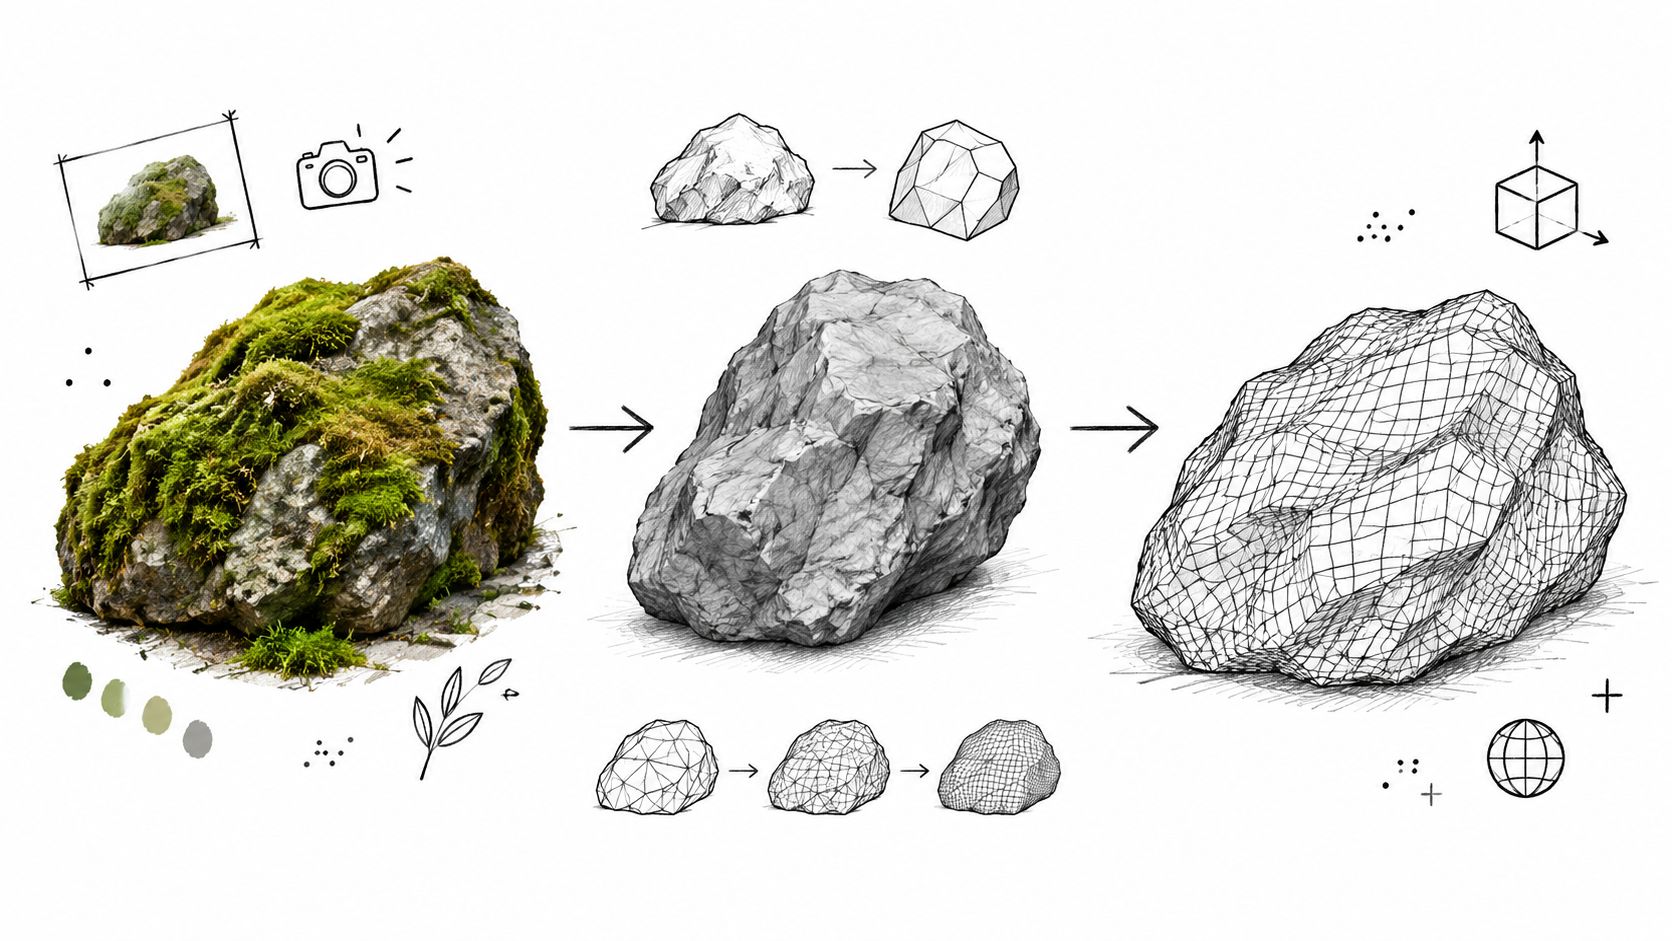
Multi-view capture exchanges convenience for evidence. Photograph the subject from varied angles with strong overlap, consistent exposure and focus, and no movement between frames. Structure-from-Motion estimates camera positions, while multi-view stereo builds denser surfaces from matching image regions.
The method performs well on rigid rocks, bark sections, fossils, and controlled specimens. It becomes less reliable when foliage moves, patterns repeat, or dense structures hide the rear surface. Record camera distance, overlap, control coordinates, and whether the target is a visible surface or bare earth.
Close-range terrestrial photogrammetry can reach millimeter-level accuracy under favorable camera-to-object distances (USGS photogrammetry guidance). Accuracy and spatial resolution decline as capture distance increases. A controlled rock and a forest canopy therefore demand different validation criteria. Define the measurement target before calling either output accurate.
Handling Vegetation and Terrain Accuracy
A forest scan can produce a convincing render while misrepresenting the ground beneath it. Vegetation combines motion, occlusion, repeated shapes, and layered depth. A rock offers stable surfaces and distinctive edges. Leaves overlap, rotate in wind, resemble one another, and conceal soil from the cameras.
That makes the gap between geometric resolution and geometric accuracy a production risk. A dense canopy mesh may contain detailed leaf surfaces without recording correct terrain elevation. More polygons describe the visible evidence more closely, but they do not establish what the camera could not see.
Why foliage creates false confidence
Image matching depends on features that remain identifiable across views. Moving leaves break that consistency. Repeated foliage can create false correspondences, while occlusion removes much of the ground from the image set. The solver may then generate floating fragments, stretched triangles, closed gaps, or surfaces joining unrelated branches.
USGS guidance notes that Structure-from-Motion terrain models in densely vegetated areas can provide weaker ground-surface accuracy and fidelity than lidar-derived terrain models (USGS guidance on photogrammetry and terrain). Use photogrammetry for visible targets such as canopy shape, trunks, rocks, and close-range surface detail. Choose lidar or surveyed control points when terrain elevation affects ecological measurement, simulation, or geographically scaled visualization.
Practical rule: A detailed canopy does not validate the forest floor.
Separate the scene into layers with different evidence requirements. Image-derived geometry and authored cards or clusters can represent the canopy. A cleaned cylindrical core with scanned bark detail may serve the trunk. Build terrain from an elevation source suited to the claim the asset must support. A scene intended only for visual plausibility needs a different validation record from one used for analysis.
A production diagnostic
Before texturing, inspect the reconstruction in flat gray with backface display and wireframe overlays. Check for:
- Floaters around leaf clusters and branch intersections.
- Unclosed surfaces where the solver had insufficient visual evidence.
- Repeated patches caused by incorrect image matches.
- Canopy-ground confusion, where foliage has become terrain.
- Scale drift when no surveyed reference or known object anchors the scene.
For presentation work involving plants, create Planto 3 D product visuals illustrates the distinction between a persuasive plant image and a production asset. The same test applies to forests and habitat scenes. Decorative geometry is acceptable when the brief calls for decoration, not when the asset must support measurement, simulation, or reliable gameplay collision.
Texturing and Topology Cleanup
Raw reconstruction geometry is rarely ready for a game engine. It may contain uneven triangles, overlapping shells, pinched normals, and texture projections that look acceptable in a beauty render but fail under motion or close inspection. Topology cleanup turns inferred or scanned form into something a technical artist can light, animate, optimize, and export reliably.

Start with a high-resolution source mesh and keep it intact. Validate the silhouette, holes, normals, and scale before decimating. If you simplify first, you may destroy thin branches, leaf clusters, or shallow bark features before you've established whether the reconstruction captured them correctly.
A controlled PBR pass
Prompt-driven texturing can quickly establish a coherent material set, but the prompt should describe physical behavior rather than only color. “Wet dark bark” is more useful than “beautiful brown tree” because it suggests roughness variation, subdued highlights, and directional surface breakup.
Build the material in layers:
- Base color distinguishes bark, sapwood, moss, soil, stone, or foliage without baking lighting into the albedo.
- Roughness carries useful variation. Fresh leaves, dry bark, exposed rock, and damp soil shouldn't share one uniform response.
- Normal or height detail supplies small-scale relief after the main form is stable.
- Opacity and transmission handle thin leaves, grass blades, and translucent organic surfaces, but use them carefully because they can be expensive and unstable in real time.
- UVs and texel density keep detail consistent across the asset and prevent a trunk from looking sharper than the surrounding terrain for accidental reasons.
AI-generated maps need inspection. Watch for painted cracks that don't follow the geometry, repeated bark motifs, directional highlights baked into the color channel, and moss that crosses impossible boundaries. PBR means the channels describe material properties, not that the texture merely looks realistic in one lighting setup.
After the texture pass, remesh or retopologize according to the deployment target. A cinematic asset may retain dense geometry for close-up shots. A game asset needs clean triangles or quads, sensible edge flow, stable normals, and deliberate level-of-detail versions. A printable model needs watertight volume and appropriate wall considerations. Those are different deliverables, not one universal “optimized” mesh.
Geometry cleanup is not cosmetic. It controls shading, deformation, collision, memory use, and export reliability.
A vegetation benchmark found that tested photogrammetry implementations produced area-under-the-ROC-curve scores ranging from 0.822 to 0.948, with high- and medium-quality PhotoScan configurations scoring 0.948 and 0.947 (the vegetation reconstruction benchmark). The benchmark also reported artifacts in strong results, which is why dense point count alone can't validate biological geometry. Check canopy completeness, stem diameter error, height error, and missing-surface rate against the purpose of the asset.
Use this walkthrough to see how a studio can combine generation, materials, and cleanup without treating the first mesh as final:
Single-Engine vs Multi-Engine Workflows
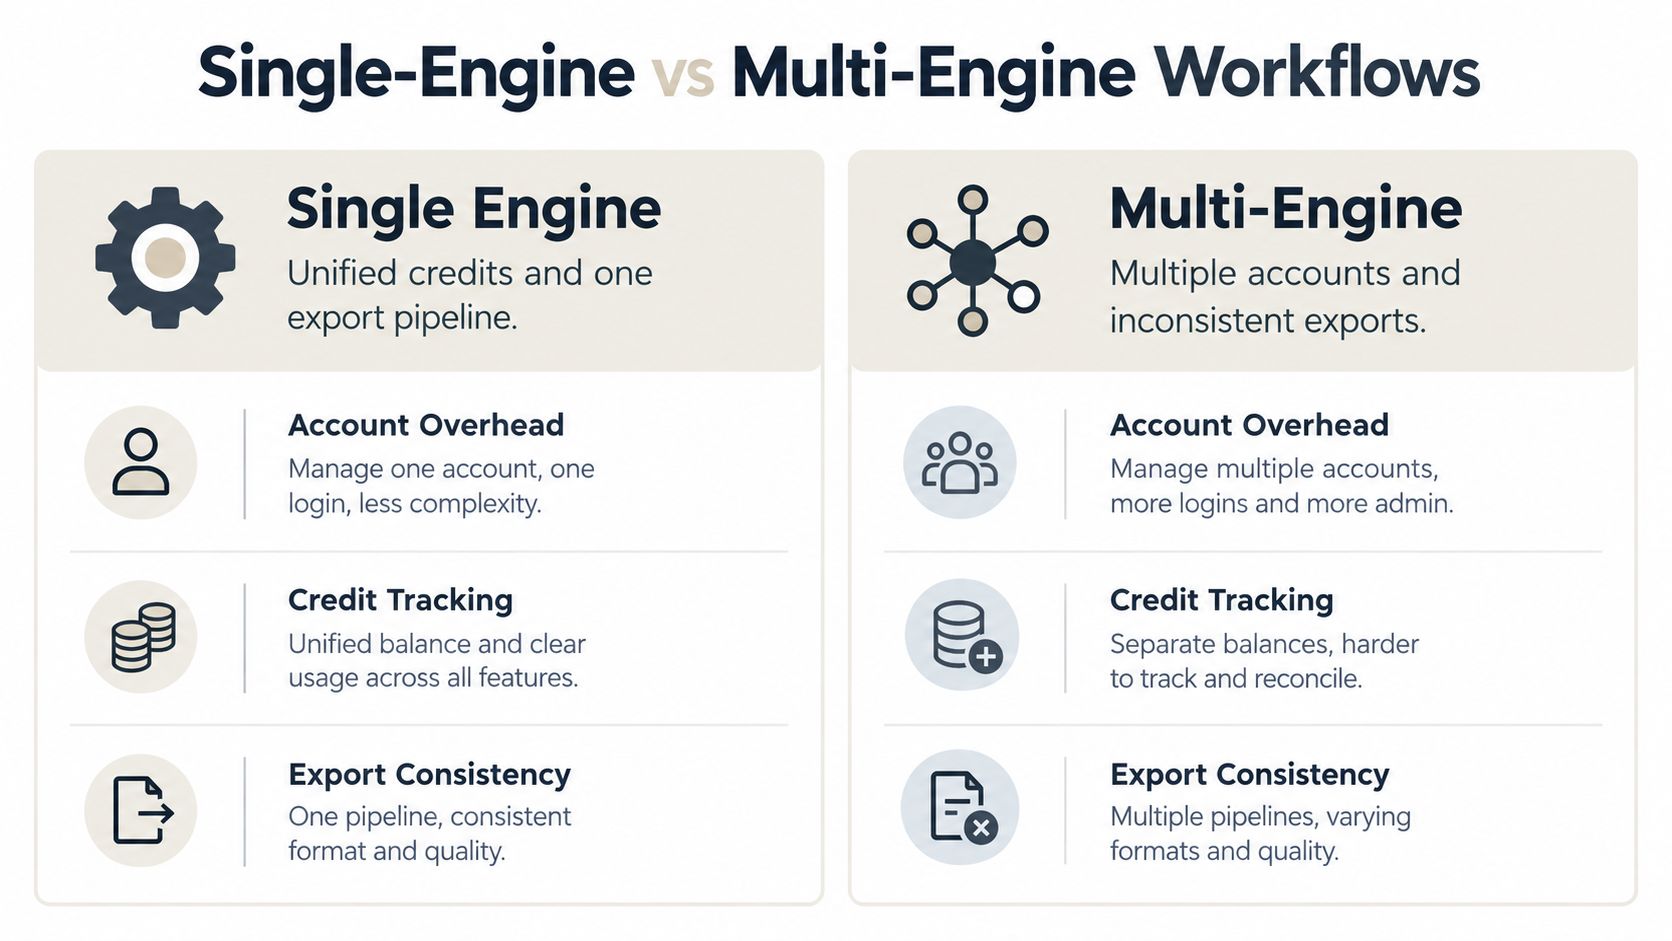
A single-engine workflow is easy to start. One interface, one prompt format, and one export path reduce setup friction. The limitation is specialization. One model may produce a strong rock silhouette but weak foliage, while another may preserve image appearance better but generate heavier topology.
A multi-engine workflow gives you choice, but it creates operational overhead. You may manage separate accounts, credit systems, galleries, naming conventions, file formats, and update schedules. That overhead becomes especially visible when a team compares several candidate meshes and needs to reproduce a result later.
Compare the real trade-offs
| Workflow | What works | What fails |
|---|---|---|
| Single engine | Fast iteration, consistent controls, simpler asset tracking | Limited choice when a subject exposes the engine's weak point |
| Separate multi-engine tools | Specialist selection for terrain, foliage, or hard-surface forms | Repeated logins, inconsistent settings, fragmented exports |
| Unified studio routing | One gallery and export process while selecting different engines per job | Still requires validation because no engine removes evidence gaps |
For a studio workflow, route the task rather than forcing one model to handle every subject. Generate a broad concept with text, use image-to-3D when one reference dominates, and choose multi-view reconstruction when the source provides reliable coverage. The output should then pass through the same naming, material, cleanup, and review stages.
A unified web studio such as Sculpty provides multiple text-to-3D and image-to-3D engines, PBR texturing, remeshing, retopology, rendering, and turntable export behind one browser-based workflow. Its stated export options include GLB, STL, OBJ, FBX, USDZ, and 3MF, which can reduce format switching when assets move toward Blender, Unity, Unreal, or printing tools. For adjacent image preparation, an offline AI photo editor can help creators clean or organize references before reconstruction, particularly when source imagery shouldn't leave a local workflow.
The important distinction is consolidation versus automation. A unified interface can reduce account and export friction. It can't determine whether an inferred leaf cluster is biologically correct or whether a terrain surface is suitable for measurement. Keep the same review gates regardless of how many engines sit behind the interface. For multi-view capture decisions, the multi-view 3D reconstruction guide provides a useful production frame.
Scene Staging and Rendering
A polished render can still hide an unusable asset. Stage the scene according to the handoff: a client presentation needs a readable silhouette and controlled lighting, a game asset needs correct scale, pivots, collisions, engine-compatible materials, and predictable performance, while a scientific or educational view needs labels, context, and camera access to relevant structures.
Start with a neutral inspection setup. Use a broad key light, soft fill, and controlled background so holes, stretched surfaces, and weak forms remain visible. Add a scale reference or known-size object when dimensions matter. Build the final lighting around the subject only after the asset passes this inspection.
Compose for the asset's purpose
A forest scene needs depth separation between foreground trunks, midground foliage, and distant canopy. Scatter systems should follow habitat logic, slope, and clearance rather than placing identical plants on a grid. Vary rotation, scale, age, and material response within biologically plausible limits. Randomness should break repetition, not create unsupported ecosystem detail.
Terrain staging requires a clear boundary between measured elevation and artistic dressing. Rocks, roots, moss, and leaf litter can improve a presentation, but mark them as authored or inferred when the scene represents a reconstruction. Shaded relief combines elevation with imagery, a principle NASA's SRTM visualizations demonstrated decades ago and one that applies equally to a game scene, where lighting should reveal form instead of replacing it.
Stage lighting to separate materials, not merely to create drama. A narrow rim can outline trunks against dense foliage, while a lower fill can preserve terrain contours without flattening the subject. Keep fog behind the main asset when possible. Front-facing fog reduces silhouette readability and can conceal gaps that should be fixed in the mesh.
A browser-based render studio can support quick review images and client handoffs. Render at the resolution required by the brief, inspect edge quality and texture continuity, and keep a neutral version beside the beauty render. That neutral view often exposes stretched UVs, incorrect roughness, and mesh holes that bloom and depth of field conceal.
Build a turntable that proves the model
A 360-degree turntable is a production check, not just a marketing animation. It exposes the rear silhouette, underside assumptions, texture seams, and inconsistent material response. Keep camera height stable, use a consistent focal length, and avoid lighting changes that prevent comparison between adjacent angles. A transparent-background export separates the asset from a fixed studio environment, while a contextual render shows how it sits in its habitat.
Deliver both when artists or buyers need to judge the asset. The clean turntable shows the object. The staged scene shows its intended use. For game teams, include the optimized mesh and material package. A high-resolution render cannot substitute for an engine-ready asset.
Best Practices for Realism and Validity
A trustworthy nature asset carries its limitations with it. The model doesn't need to be perfect, but the production team must know which surfaces came from photographs, which elevations came from measured data, and which details were authored to complete a scene.
Validate before export
Use a repeatable review pass:
- Check silhouette: Rotate under flat lighting and inspect the profile from every important angle.
- Check scale: Compare against recorded camera distance, surveyed control, known specimen dimensions, or a clearly documented reference.
- Check biology: Verify identifying features, branching logic, leaf arrangement, age cues, and habitat relationships with appropriate domain references.
- Check topology: Find holes, non-manifold regions, flipped normals, self-intersections, stretched UVs, and unstable thin geometry.
- Check materials: Confirm that albedo isn't carrying baked shadows and that roughness distinguishes material behavior.
- Check uncertainty: Mark hidden, inferred, stylized, or procedurally completed regions in the asset notes.
- Check accessibility: Provide alt text, a longer nonvisual description, and an alternative way to obtain or inspect the content when the asset is published.
Species documentation gives this discipline real importance. The IPBES global assessment estimated approximately 8.1 million animal and plant species, while around 1.7 million had received scientific names, and it reported roughly 1 million species threatened with extinction (IPBES assessment context). A 3D reconstruction can support education, virtual exhibits, field training, and conservation storytelling, but it shouldn't imply taxonomic evidence that the source doesn't provide.
Preserve provenance
Record the source photographs or datasets, capture conditions, processing method, engine used, manual edits, texture origin, license, and intended use. Rights matter because a creative 3D model may involve copyright and licensing choices, while nature references can originate in museums, research collections, field photographs, or citizen-science observations. Europeana's report on 3D models and rights management also highlights the need to consider accessibility fields such as alt text, long descriptions, and alternative formats.
Use the final asset only after its evidence and limits are clear. A visually attractive render is a result. A validated, documented, optimized model is a production asset.
Sculpty brings image-to-3D and text-to-3D generation together with PBR texturing, remeshing, retopology, rendering, and 360-degree export in one browser-based studio. Use Sculpty to turn a nature reference into a reviewable starting mesh, then inspect and prepare it for presentation, games, education, or fabrication with the evidence and limitations documented.