
10 Things 3D Printers Can Make in 2026

A 3D printer can make far more than novelty figures. In current industrial use, 67% of surveyed users apply 3D printing to prototyping, while 21% use it for end-use parts, including transportation, robotics, and industrial automation applications (2024 industry survey). That shift changes the practical question from “What can I print?” to “What should this object do, and what does it need to survive?”
The answer depends on detail, strength, scale, tolerances, material, print method, and post-processing. A resin printer may reproduce a miniature's facial features, while an FDM printer is often better suited to a replacement bracket or storage insert. A large sculpture may need to be divided into modules, and an AI-generated mesh may require inspection before it can become a reliable physical object.
The modern story began with stereolithography in 1986, when Chuck Hull patented SLA and founded 3D Systems. FDM followed in 1989, and the open-source RepRap project helped launch the desktop printing era by 2005 (3D printing history overview). Today, browser-based tools such as Sculpty can help generate, texture, remesh, preview, and export concepts for physical production. If you're comparing this workflow with other personalized manufacturing models, see what is print on demand.
Table of Contents
- 1. Custom Miniatures and Figurines
- 2. Functional Mechanical Parts and Assemblies
- 3. Architectural Models and Visualizations
- 4. Custom Jewelry and Wearables
- 5. Prosthetics and Medical Devices
- 6. Educational Models and Scientific Visualizations
- 7. Custom Lithophanes and Light-Diffusion Artwork
- 8. Interlocking Puzzles and Mechanical Fidgets
- 9. Customized Organizers and Functional Home Goods
- 10. Art Sculptures and Gallery Installations
- 10-Item Comparison of 3D-Printed Creations
- Choose the Right Thing to Print
1. Custom Miniatures and Figurines
Miniatures are among the clearest examples of where 3D printing turns a digital idea into a personal object. You can create tabletop gaming pieces, character models, collectible figurines, action figures, and display sculptures rather than relying on a fixed catalog. A player might print custom D&D party members for a campaign table, while an indie creator could develop a small licensed anime figurine run or combine separate parts into a Warhammer 40K kitbash.
For faces, armor details, hair strands, and ornamental surfaces, resin printing usually offers the cleaner result. FDM printing remains useful for larger figures, terrain, bases, and props, especially when surface detail matters less than size and cost. Resin parts can be brittle, so thin weapons, ankles, fingers, and decorative projections need careful orientation and support placement.
Sculpty's text-to-3D tools can turn a detailed character description into a starting mesh, while AI texturing helps preview clothing, skin, metal, or painted surfaces. Remeshing can reduce an unnecessarily dense file without removing the details you need. Use the platform's guidance on 3D print settings before exporting an STL for your slicer.
Practical rule: Print a small test version first. It exposes fragile parts and difficult support locations before you commit to a larger model.
A sensible workflow is simple:
- Generate the concept: Describe the character, pose, clothing, accessories, and intended scale.
- Inspect the mesh: Check for missing limbs, enclosed cavities, floating details, and non-manifold surfaces.
- Preview the finish: Use a high-resolution render to confirm that textures and small details will remain visible.
- Test and refine: Print at a modest tabletop scale, remove supports carefully, then adjust the model before producing the final figure.
2. Functional Mechanical Parts and Assemblies
A 3D printer can produce parts that hold, connect, guide, protect, or move. Useful examples include gears, brackets, replacement covers, motor mounts, adapters, housings, jigs, and assembly fixtures. A maker might design a drone frame adapter, restore a vintage electronic device with a replacement gearbox housing, or create a prototype intake manifold for an experimental engine.
The design target matters more than visual complexity. A bracket carrying a load needs suitable wall thickness, reinforcement, layer orientation, and attachment points. A sliding cover needs controlled clearance. A gear needs accurate tooth geometry and a material that can handle repeated contact. AI-generated meshes can provide a fast starting point, but they shouldn't be treated as automatically engineered components.
For many indoor parts, PLA is convenient for early prototypes. PETG offers a more durable option for parts exposed to impact or moisture, while nylon and carbon-fiber-reinforced filaments can suit more demanding applications when the printer, nozzle, drying process, and design are appropriate. Resin can produce detail, but standard resin isn't the default choice for heavily loaded mechanical parts.
Sculpty's image-to-3D and multi-view workflows can help reconstruct the shape of an existing part from photographs or CAD references. Remeshing and retopology can clean the geometry before you export it to a CAD or simulation workflow. A practical sequence looks like this:
- Define the failure: Record what broke, where the part attaches, and what movement or load it experiences.
- Create the geometry: Use measurements, reference images, or an existing CAD design.
- Validate the form: Inspect thickness, holes, seams, clearances, and likely stress concentrations.
- Print a fit check: Use PLA for a quick dimensional test, then switch to the final material after the shape fits.
- Test conservatively: Keep safety-critical or high-load parts under human engineering review.
3. Architectural Models and Visualizations
Architectural models make buildings easier to discuss because clients can examine massing, circulation, openings, and relationships between spaces in three dimensions. A printed model might show a curved competition façade, an urban masterplan for a planning board, a museum reconstruction, or an interior showroom with removable walls.
The best print method depends on the model's scale and the level of surface detail. FDM works well for larger massing studies, terrain, roads, and block models. Resin is better for small façade details, thin architectural elements, and presentation pieces where surface smoothness matters. Large buildings often need to be split into floors, façades, roof sections, or terrain tiles so they fit the print area and remain easier to assemble.
A rendering alone doesn't guarantee a printable model. Thin walls, unsupported balconies, deep recesses, and disconnected decorative details may disappear or fail during printing. Before export, simplify details that won't survive the chosen scale, add alignment features, and decide whether windows should be open, recessed, or represented by a contrasting material.
Sculpty can generate a starting mesh from an architectural sketch or reference image, then help you preview concrete, brick, glass, or steel-like surface treatments. Its rendering workflow is useful for showing a client the intended appearance before fabrication. For broader visualization comparisons, explore best 3D rendering software.
A reliable workflow is to generate or import the building, establish the intended scale, thicken vulnerable features, divide the model into printable modules, and run a small façade test. Use GLB when you need a web or presentation version, and STL or 3MF when you're preparing the physical print.
4. Custom Jewelry and Wearables
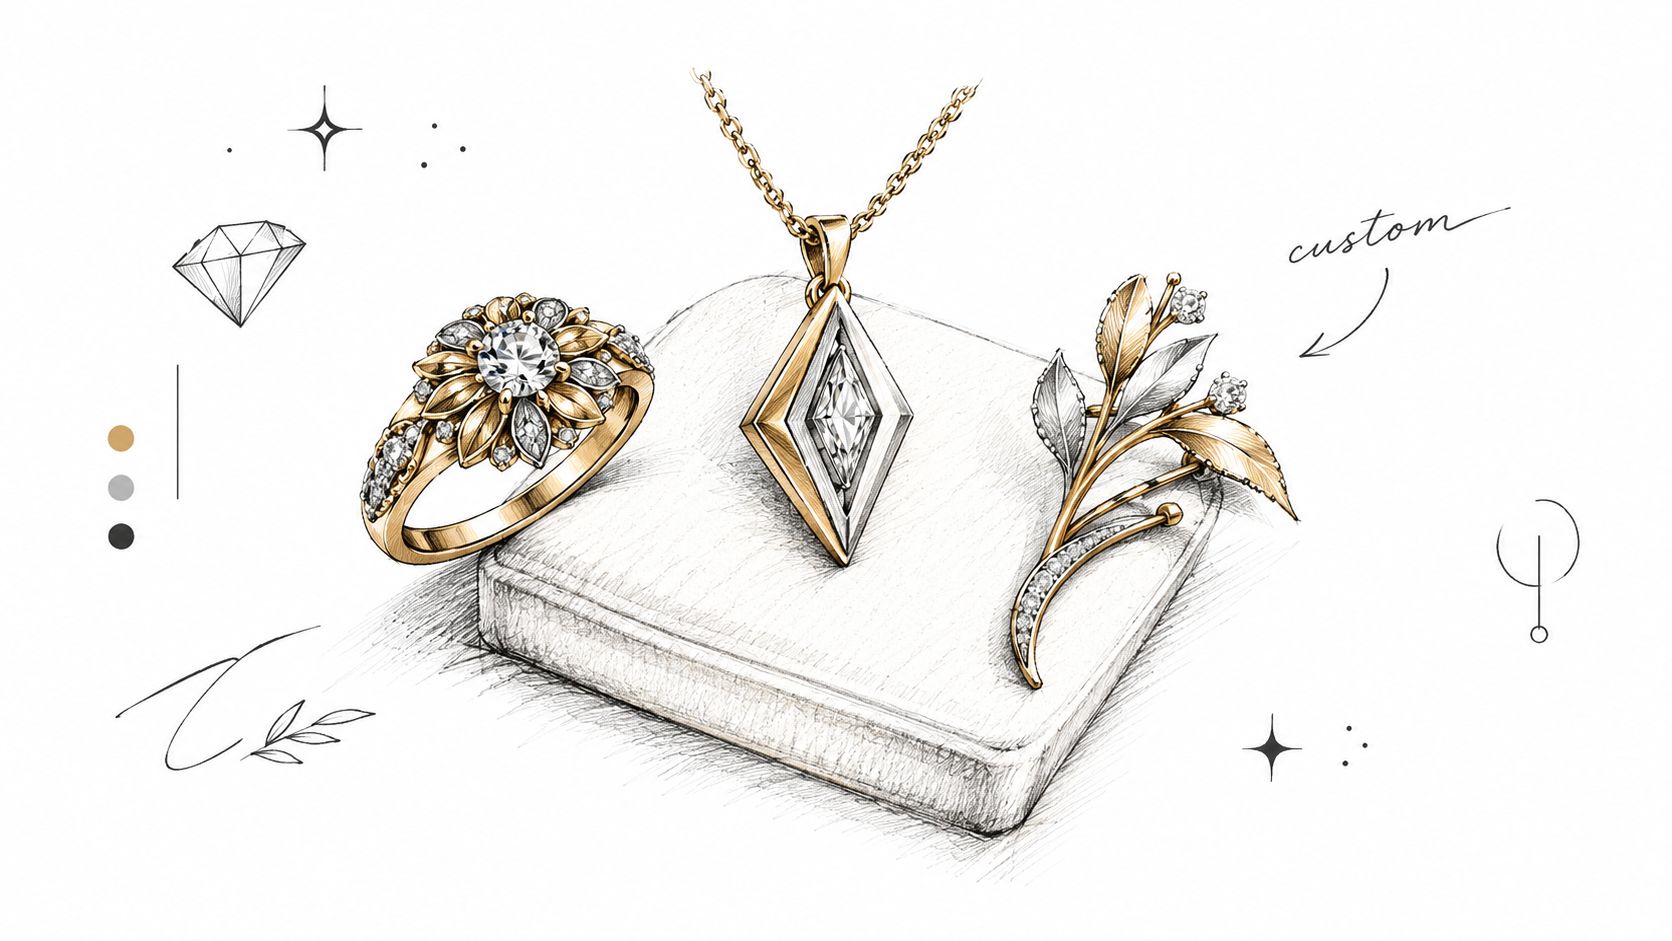
Jewelry is a strong fit for 3D printing because buyers often value personalization, intricate geometry, and low-volume production more than mass-market uniformity. Printable designs include rings, pendants, brooches, earrings, buckles, and decorative accessories. An AI-generated mandala ring can become a design study, while a custom engagement band can be adjusted around a specific stone or finger profile.
Jewelry workflows differ from ordinary decorative printing. A resin printer can produce a detailed master for lost-wax casting, or a specialist service can print in a suitable metal. Direct resin printing may work for prototypes, display pieces, or molds, but the final material must match the intended wear, skin contact, heat, and finishing requirements.
Start with a prompt that describes both form and construction, such as an Art Deco band, a gothic signet, or an organic pendant with controlled openings. Then inspect the underside, inner surfaces, prongs, and narrow connections. AI meshes often create attractive shapes that still need practical adjustment. A ring that looks elegant in a render may have uncomfortable edges, a blocked setting, or a section too thin to cast reliably.
Wearable designs need human fitting. A visually correct mesh can still feel wrong against the body.
Use metallic material previews to evaluate the intended appearance, but treat them as visual references rather than proof of the final finish. Remesh the model when necessary, check wall continuity, export an appropriate file, and produce a non-precious test before commissioning a final cast or metal print. That sequence protects both the design and the material budget.
5. Prosthetics and Medical Devices
3D printing can support custom orthotics, prosthetic sockets, surgical guides, anatomical models, splints, and braces. These applications benefit from personalization because the object must correspond to a body, scan, surgical plan, or teaching requirement. A clinician might use an anatomical model to explain a procedure, while a technician may use a patient-specific digital model as part of a supervised fitting process.
This category requires a stricter standard than ordinary household printing. A model generated from a photo or scan can contain alignment errors, missing surfaces, or incorrect assumptions about anatomy. A medical device also needs appropriate material selection, cleaning, sterilization, fit testing, documentation, and professional oversight. AI can accelerate design exploration, but it cannot replace clinical validation or regulatory review.
A practical workflow begins outside the AI studio. DICOM data may need conversion into a usable mesh through dedicated medical imaging software. After that, the model can be cleaned, separated into relevant regions, and checked for consistent surfaces. Flexible, rigid, or cushioned components should be designed as intentional parts rather than left to an automatic material guess.
For a classroom or patient-education model, PLA or resin may be suitable depending on detail and handling. For a body-contact component, material safety and professional approval determine the choice. The appropriate 3D printed prosthetics material depends on the application, fabrication route, and required compliance.
The safest sequence is scan, reconstruct, review, prototype, fit-test, document, and approve. Never use an unvalidated AI-generated object as a clinical device because it prints successfully.
6. Educational Models and Scientific Visualizations
A printed model can make an abstract structure tangible. Schools, laboratories, museums, and training programs can produce molecular structures, anatomical forms, geological specimens, geometric solids, and physics demonstrations. Students can handle a DNA model, compare a bone structure with a fracture model, or examine how a gear and pulley transfer motion.
Accuracy begins with the source data. For molecular or biological forms, use established scientific repositories such as the Protein Data Bank and NCBI, then simplify the geometry only after deciding what students need to learn. A model designed to show a protein's overall shape may need different treatment from one intended to highlight a binding site.
FDM is useful for larger classroom objects and color-coded components. Resin can reveal smaller features, although it needs careful handling and post-processing. Separate parts can make a model easier to assemble and explain. Magnets, pegs, labels, and contrasting colors can turn a static object into a teaching aid.
Turning scientific data into a classroom object
- Choose the learning objective: Decide whether the model should show shape, scale, motion, layers, or relationships.
- Prepare the geometry: Remove irrelevant detail and strengthen narrow connectors.
- Add visual language: Use colors, labels, cutaways, or removable sections that support the lesson.
- Test comprehension: Ask a learner to identify the important regions without relying on an accompanying explanation.
- Export for access: Use a printable format for the physical model and GLB for a web-based 3D viewer when both forms are useful.
Sculpty can help create a concept from a scientific description, but educators should compare the result with the underlying reference data before presenting it as accurate.
7. Custom Lithophanes and Light-Diffusion Artwork
A lithophane turns a photograph into a relief whose varying thickness controls how light passes through it. When placed in front of an LED source, raised and recessed areas create a grayscale image without requiring ink or a conventional screen. This makes lithophanes suitable for memorial gifts, pet portraits, wedding artwork, night lights, and personalized wall pieces.
The source image needs clear subject separation and strong tonal contrast. A flat, low-contrast photograph may produce a weak result even when the mesh is technically correct. Image-to-3D tools can convert the photo into a height map, but the final geometry still needs a stable base, a sensible curve, and enough thickness to handle printing.
For material, translucent white resin can produce a refined light-diffusion effect, while suitable filament can work for larger or simpler pieces. Opaque material won't transmit light in the same way. A rigid backing or frame helps prevent warping and creates a controlled space for an LED strip or panel.
The workflow is visual first: crop and improve the photograph, generate the relief, preview the light response, inspect the thin areas, and print a small section before producing the complete piece. If you're starting from a photograph, this guide to creating an STL file from an image explains the conversion stage.
Mount the lighting behind the thickest or framed edge rather than pressing a hot source directly against the print. Finally, view the object in the same lighting conditions where it will be displayed. A lithophane that looks excellent against a bright LED may appear too faint in a dim room or too harsh with a point light.
8. Interlocking Puzzles and Mechanical Fidgets
Interlocking objects reward careful geometry because the object must be enjoyable to use, not merely recognizable. Printable examples include infinity cubes, articulated dragons, organic jigsaw puzzles, snap-fit boxes, rotating rings, and hidden-compartment puzzle boxes. These designs turn the printer into a way to explore movement, friction, sequencing, and tactile feedback.
Clearance is the central design issue. Parts that touch in the digital file may fuse during printing, while parts separated too generously may rattle or fail to hold together. The right clearance depends on the printer, material, layer height, cooling, and geometry, so a calibration piece is more reliable than copying a value from another machine.
PLA is a useful first material because it supports fast iteration and predictable prototypes. PETG can improve durability for frequently handled parts, while TPU may suit flexible elements. Rotating hinges need enough space for movement and enough material around the pin to resist cracking. Snap fits need flexibility in the arm, not just extra force.
Before assembly, inspect the STL for self-intersections, trapped support material, and surfaces that shouldn't be connected. Sanding can improve contact areas, and a compatible lubricant may reduce friction after the mechanism works cleanly.
Prototype the mechanism before polishing the appearance. A beautiful puzzle that binds is still a failed puzzle.
This video shows the kind of movement a folding fidget design must preserve during printing and assembly:
9. Customized Organizers and Functional Home Goods
Some of the most valuable things 3D printers can make are ordinary objects that fit an unusual space. Drawer dividers, cable guides, spice organizers, toolbox inserts, medication organizers, hobby boxes, and desk trays can be designed around the exact dimensions of a cupboard, workbench, or workstation.
FDM printing is especially practical here. PLA works well for many indoor organizers, while PETG is a stronger choice when an item faces moisture, impacts, or repeated handling. A modular design is usually better than one oversized print. Separate trays, clips, labels, and connectors are easier to print, replace, and rearrange.
Start with measurements rather than a decorative prompt. Record the available width, depth, height, obstructions, and the dimensions of the objects the organizer must hold. Then describe the use case clearly, such as a standing-desk cable tray with pass-throughs or a toolbox insert with dedicated recesses. A generated concept should be converted into measured geometry before printing.
Sculpty can help visualize the organizer from a reference photo or text description, then export the geometry for a slicer or downstream CAD adjustment. A render with the intended desk or cupboard context can reveal whether the design looks too large, blocks a handle, or leaves labels difficult to read.
Use this sequence:
- Measure the space: Include clearances for doors, drawers, cables, and hands.
- Divide the object: Create sections that fit the build area and can be assembled.
- Test the fit: Print only a corner, wall, or one compartment first.
- Refine usability: Round edges, enlarge finger access, and add labels or mounting features.
- Print the system: Produce the final modules in a durable material suited to the room.
The best organizer doesn't just reduce clutter. It makes the intended action easier.
10. Art Sculptures and Gallery Installations
3D printing gives artists a route from abstract digital form to physical sculpture. It can produce geometric studies, biomorphic objects, figurative works, memorial pieces, public-art components, and installation elements. The printed result may be the final artwork, a master for casting, or one part of a larger assembly made from several materials.
AI generation is particularly useful during exploration. An artist can test variations of an organic form, a folded surface, or an architectural volume without sculpting every version manually. However, the strongest physical work usually comes from editing the generated form. The artist must decide how the object stands, where it joins, how it will be lifted, how light passes across it, and what viewers should notice from different angles.
FDM is suitable for large structural studies and many modular sculptures. Resin provides fine detail for smaller works. For monumental pieces, a service bureau or fabrication partner may be more appropriate than a desktop machine. Splitting the design into keyed sections makes transport, printing, assembly, and surface finishing more manageable.
Surface treatment changes the perceived material. Sanding, filler, paint, metallic coatings, patina, and clear finishes can turn a printed polymer form into an object that reads as stone, bronze, ceramic, or something deliberately synthetic. The digital texture preview remains useful for planning, but the physical finish must be tested on the actual material.
Design the installation around its site. Scale, lighting, access, anchoring, and audience movement matter as much as the mesh.
Artists can document the work with high-resolution renders, export formats suited to animation or fabrication, and maintain provenance records for limited editions. For practical advice on display decisions, see these sculpture installation tips.
10-Item Comparison of 3D-Printed Creations
| Item | 🔄 Implementation complexity | ⚡ Resource requirements | 📊 Expected outcomes | 💡 Ideal use cases | ⭐ Key advantages |
|---|---|---|---|---|---|
| Custom Miniatures and Figurines | Medium–High, fine-detail modeling & supports | High‑resolution resin (SLA/DLP) or high‑res FDM; multi-color segmentation | High visual fidelity; collectible quality | Tabletop gaming, collectors, prototypes | Rapid iteration; no sculpting skill; scalable sizes |
| Functional Mechanical Parts and Assemblies | High, tolerance, topology & strength validation | FDM (PETG/Nylon), SLS/metal for production; FEA/validation tools | Durable, load‑bearing components for prototyping | Replacement parts, robotics, prototype assemblies | Faster iteration vs. CNC; cost‑effective custom parts |
| Architectural Models and Visualizations | Medium, scale conversion & detail management | SLS/polyjet/resin for finish; large‑format printing; 4K renders | Accurate scale maquettes and presentation‑ready visuals | Client presentations, competitions, urban planning | Converts 2D to tactile models quickly; improves spatial comprehension |
| Custom Jewelry and Wearables | High, sub‑mm precision, casting prep | SLA resin for molds; SLM/DMLS for metals; post‑polish & casting workflow | Jewelry‑grade prototypes; casting‑ready CAD models | Bespoke rings, pendants, small production runs | Eliminates hand‑sculpting curve; rapid customization |
| Prosthetics and Medical Devices | Very High, regulatory, clinical validation required | Medical imaging (DICOM), biocompatible materials, SLA/FDM with special filaments | Patient‑specific devices, surgical guides, anatomical models | Prosthetic sockets, surgical planning, orthotics | Dramatically faster fabrication; better patient fit; accessible solutions |
| Educational Models and Scientific Visualizations | Low–Medium, data accuracy important | FDM/resin; color/textured prints; GLB export for web/VR | Accurate tactile learning aids; scalable models | Classrooms, museums, labs, outreach | Improves comprehension; reusable and accessible |
| Custom Lithophanes and Light‑Diffusion Artwork | Low–Medium, image quality drives complexity | Translucent resin SLA preferred; high‑res source images; LED backlighting | Backlit photo sculptures with strong visual impact | Personalized gifts, memorials, decorative art | High emotional/artistic impact; scalable formats |
| Interlocking Puzzles and Mechanical Fidgets | Medium, tight tolerance & iterative testing | FDM (PLA/PETG/TPU); tuned layer height/nozzle; light post‑processing | Smooth snap‑fit or articulated mechanisms | Fidget toys, puzzles, hobby market products | Low print time; high engagement; profitable niche |
| Customized Organizers and Functional Home Goods | Low–Medium, accurate dimensions & modularity | FDM with PETG/Nylon for durability; parametric design exports | Fit‑for‑purpose organizers; durable functional goods | Desk organizers, toolbox inserts, custom storage | Perfect fit for spaces; cost‑effective vs. carpentry |
| Art Sculptures and Gallery Installations | High, large scale, material & curation demands | Multi‑material SLS/SLM/polyjet; fabrication partners for large work | Gallery‑quality sculptures; limited editions or public art | Exhibitions, commissions, public installations | Lowers sculptural barrier; rapid ideation; reproducible editions |
Choose the Right Thing to Print
The right object starts with its job, not with the printer's maximum build volume. Ask whether you need fine detail, impact resistance, flexibility, dimensional accuracy, light diffusion, body fit, or presentation quality. A miniature and a replacement bracket may both be described as 3D prints, but they demand completely different workflows.
Choose resin when small details and smooth surfaces matter most, such as miniature faces, jewelry masters, anatomical teaching models, or intricate display objects. Resin selection still matters. Standard resin may suit visual models, while tough, flexible, castable, or specialist materials are better for specific requirements. Wash and cure parts according to the material instructions, and handle uncured resin responsibly.
Choose FDM for many household goods, organizers, prototypes, terrain pieces, and larger sculptures. PLA is convenient for indoor prototypes and decorative objects. PETG can be a better fit for parts that face moisture or repeated handling. Nylon and reinforced filaments can support more demanding mechanical designs, but they require appropriate printer settings, storage, drying, and post-processing.
Load-bearing, heat-exposed, moving, or safety-related objects need testing beyond a successful first print. A replacement cover is relatively simple. A bracket that supports equipment, a mechanism exposed to repeated stress, or a wearable medical component requires measured validation. AI-generated geometry can contain hidden weaknesses, so inspect walls, joints, holes, overhangs, and contact surfaces before use.
Oversized objects should become printable modules. Add alignment pins, screw holes, dovetails, or keyed joints, then test the connection before printing every section. Modular construction also makes repair easier because one damaged part can be replaced without reproducing the entire object.
Use this compact workflow for almost any project:
- Define the use case: State what the object must do, where it will be used, and who will handle it.
- Generate or model the shape: Use CAD, a scan, reference images, or an AI concept as the starting point.
- Inspect and remesh: Check watertightness, topology, wall thickness, clearances, and unsupported details.
- Preview the result: Review the shape, texture, scale, orientation, and assembly before export.
- Export the right file: Use STL or 3MF for slicing, and GLB, OBJ, FBX, or another suitable format for downstream visualization or editing.
- Test-print a critical area: Verify fit, movement, surface detail, and strength before producing the final version.
- Refine and document: Record the changes, material, orientation, and settings that produced the usable result.
A practical starting project is usually small, measurable, and easy to improve. Print a custom organizer insert, a miniature, a lithophane panel, or a simple replacement cover. Once you understand how geometry, material, orientation, and post-processing affect the result, you can move toward larger assemblies, wearable products, educational models, and artistic installations with better control.
Sculpty offers browser-based text-to-3D, image-to-3D, multi-view generation, AI texturing, remeshing, rendering, and exports for printable concepts and downstream design work. Visit Sculpty to turn your next measured idea into a previewable model, then test it physically before refining the final object.