
How to Model 3D Assets: A Complete Beginner Guide
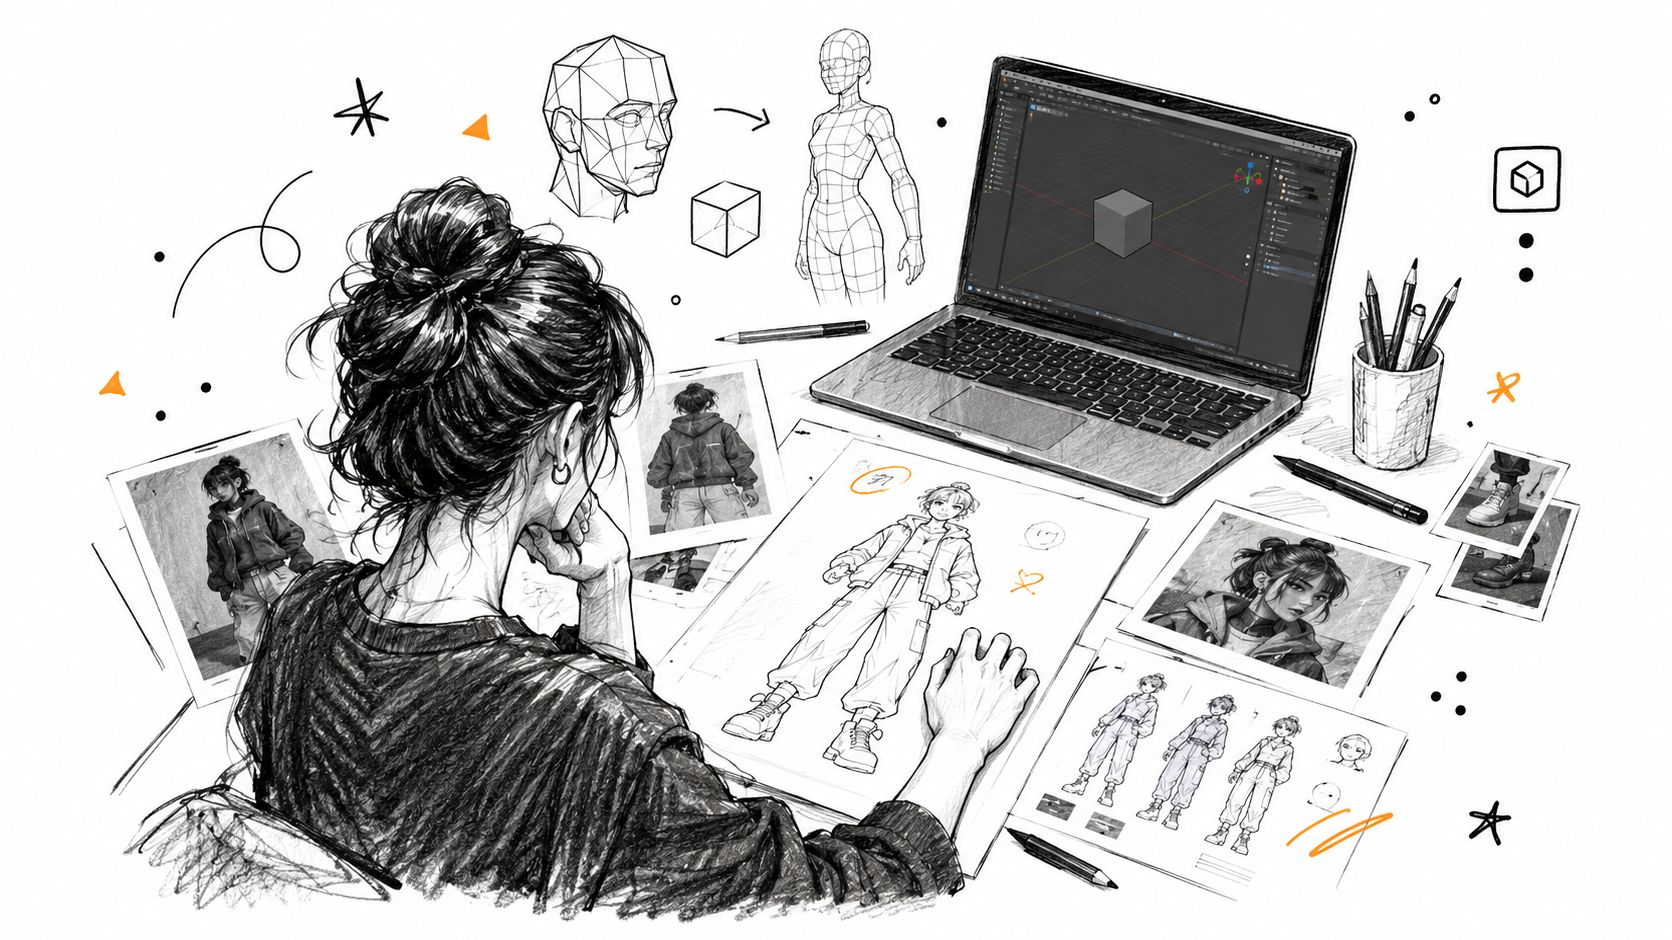
You've got a concept sketch, a folder of reference images, and an empty Blender viewport. The object looks finished on paper, but the moment you try to build it, practical questions appear. What scale should it use? Which dimensions matter? Does it need to deform, render, print, or communicate an idea to a client?
That's the part most beginner tutorials skip. Learning how to model 3D assets isn't only about pushing vertices. It's about choosing geometry, materials, file formats, and tools for the asset's final destination. A character for a game, a watertight figurine for a slicer, and a product model for KeyShot may begin with the same cube, but they shouldn't finish through the same pipeline.
Additive manufacturing has existed since the 1980s, while broader industry adoption accelerated more recently. An industrial design survey from IDSA reported that 51% of designers use 3D printing in at least 60% of their projects, 66% use an in-house 3D printer, and 63% outsource some or all 3D printing. That shift makes clean, interoperable modeling more than an artistic preference. Your mesh often becomes a production file.
Table of Contents
- Starting From a Concept and a Blank Workspace
- The Production Pipeline Every 3D Asset Travels Through
- Building Geometry With Blocking, Topology, and Retopology
- Using AI Generation for the Initial Shape Step
- Texturing, UVs, and 4K Rendering for a Finished Look
- Exporting Assets for Games, Print, and Visualization
- Final Checklist and Common Mistakes to Avoid
Starting From a Concept and a Blank Workspace
The first ten minutes matter more than most beginners expect. Before creating a single polygon, a working artist turns the blank viewport into a controlled project.
Start with a folder that separates references, working files, exports, textures, and deliveries. Name the asset immediately, using a versioned filename such as lantern_game_v001.blend rather than leaving it as an untitled document. That small decision prevents confusion when you create a high-poly sculpt, a retopologized game mesh, a print version, and a client preview.
Set the brief before the mesh
Put your reference images into a PureRef board or an equivalent reference tool. Separate orthographic views from inspiration images, because a dramatic three-quarter photograph can mislead proportions when you're trying to match a front or side profile.
Then answer four questions:
- What is the deliverable? A real-time asset, a physical object, a marketing render, or a reusable source model?
- What must be accurate? Product dimensions and assembly surfaces need a different standard from a background prop.
- What will move? A character face, elbow, or mechanical hinge needs deliberate edge flow.
- What will be judged? A client may care about silhouette and material realism, while a slicer cares about scale and watertight volume.
Use a primitive as a scale anchor. If the asset is a chair, block in a rough seat and leg volume before refining the design. For a character, establish a simple body proportion guide. For a building, set the floor height and window spacing. The primitive isn't disposable busywork. It gives every later decision a reference.
Practical rule: Treat the viewport as a planning surface first and a modeling surface second.
Don't start with tiny bevels, stitching, pores, or decorative screws. Block the largest masses and compare the silhouette against your references from several angles. If the object fails at that stage, detail will only make the wrong shape more expensive to fix.
The rest of the workflow follows once the project has a name, a target, a scale anchor, and a clear reference board. You'll block the form, choose how much detail to generate or sculpt, rebuild the geometry where necessary, prepare its materials, and export a file that behaves correctly outside your modeling software.
The Production Pipeline Every 3D Asset Travels Through
A shipped asset usually passes through five practical stages, even when the artist uses different software at each point. The tools may be Blender, ZBrush, Substance 3D Painter, a slicer, Unreal Engine, or a renderer, but the responsibilities remain recognizable.
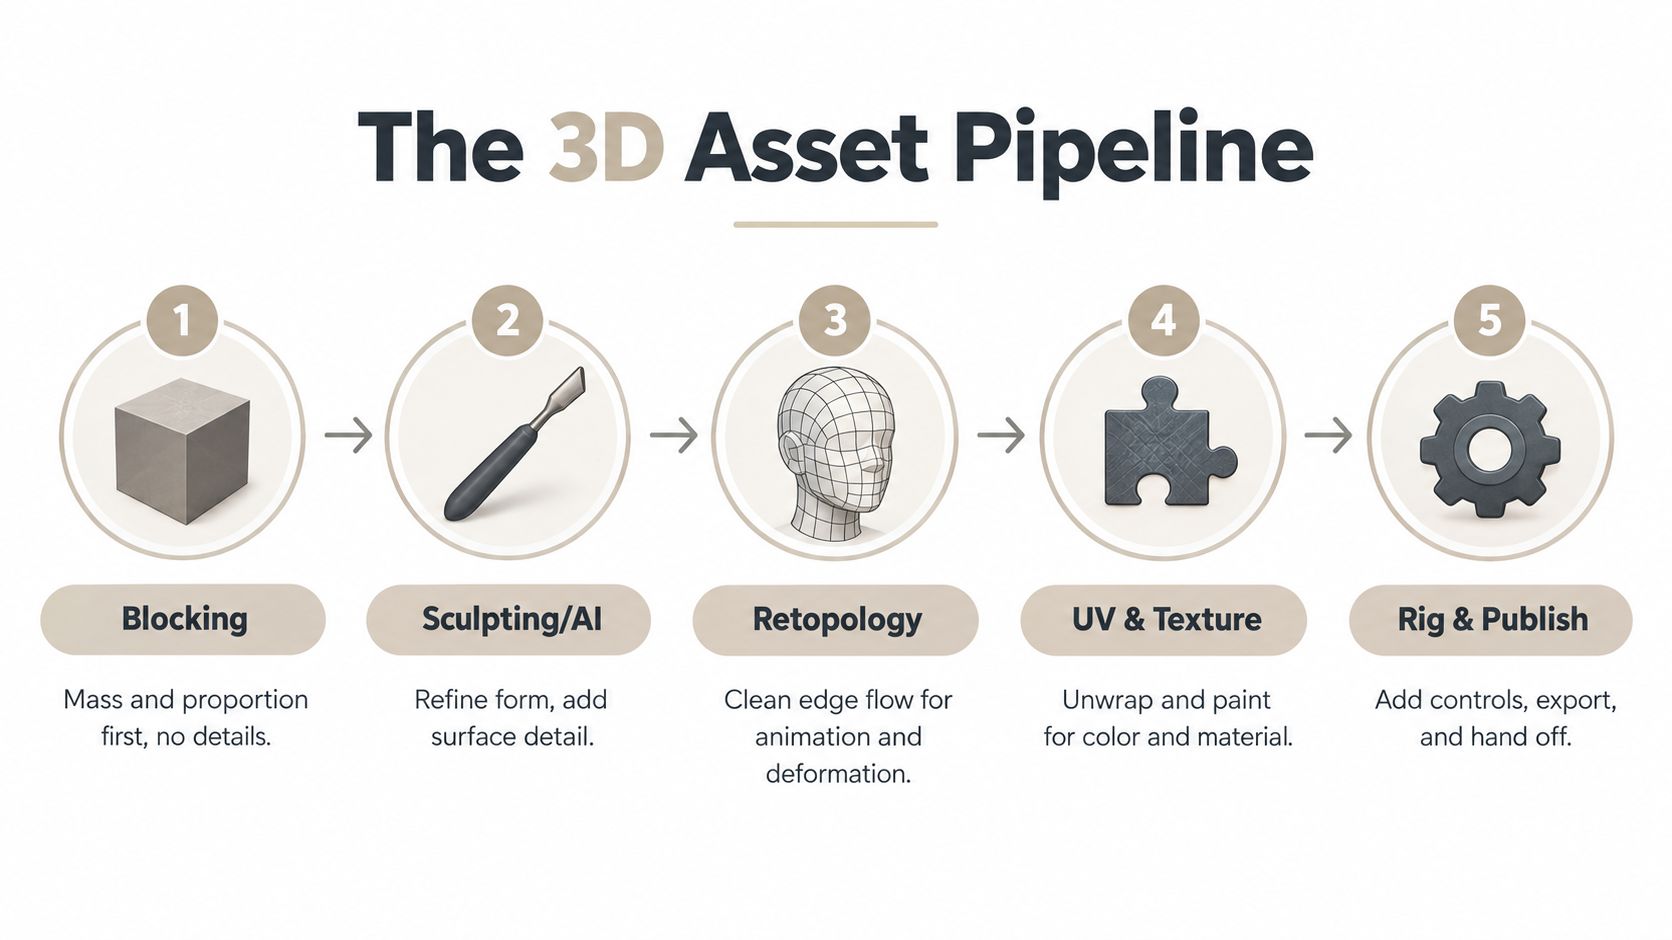
The five stages
Blocking establishes mass and proportion. Use primitives, box modeling, or a kitbash to solve the silhouette. A hero prop needs recognizable major forms before surface treatment. A background building may stop at this stage if it only appears far from the camera.
Sculpting or AI generation develops the surface. Sculpting gives you direct control over organic transitions, damage, folds, and secondary forms. AI generation can provide a starting mesh when the concept is still exploratory, but it doesn't remove the need for evaluation.
Retopology turns density into usable geometry. A sculpt or generated mesh may look convincing while carrying uneven density, hidden intersections, or unusable edge flow. Retopology rebuilds the surface for deformation, editing, baking, or efficient rendering.
UVs and texture maps define material response. Unwrapping creates the relationship between the 3D surface and 2D texture space. Base color, roughness, metallic, normal, and ambient occlusion information then give the mesh a readable material.
Rigging and publishing prepare the handoff. A character may need a skeleton and deformation test. A print model needs a watertight volume and correct units. A client render needs stable materials, linked textures, and a scene that opens reliably.
A character for Unreal may travel through all five stages. A mechanical bracket for printing may need careful blocking, hard-surface cleanup, and validation instead of rigging. A product visualization asset may preserve subdivision history and high-resolution surfaces because the client can request a close-up late in the project.
A useful T³Bench evaluation framework treats text-to-3D assessment as a two-part process. It first creates multi-view renders, then measures both visual quality and text-to-3D alignment. That mirrors production review: don't judge only the mesh in one viewport. Rotate it, inspect the underside, test the target use, and compare the result with the brief.
The pipeline is format-agnostic. It applies whether the final home is a game engine, a Bambu slicer, or a client's KeyShot scene. The correct question isn't “Which software makes the model?” It's “What must this asset do after I finish modeling it?”
Building Geometry With Blocking, Topology, and Retopology
Geometry has three separate jobs, and confusing them creates unnecessary rework. Blocking solves proportion. Topology organizes the surface. Retopology converts an existing dense result into production geometry.
Block the silhouette before detail
Begin with low-resolution primitives. In Blender, a cube, cylinder, plane, or simple sphere is enough to establish the main masses. Use box modeling for furniture, props, and mechanical forms. Use primitives or a base mesh for characters. Kitbash only when the borrowed parts help you test proportion quickly, not when they hide decisions you still need to make.
Check the blockout in front, side, top, and three-quarter views. A character head can have beautiful eyes and still fail because the cranium is too narrow. A mechanical bracket can have clean bevels and still be unusable because the mounting holes don't align with the intended assembly.
Topology follows the asset's behavior
Topology is the arrangement of vertices, edges, and faces across the surface. On a deforming character head, loops should support the eyes, mouth, cheeks, and jaw. Put poles where they won't collapse during facial movement, and keep the flow readable around joints such as shoulders, elbows, knees, and hips.
A hard-surface bracket has different priorities. Its edge flow supports planar surfaces, bevels, booleans, shading, and manufacturing logic. It doesn't need the same circular facial loops as a character, but it does need controlled support edges and clean normals.
For a focused explanation of edge flow and production constraints, use this 3D modeling topology guide alongside your mesh checks.
Retopology is a rebuild, not a cleanup button
A sculpted creature or AI-generated object often contains dense triangles, stretched polygons, internal fragments, and inconsistent resolution. Automatic tools such as QuadRemesher can produce a useful starting result quickly. Manual retopology in Blender takes longer, but it gives you control over loops, seams, deformation zones, and important silhouette edges.
Choose automatic retopology when the asset is a static prop, a concept, or an early visualization. Choose manual work when the model will animate, receive a carefully baked normal map, or be edited repeatedly by another artist. For a print model, prioritize a closed volume and reliable wall geometry over attractive quad flow.
| Stage | Primary Goal | Typical Polycount | Best Use Case |
|---|---|---|---|
| Blocking | Solve mass and proportion | Low and deliberately simple | Early silhouettes, layout, proportion checks |
| Topology | Organize surface flow | Depends on deformation and detail | Animation, subdivision, controlled shading |
| Retopology | Rebuild dense geometry for use | Target-dependent production density | AI meshes, sculpts, baking, game assets |
Beginners often spend hours perfecting edge flow on a static rock that will never deform, subdivide, or receive a close-up. Use this heuristic: if the asset bends, subdivides, needs a baked normal map, or must be edited by someone else, topology deserves serious planning. If it's a static background object, prioritize silhouette, shading, file cleanliness, and the final performance target.
Using AI Generation for the Initial Shape Step
AI generation is most useful when it replaces a slow exploratory blockout, not when it pretends to be the finished asset. A generated mesh can give you a recognizable starting volume quickly, but it may also create cleanup debt that exceeds the time saved.
Start with a precise prompt or a clean reference image. Describe the object's category, major forms, proportions, pose, material cues, and intended presentation. Avoid packing unrelated design directions into one prompt. If you need inspiration for constructing a strong visual reference before generating geometry, Writingmate's AI image guide offers useful context for image prompting.
Text-to-3D and image-to-3D solve different problems. The 3DGen-Bench benchmark evaluated the modalities independently, covering 19 open-source models across 9 text-to-3D and 13 image-to-3D systems. Its human-preference leaderboard reported MVDream at an average Elo of 1177.66 for text-to-3D and Wonder3D at an average Elo of 1304.05 for image-to-3D, showing why a single “best AI model” claim is misleading.
Inspect the mesh before investing in it
Drop the result into Blender or ZBrush immediately. Rotate it under neutral lighting and inspect the underside, contact points, openings, and thin parts. Look for fused limbs, floating fragments, collapsed cavities, stretched triangles, inconsistent density, and surfaces that only look correct from the input camera.
Use this inspection order:
- Shape first: Does the silhouette match the brief from multiple views?
- Structure next: Are major parts separated where they need to be edited, rigged, or printed?
- Mesh health after that: Is the surface manifold, connected, and free of obvious internal debris?
- Production readiness last: Does it have usable UVs, sensible density, and a format your next tool can read?
| Method | Typical Triangle Count | Topology Quality | Best Use Case |
|---|---|---|---|
| Text-to-3D generation | Variable and engine-dependent | Often requires cleanup | Hard-surface ideation and early concepts |
| Image-to-3D generation | Variable and view-dependent | Often requires retopology | Organic concepts and reference-led starting shapes |
| Traditional blocking | Artist-controlled and intentionally low | Clear if built carefully | Proportion, silhouette, and production planning |
The benchmark evidence supports separate evaluation for the two AI modalities, but it doesn't make either one a substitute for artist judgment. Image-to-3D is often a stronger starting point when a specific visual reference controls the design. Text-to-3D is useful when you're exploring hard-surface ideas that don't yet have a complete image.
A practical decision rule is simple. Keep the AI result when it gives you the correct silhouette and saves a meaningful blockout pass. Discard or rebuild it when fused parts, missing structure, poor topology, or a remeshing tax will slow every later stage. For a practical text-to-3D workflow, see this guide to generating a 3D model from text.
Texturing, UVs, and 4K Rendering for a Finished Look
A clean mesh can still look unfinished if its UVs, materials, and lighting are weak. Texturing begins with an unambiguous relationship between the surface and the image space, so unwrap before painting and inspect the result with a checker texture.
Place seams where the viewer won't punish them
In Blender or RizomUV, cut seams along hidden edges, natural material breaks, and areas with low visual sensitivity. A cylindrical object can often hide a seam along its rear or underside. A character needs more careful planning around limbs, ears, hands, and facial regions because distortion is easy to notice.
Pack islands with consistent scale and sufficient padding. If one part of the model appears closer to the camera or carries fine markings, give it more texture space. Split into multiple UDIMs when a single texture tile can't preserve the detail required by the shot or asset class. Don't use UDIMs just because the option exists. They add file-management and renderer requirements.
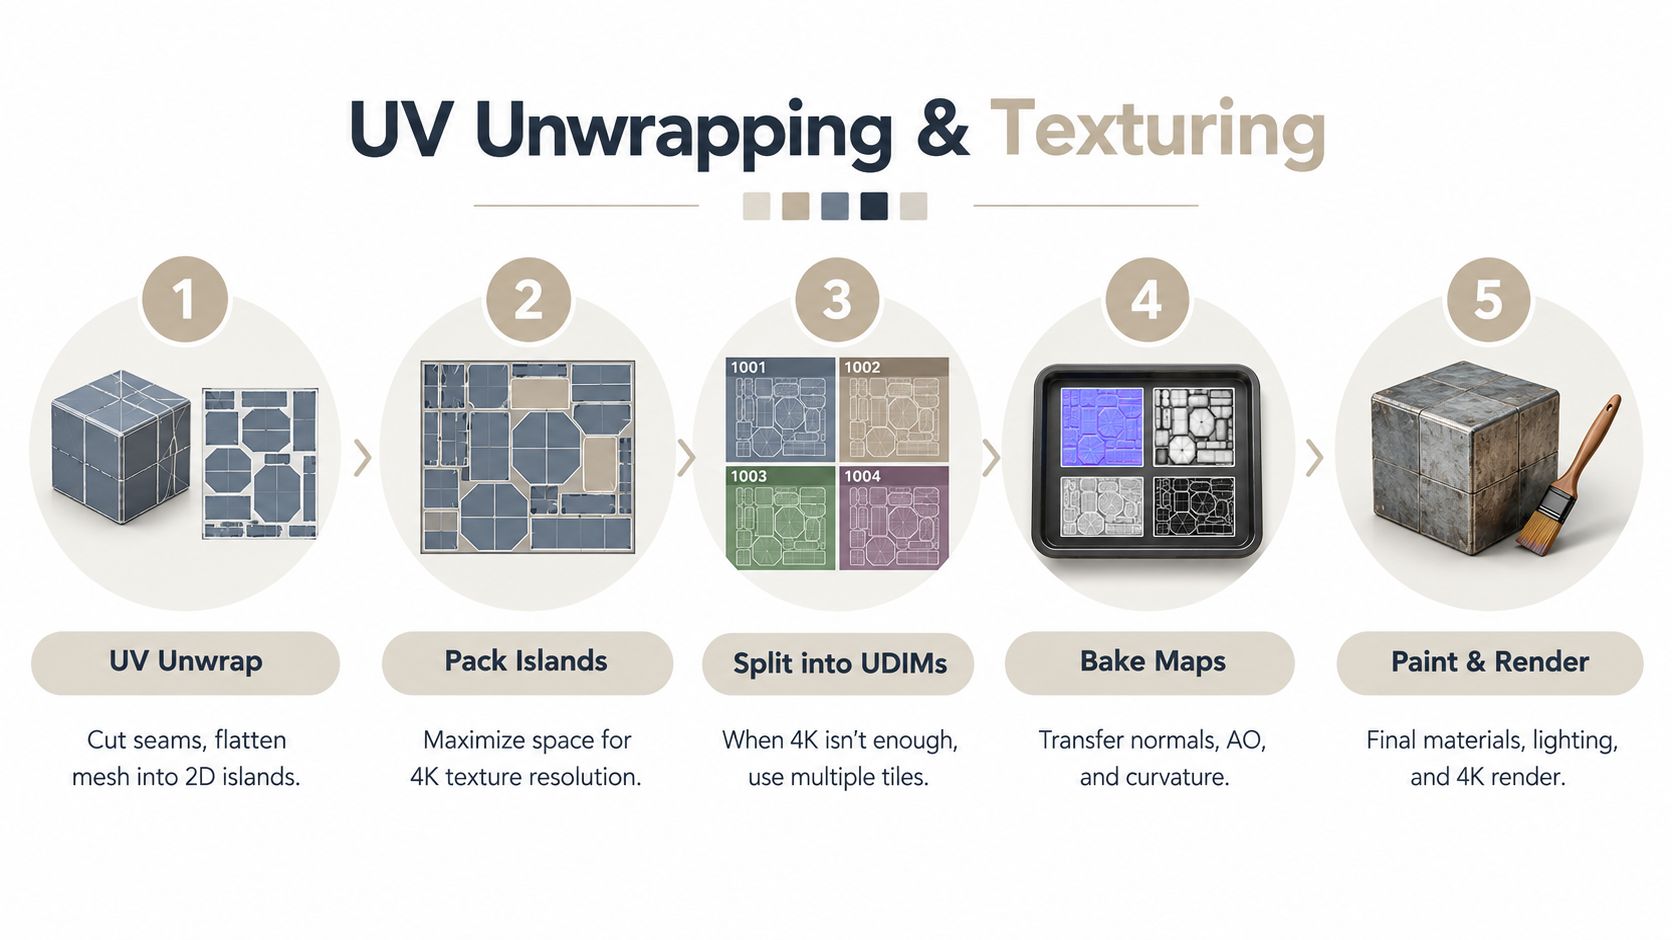
Build materials from measurable channels
A standard PBR setup separates material behavior into maps such as:
- Base color: The visible color without lighting information painted into it.
- Roughness: The spread of reflections across the surface.
- Metallic: Whether the shader treats the surface as conductive metal or a non-metal.
- Normal: Small surface direction changes that affect lighting without adding major geometry.
- Ambient occlusion and curvature: Supporting maps for creases, contact shading, and controlled wear.
Substance 3D Painter and Quixel Mixer remain useful for authored materials, while AI texture tools can accelerate variations and reference matching. The important step is still inspection. A generated texture can contain inconsistent scale, accidental lettering, repeated wear, or highlights baked into the base color.
For a practical walkthrough of the handoff from mesh to material, use this 3D model texturing guide.
Treat a 4K render as a review tool
In Cycles or Octane, set the output resolution, sampling strategy, denoising, and light-path controls for the shot rather than blindly maximizing every setting. Test with lower samples while adjusting composition and lighting, then raise quality for the final frame. Denoising helps, but it won't repair bad UV seams, noisy reflections caused by poor lighting, or material values that don't make physical sense.
Keep downstream formats in mind. A game engine doesn't benefit from receiving oversized, uncompressed source textures when the project expects optimized maps. Preserve high-quality working files, then create delivery textures at the bit depth and compression format required by the target.
Exporting Assets for Games, Print, and Visualization
Export settings should follow the recipient's workflow, not your personal software preferences. Before choosing a format, identify whether the asset must deform, render at close range, survive a slicer, or load efficiently in a real-time scene.
| End Use | Format | Poly Budget | Texture Resolution |
|---|---|---|---|
| Game engine | FBX or glTF | Target-dependent, with LODs where needed | Match camera distance and platform constraints |
| 3D printing | STL or 3MF | Enough density for the physical surface | Usually unnecessary unless color is supported |
| Client visualization | FBX, OBJ, USD, or renderer-specific scene | High enough for close shots | Match the final framing and material detail |
Games need predictable performance
FBX remains common for characters, animation, and engine interchange. glTF and GLB are convenient for web and real-time delivery, and Draco compression can reduce geometry transfer size where the receiving pipeline supports it. Generate LODs for assets viewed at different distances, apply consistent pivots, verify axis orientation, and remove hidden geometry that serves no purpose in the engine.
Don't judge a game asset only by its triangle count. Materials, texture memory, draw calls, skeletal complexity, and overdraw can all affect performance. The correct budget belongs to the project and viewing conditions.
Prints need physical integrity
For a slicer, apply the intended unit scale, usually working in millimeters when the manufacturing workflow expects them. Check for non-manifold edges, internal faces, inverted normals, self-intersections, and walls too thin for the chosen printer and material. STL is widely accepted and simple, while 3MF can carry richer manufacturing information and color-related data depending on the workflow.
A beautiful viewport render proves almost nothing about printability. Open the exported file in the target slicer, inspect the preview layer by layer, and confirm that supports, cavities, and wall behavior match the design.
Visualization rewards flexibility
For client renders and architectural visualization, retain high-resolution geometry where the camera needs it, preserve subdivision history when last-minute changes are likely, and package textures with clear relative paths or an agreed delivery structure. Test the export in a clean scene rather than assuming your local links will survive the handoff.
The final validation should happen outside the source file. Import the export into the game engine, slicer, or renderer that will receive it. That test catches scale errors, missing textures, flipped normals, broken materials, and incorrect pivots before the recipient finds them.
Final Checklist and Common Mistakes to Avoid
The handoff is where many apparently finished models fail. A viewport can hide non-manifold geometry, unapplied scale, reversed normals, missing files, and modifiers that another application can't interpret.
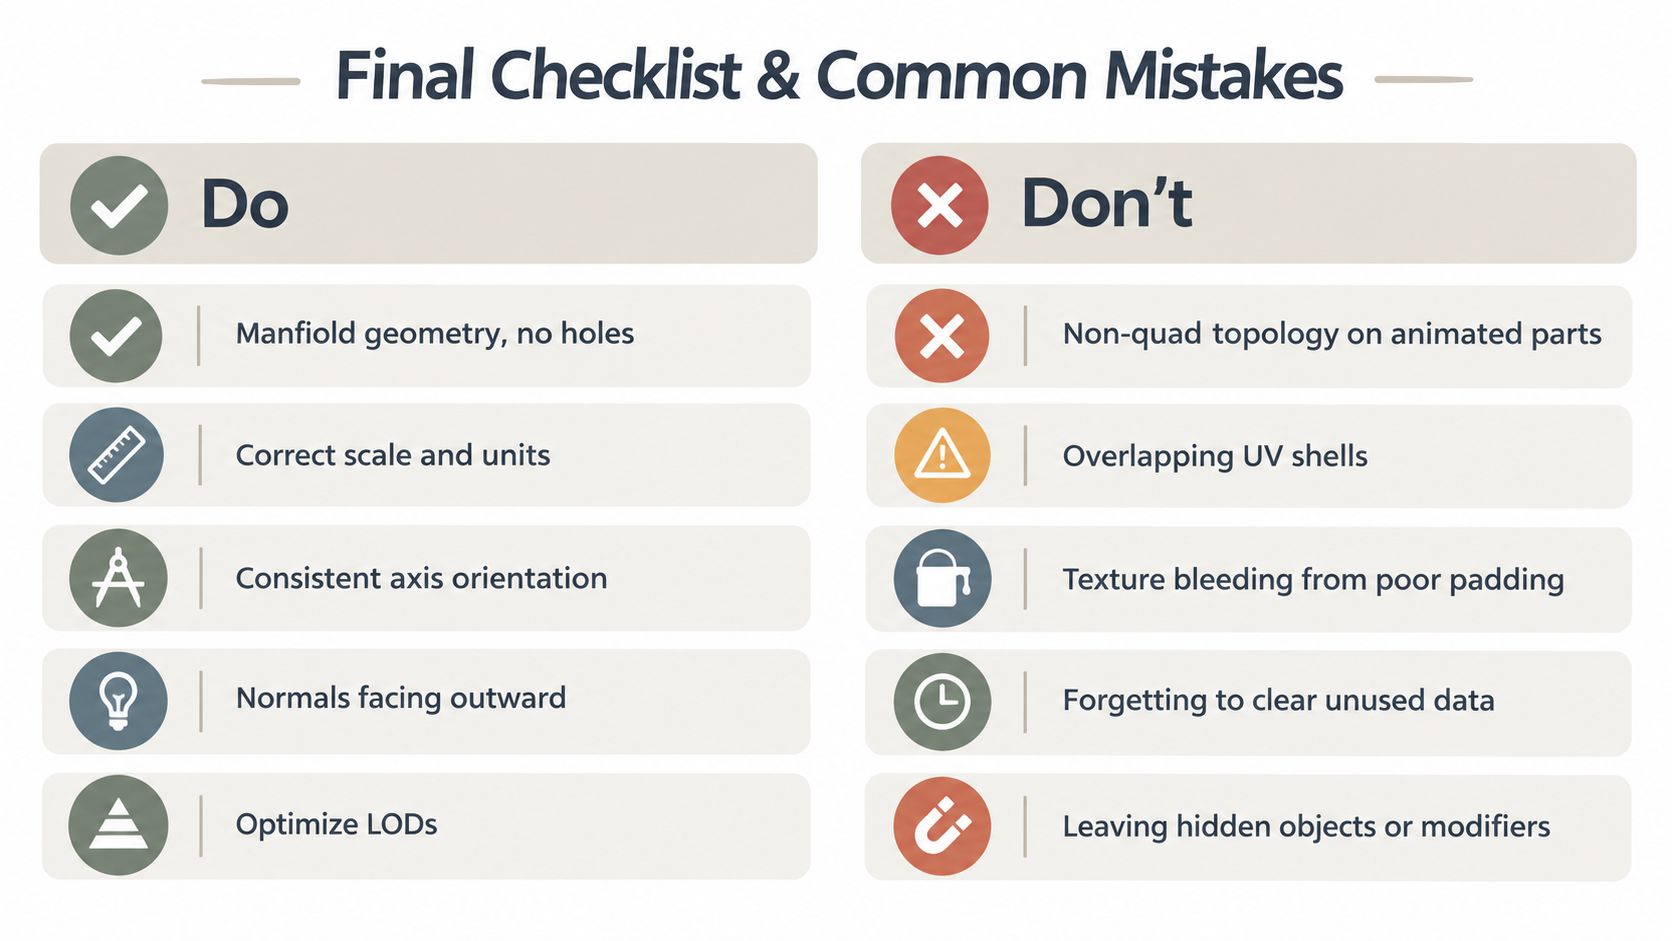
Validate the model
Use a repeatable review instead of relying on memory:
- Geometry: Check manifold status, holes, self-intersections, loose parts, and hidden objects.
- Scale: Confirm the scene units and compare the exported dimensions with the brief.
- Orientation: Verify the forward axis, up axis, origin, and pivot location.
- Normals: Recalculate or inspect face direction, especially after booleans and manual edits.
- Animation: Test deformation on joints and facial areas before delivering a rigged asset.
- Optimization: Create appropriate LODs and remove unnecessary modifiers or source objects.
- Textures: Check UV overlaps, padding, naming, bit depth, color space, and packed map references.
- Export: Reopen the file in the actual target application and inspect it there.
Avoid expensive handoff failures
Beginners often send dense meshes with millions of polygons to a game engine because the model looked impressive in the sculpting viewport. They leave non-manifold edges in a print file, forget to bake high-to-low normal maps after retopology, or deliver inconsistent pivots and scale that force someone else to repair the asset.
Other failures are quieter. Overlapping UV shells can cause textures to appear in the wrong places. Poor padding creates texture bleeding at mip levels. Unused data, hidden objects, unapplied modifiers, and unclear filenames make a file harder to maintain even when it renders correctly.
A finished model is one that survives the next tool, not one that merely looks good in the current viewport.
The reusable solution is a clean template project with folders, naming rules, unit settings, export presets, material conventions, and validation checks already prepared. Every new asset then follows the same path: block the form, develop detail, rebuild the mesh where needed, prepare UVs and materials, and publish for the actual destination.
Sculpty brings text-to-3D, image-to-3D, multi-view generation, AI texturing, remeshing, retopology, 4K rendering, and format conversion into a browser-based workflow. Use Sculpty to test an initial shape, clean it for a downstream tool, and move the result toward a game, print, or client-ready handoff.