
Graphic Design 3D: Complete Guide for Modern Creators

A client asks for a logo that feels dimensional, a product visual that can rotate, and a campaign asset that works on both a landing page and a printed display. You open an AI 3D tool, enter a prompt, and receive a model that looks convincing in the viewer. Then the practical questions arrive: Are the surfaces closed? Is the topology usable? Will the textures survive export? Can the asset load quickly, print correctly, or enter the client's pipeline without repair?
That gap defines modern graphic design 3D. Generating an object is only the beginning. A professional result combines visual direction, geometry, materials, lighting, validation, and a delivery format suited to the destination.
Table of Contents
- Introduction to 3D in Graphic Design
- Core Concepts of 3D Design
- Essential File Formats for 3D
- Rendering for Print vs Web
- Creating 3D Logos and Typography
- Streamlining Workflows with Sculpty
- Conclusion and Next Steps
Introduction to 3D in Graphic Design
A brand team may need a dimensional wordmark for social media, a product scene for an ecommerce page, or a set of objects for an interactive campaign. A junior designer often starts with the visible part, the glossy render. A senior designer starts by asking where the asset will go, how often it will be revised, and what the next person in the workflow must be able to do with it.
3D isn't a separate universe from graphic design. It extends familiar skills such as composition, hierarchy, color, contrast, typography, and visual storytelling into a space where form, camera position, light, and motion also influence meaning. A soft material can make a product feel approachable. A hard rim light can make the same silhouette feel technical. Depth can guide attention in ways that a flat background can't.
The field grew from research into interactive modeling and rendering. Ivan Sutherland's 1963 Sketchpad introduced direct manipulation and computer-aided design concepts, while Bézier curves, the z-buffer, Gouraud shading, and Phong shading established core methods for constructing and displaying form. ACM's graphics community began in 1969, and its first conference in Boulder in 1973 attracted approximately 1,200 attendees, as documented in this history of computer graphics presentation.
You don't need to abandon 2D design to work in 3D. Start with one controlled object, one camera, and one clear communication goal. The valuable shift is learning to deliver an asset that remains useful after the first attractive render.
Core Concepts of 3D Design
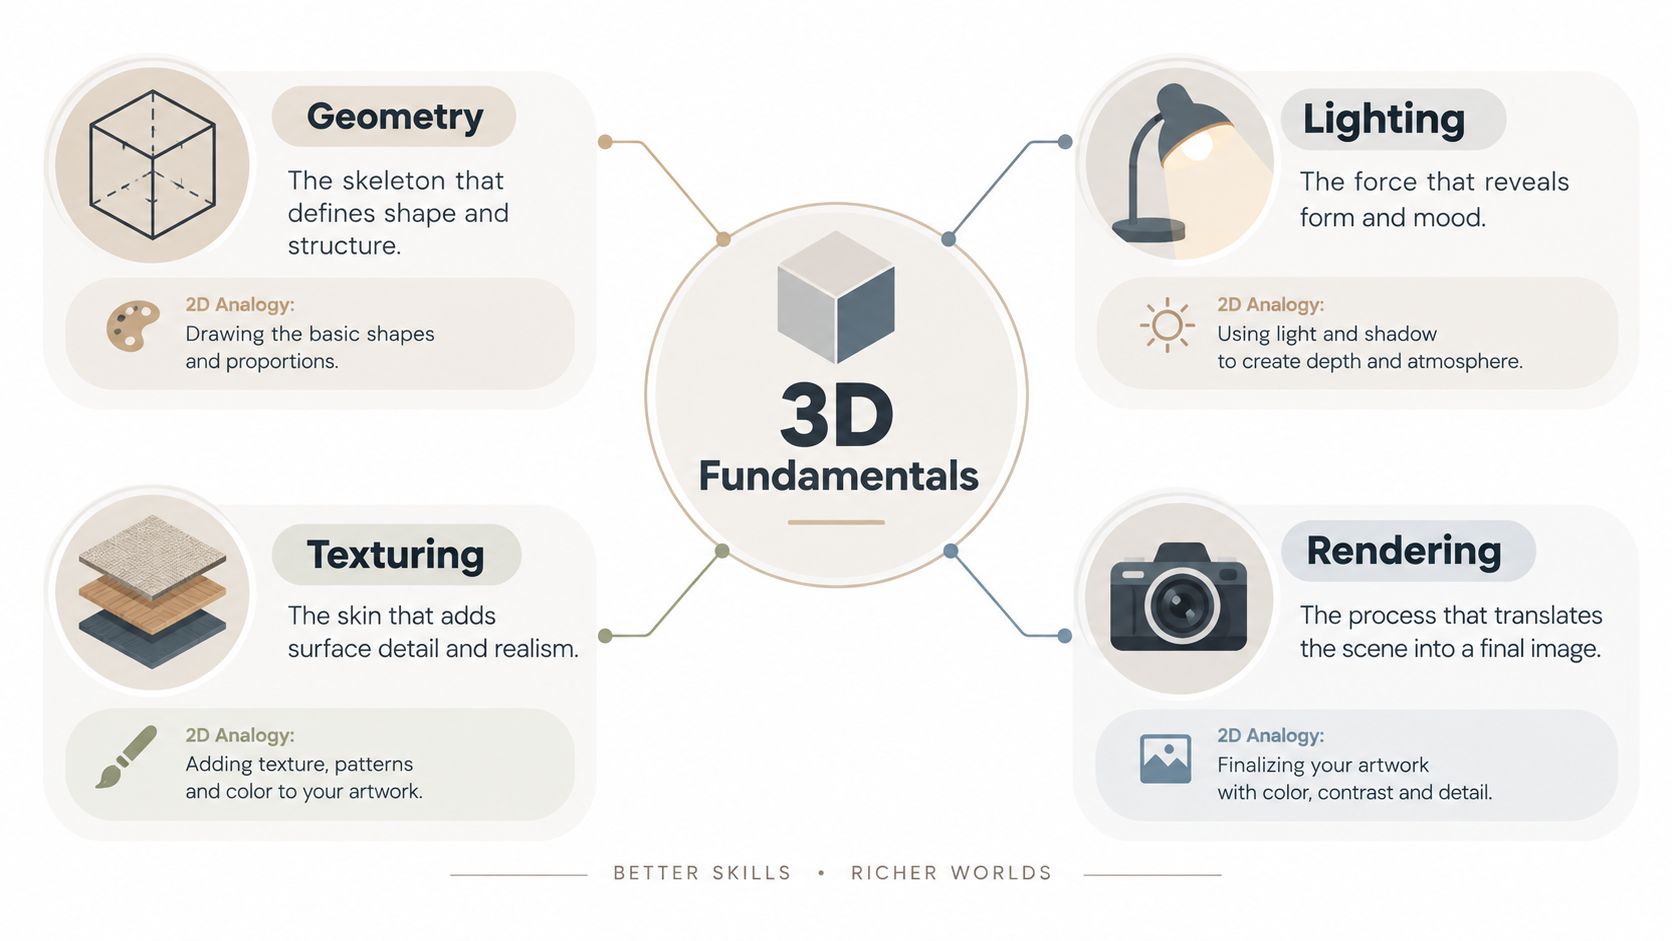
A 3D scene has four practical building blocks. Think of them as the equivalent of layout, color, imagery, and output preparation in 2D work.
Geometry gives the object its structure
Geometry is the object's shape. A mesh contains vertices, edges, and faces. Polygons are the small surfaces that build the larger form, much like paths and shapes build an illustration. A low-detail mesh may be appropriate for a distant web object, while a close-up product image needs enough curvature to avoid visible faceting.
Topology describes how those polygons flow across the surface. Good topology supports clean deformation, predictable smoothing, and manageable editing. It isn't the same as visual quality. An AI model can have a convincing silhouette and still contain stretched faces, internal geometry, self-intersections, or non-manifold edges.
Lighting reveals form and controls mood
Lighting determines what the viewer notices. A large soft source produces gentle transitions, while a narrow source creates sharper highlights. The camera and light work together, so a beautiful material can look dull if the object is viewed from a weak angle or lit without enough separation from the background.
Texturing supplies surface information
A texture can describe color, roughness, metal behavior, normal detail, or ambient occlusion. UV mapping lays a flat texture across a 3D surface, similar to cutting and arranging a paper pattern around a sculpted form. Base color is not the same as roughness, and a normal map isn't a replacement for geometry when the silhouette must change.
Rendering translates the scene into an image
Rendering calculates the visible result from geometry, materials, lights, and camera settings. The history of the field moved from experimental displays toward production tools, then into entertainment and commercial workflows. Disney's Tron used about 15 minutes of fully computer-generated 3D shots in 1982, while Toy Story arrived in 1995 as the first fully computer-generated 3D feature film, according to this SIGGRAPH account of computer graphics history.
Practical rule: A model isn't finished when it looks right from one camera. It's finished when its structure, materials, and output behavior match the destination.
Essential File Formats for 3D
Choose the destination before choosing the export format. A format is not just a container. It determines which parts of your work, such as animation, materials, scale, or scene structure, can travel with the asset.
| Format | Best For | Key Feature |
|---|---|---|
| GLB | Web viewers, interactive product pages, lightweight sharing | Packages geometry and commonly used materials into a compact binary file |
| OBJ | Basic interchange and static models | Simple, widely supported geometry export, usually accompanied by material and texture files |
| STL | 3D printing and slicers | Stores surface geometry for fabrication, but not rich materials or animation |
| FBX | Animation, games, and production handoff | Supports scene data, skeletal animation, cameras, and materials depending on the export |
| USDZ | Apple-centered augmented reality and presentation workflows | Designed for packaged 3D experiences in compatible Apple environments |
GLB is often the most practical choice for a browser viewer because it can keep the model and associated resources together. OBJ remains useful when a receiving application expects a straightforward static mesh, but missing texture files can make the export appear untextured. STL is for shape and fabrication, not a textured brand presentation.
For animation or a game pipeline, confirm whether the export preserves the armature, animation clips, material assignments, and coordinate conventions. For printing, check scale, wall thickness, normals, and watertightness in the slicer rather than trusting the modeling viewport.
Before exporting, run this sequence:
- Apply or record the object scale.
- Check normals and remove hidden internal surfaces.
- Confirm texture paths or use a format that packages them.
- Export a test file and reopen it in the destination application.
- Keep a native working file alongside the delivery file.
This 3D file format guide is useful when you need to compare interchange choices before sending an asset onward.
Rendering for Print vs Web
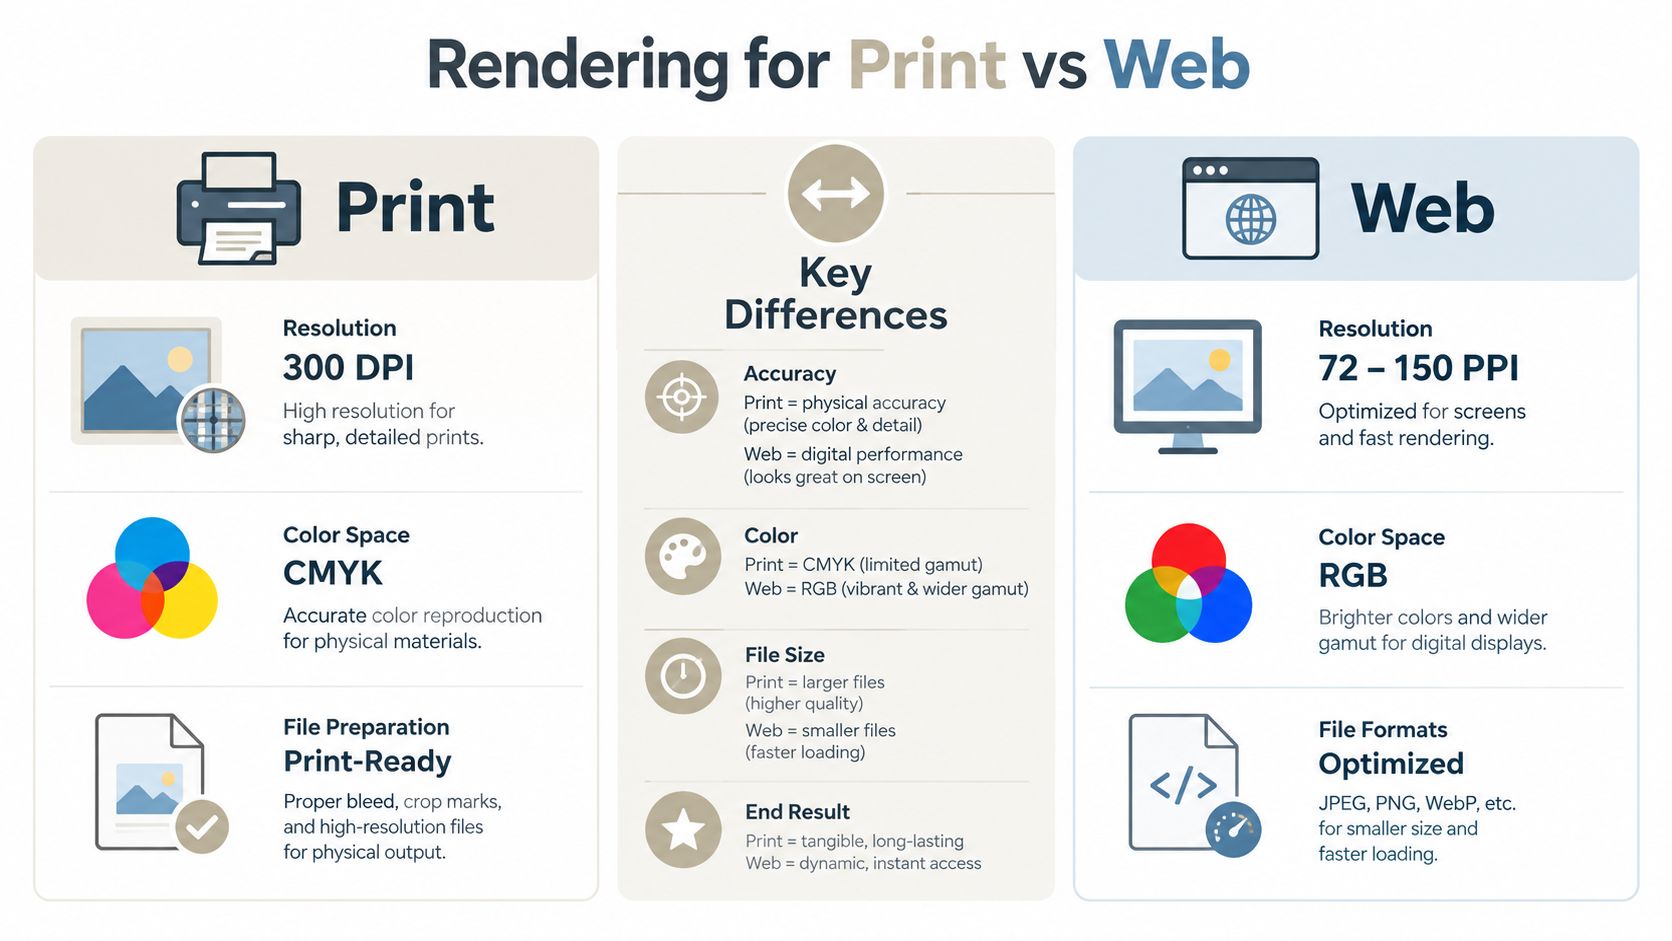
A print render and a web render may depict the same object, but they solve different problems. Print prioritizes physical reproduction and sufficient image detail. Web delivery prioritizes loading, responsive display, interaction, and predictable appearance across screens.
Print requires controlled output preparation
For a printed poster or package image, render at the final physical size and use the color workflow required by the print provider. A high-detail source mesh can help with close framing, but the final raster image, sharpening, bleed, and color conversion still need review in the print layout.
Don't assume that a display render will reproduce identically on paper. Paper, ink, viewing light, and the printer's profile all influence the result. Request the production specification before you finalize lighting or color decisions.
Web requires a lean asset and reliable color
A web asset needs an appropriate mesh budget, compressed textures, and a file type the viewer can load. Texture resolution should follow screen coverage. A small object in a card doesn't need the same texture treatment as a full-screen hero object, and adding texture detail won't fix excessive geometry or too many draw calls.
Color management is a common source of confusion. In a physically based workflow, albedo or base-color JPEG and PNG files are normally interpreted as sRGB and decoded to linear values before lighting. Roughness, metallic, ambient-occlusion, and normal maps are non-color data, so they shouldn't receive the same conversion. Illumination happens in scene-linear space, then tone mapping and gamma conversion happen at display output, as explained in Adobe's color management guidance for 3D rendering.
For higher-end rendering, ACEScg can serve as a scene-referred working space because it offers a wider gamut than sRGB. In glTF-style metallic-roughness materials, metallic is conventionally stored in the blue channel and roughness in the green channel. Incorrect channel packing can make a polished asset look wrong after export.
A published performance test found that a 15K-polygon model rendered about 22% slower than a comparable 8K model, while models below roughly 10K polygons maintained consistent performance in that tested environment, according to this polygon-performance study. Treat those figures as study-specific guidance, not a universal rule. Screen coverage, draw calls, shader complexity, and the device GPU still determine the final result.
Creating 3D Logos and Typography
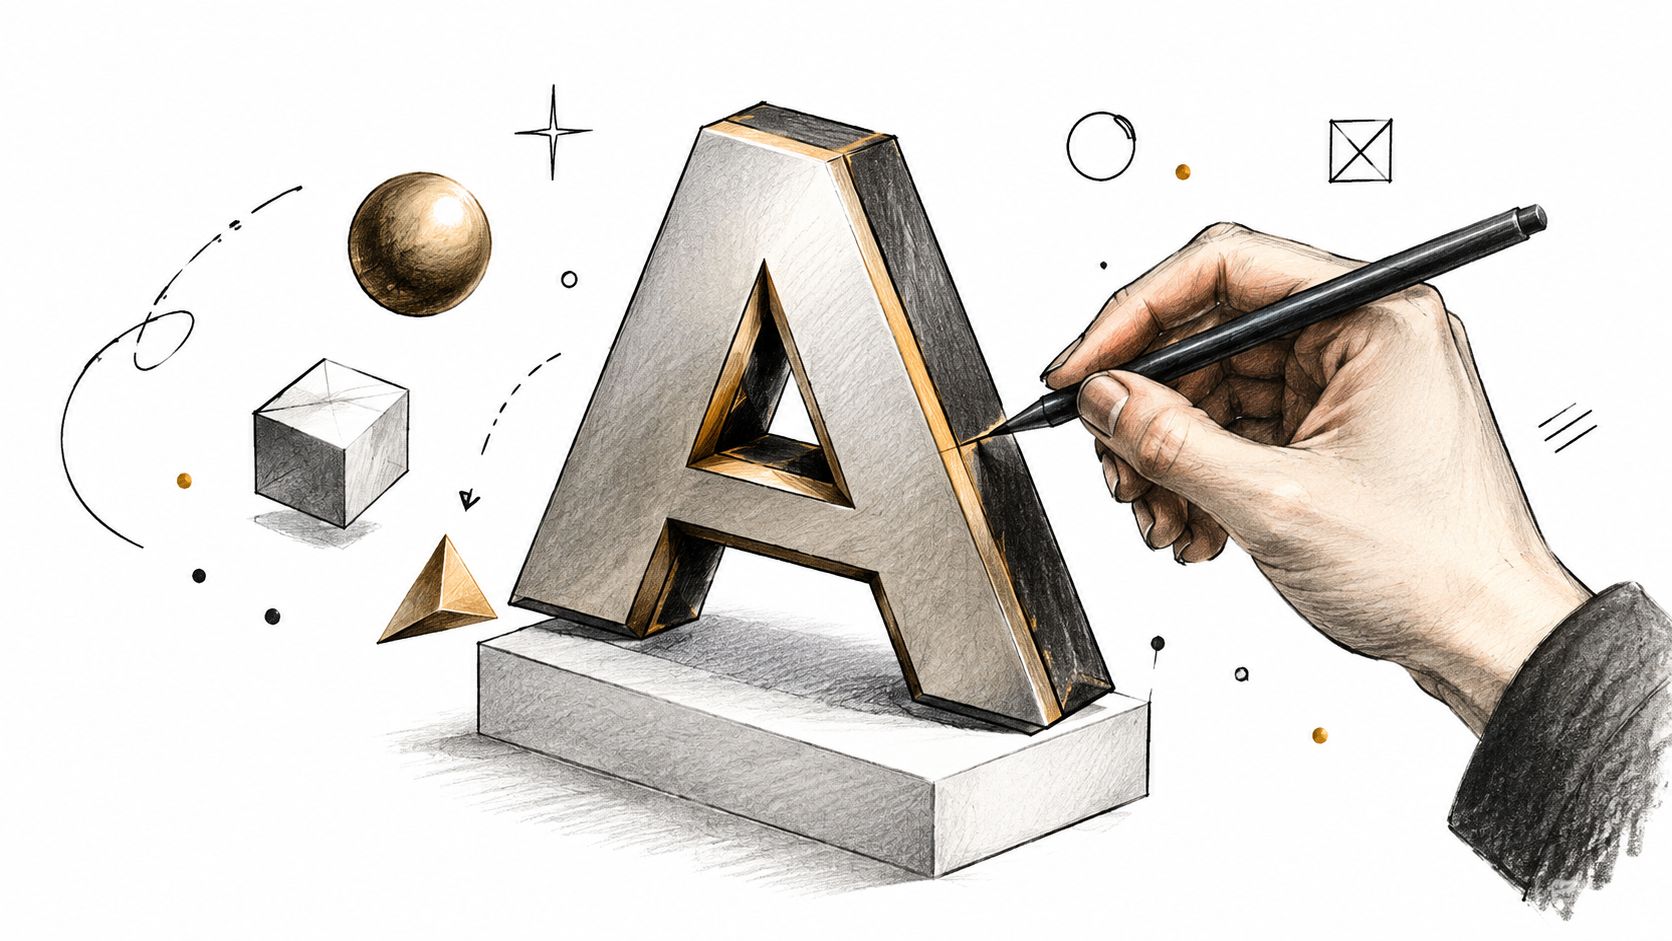
A 3D logo shouldn't become a different brand every time you add depth. Begin with the original vector mark, preserve its proportions, and decide which parts are allowed to change. Extrusion, bevels, material, and light should support recognition rather than bury it.
A reliable working sequence looks like this:
- Start with the vector outline. Clean overlapping paths and convert the mark into a form your 3D application can interpret consistently.
- Add restrained depth. Use extrusion to create volume, then add a small bevel so highlights describe the edges without changing the silhouette.
- Build a material system. Define a brand-safe base color, roughness range, and metallic behavior. Don't let a dramatic shader override the identity.
- Set a repeatable camera. Save views for a front lockup, three-quarter presentation, and close detail. A logo that works from only one angle won't travel well across campaigns.
- Validate small sizes. A complex bevel or fine highlight may disappear in a social avatar, while a deep shadow can make a wordmark unreadable.
For broader identity guidance, this DesignStack ecommerce logo guide offers useful context on how logo decisions support recognition and online presentation.
A 360-degree presentation can help clients understand a dimensional mark, but it shouldn't replace a flat master logo. Keep the vector source, a clean 3D asset, rendered stills, and transparent-background motion exports as separate deliverables.
You can explore a dedicated logo-to-360 workflow when a brand needs a rotating presentation asset. Before delivery, compare the animation against the approved flat mark and check that the logo remains legible at the smallest planned use.
Streamlining Workflows with Sculpty
AI generation helps most at the exploratory end of a project. You can test silhouettes, materials, and object directions without modeling every possibility by hand. It creates more value when the same workflow also handles the less visible work, such as cleanup, texture preparation, format conversion, and review exports.
A practical pipeline separates the asset into stages:
- Explore: Generate from a prompt, a reference image, or several views. Keep the brief focused on shape, function, and visual language.
- Inspect: Open the mesh in a viewer and rotate it. Look for holes, floating parts, self-intersections, broken normals, and surfaces that only appear correct from one angle.
- Prepare: Remesh or retopologize according to the destination. A close-up advertising asset, a mobile web object, and a printable part need different priorities.
- Surface: Apply PBR materials and confirm that base color, roughness, metallic, normal, and ambient-occlusion inputs use the correct interpretation.
- Deliver: Export the required file, reopen it in the receiving tool, and create a still or turntable for client approval.
Sculpty is one browser-based option that combines text-to-3D and image-to-3D generation with PBR texturing, remeshing, retopology, rendering, format conversion, and exports including GLB, STL, OBJ, FBX, USDZ, and 3MF. Its role is not to remove judgment. It gives designers a single place to move from concept exploration toward an asset that can be inspected and handed off.
This distinction matters in commercial environments. A product visual may need a clean render for an expo booth design, a lightweight web version for review, and a high-detail source for later framing. Those are related outputs, not one universal file.
The strongest workflow records acceptance criteria before generation. For print, define watertightness, scale, and wall requirements. For games, define topology, texture limits, and animation needs. For web, define loading expectations, file format, and camera behavior. Sculpty's AI 3D workflow overview can help you evaluate where generation and preparation fit into that sequence.
Conclusion and Next Steps
The central lesson of graphic design 3D is simple: a convincing preview is not the same as a production-ready asset. Geometry has to suit the destination. Topology has to support the next operation. Materials need correct color-space treatment. Files must reopen correctly, and the model needs an acceptance test designed for print, web, games, rendering, or manufacturing.
Start with a small assignment. Create one branded object and make three versions: a high-detail source, a lighter interactive version, and a validated export for the final destination. Compare the files by more than appearance. Check whether the surfaces are closed, whether normals behave correctly, whether the UVs are usable, whether textures survive export, and whether the asset still communicates the intended idea at the required size.
AI is particularly useful for reducing the cost of trying alternatives. A survey by Google Cloud and The Harris Poll of 615 game developers across the United States, South Korea, Norway, Finland, and Sweden, conducted in June and July 2025, reported that 90% used generative AI in workflows and 97% said it was reshaping the industry, as detailed in the Global AI Meets the Games Industry report. The same evidence shows uneven adoption, with 36% using AI for areas including dynamic level design, animation and rigging, and dialogue writing. Adoption doesn't mean that every task is automated.
That distinction is useful for graphic designers. Let AI generate directions, variants, and starting meshes. Keep human review responsible for silhouette accuracy, brand consistency, licensing questions, topology, print tolerances, material correctness, and client approval. The designer's advantage isn't producing the first object fastest. It's knowing which object can survive the rest of the workflow.
Choose one tool, one destination, and one measurable acceptance test for your next project. If the asset passes both the visual review and the technical handoff, you've created more than a 3D image. You've delivered a usable design component.
Sculpty brings AI text-to-3D and image-to-3D generation together with PBR texturing, remeshing, retopology, rendering, format conversion, and export tools for downstream workflows. Visit Sculpty to create a test asset and evaluate it against the production-ready checklist for your next graphic design 3D project.